
|
| Maintenance, Mods, & Tips Mods | Tips | Repairs & Troubleshooting |
 |
|
 04-04-2016, 07:55 PM
|
#2221
|
|
Internet Sanitation Engineer
Join Date: Mar 2006
Location: Crawfordville, FL
Posts: 15,125
Name : Rich Zuchowski
|
Quote:
Originally Posted by 85vette

Is that asbestos?
|
I don't think so. I believe it is some sort of fiberglass compound. I thought that almost nothing is made out of asbestos any longer because of liability issues. So I looked it up:
Quote:
|
Products today can be made with asbestos as long as it accounts for less than 1 percent of the product. Current products include brake pads, automobile clutches, roofing materials, vinyl tile, cement piping, corrugated sheeting, home insulation and some potting soils. Although products can still be made with small amounts of asbestos, the regulations that control its use and manage its removal from older buildings are very strict.
|
Source: http://www.asbestos.com/products/
__________________

|

|

|
|
04-04-2016, 10:46 PM
|
#2222
|
|
The Alignment Guy
Join Date: Aug 2007
Location: orlando, fl
Posts: 1,337
Name : Robert J Hinton
|
http://www.thermotec.com/products/11...ting-wrap.html
Quote:
|
Exhaust Insulating Wrap withstands continuous heat up to 2000°F, and contains no asbestos.
|
__________________
the alignment guy
|
|
|
|
|
04-08-2016, 01:10 AM
|
#2223
|
|
Internet Sanitation Engineer
Join Date: Mar 2006
Location: Crawfordville, FL
Posts: 15,125
Name : Rich Zuchowski
|

The motor mounts are IN.
The Hinson shorter motor mounts came in and even though there is only a 3/8ths inch difference, the difference is WAY more significant with ease of installation.
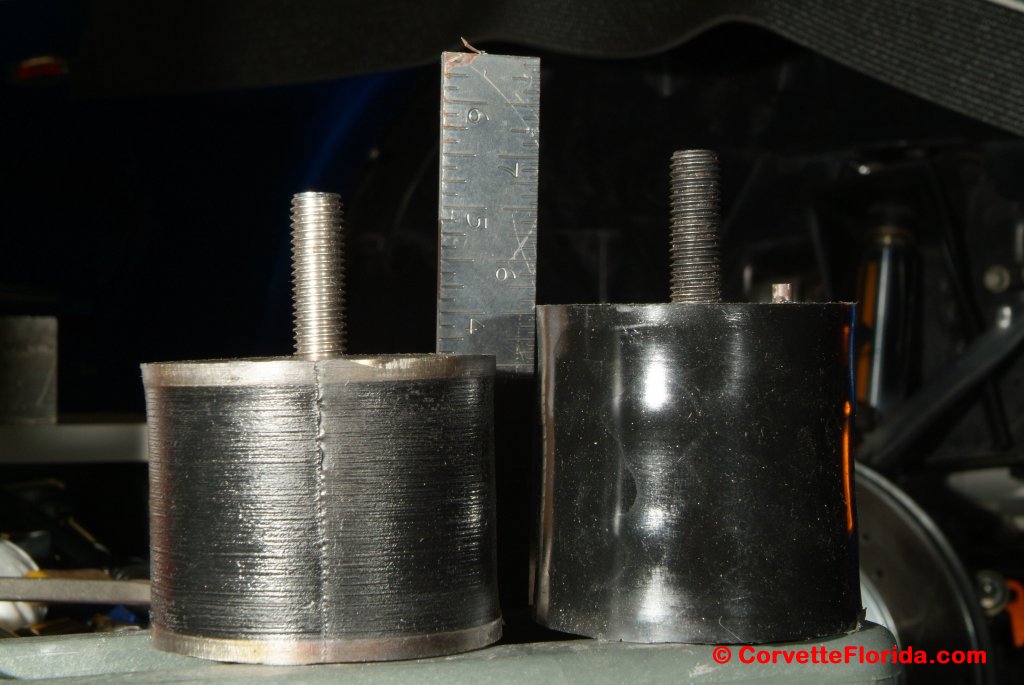
There is also a lot more space between the back top of the FAST intake manifold and the firewall lip.
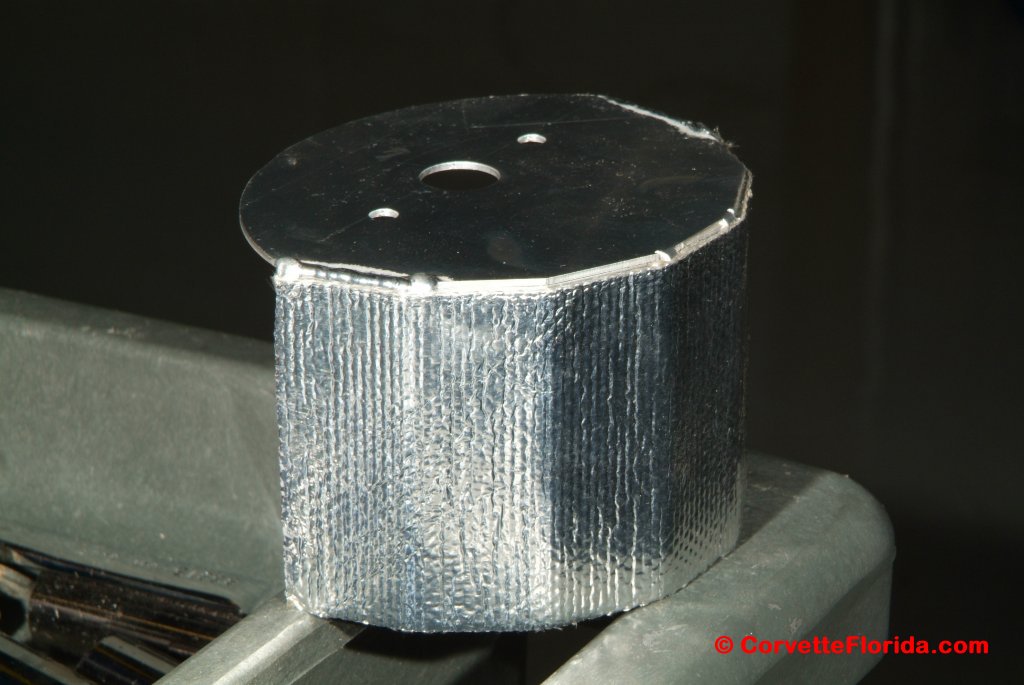
I reused the heat shields from the original motor mounts I got, but I did have to trim them by about a quarter inch or so to keep them from possibly impacting the cradle when the motor mount might get compressed during driving. I also applied some additional heat protection with some reflective tape I had laying around in the storage cabinets.
The passenger side was REAL easy with the header out of the way. Lots of room to work in there with the header removed.
As for the driver's side, well, I got the headers pushed aside as much as I could, but it was still a pretty tight fit getting the mount and bracket in and out of there.
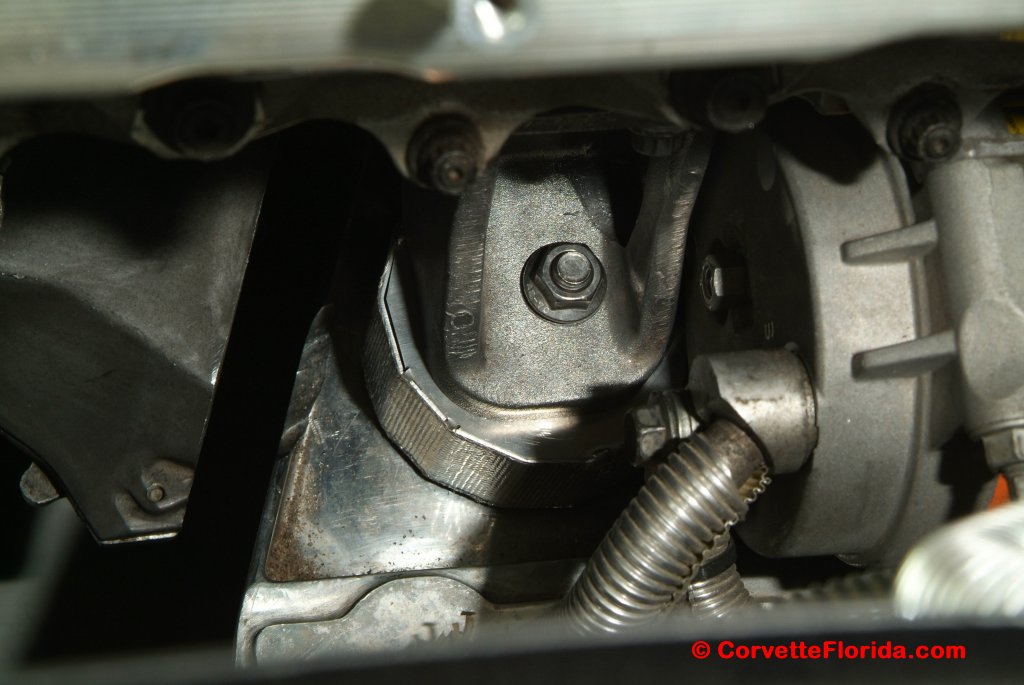
If I had used a taller mount, I really don't think I could have gotten it and the bracket back in there. It was a struggle as it was with the shorter one. Taking the bracket off I got the power ratchet I was using jammed between the lower bracket bolt and the stud on the mount. I had to lift the engine even further to break the ratchet loose. Then trying to put the mount and bracket back in, it was a struggle to get the bracket in there and oriented correctly, and then I found that I just could not get the lower hole in the bracket to go over the stud on the mount. I had to pull it all out again and drill the hole slightly larger, polish the inside of the hole, and then lube it up. When I did that, it all just dropped into place.
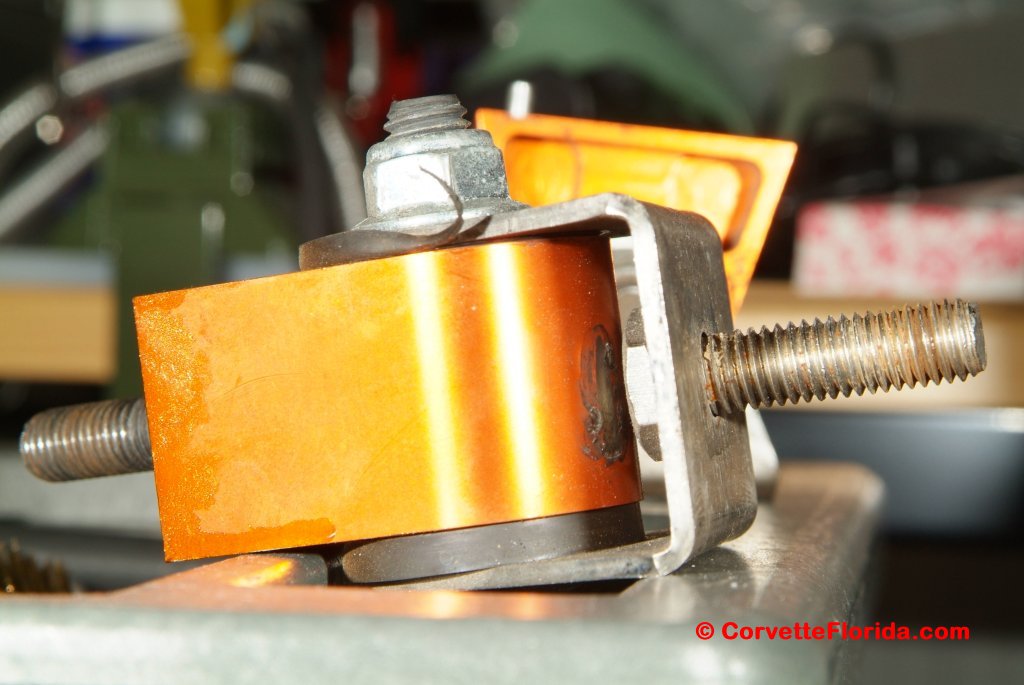
Looking over the Pfadt motor mounts that came out, looks like someone pulled the stud out on top of the mount and then threaded a bolt down through the bracket into the mount itself.
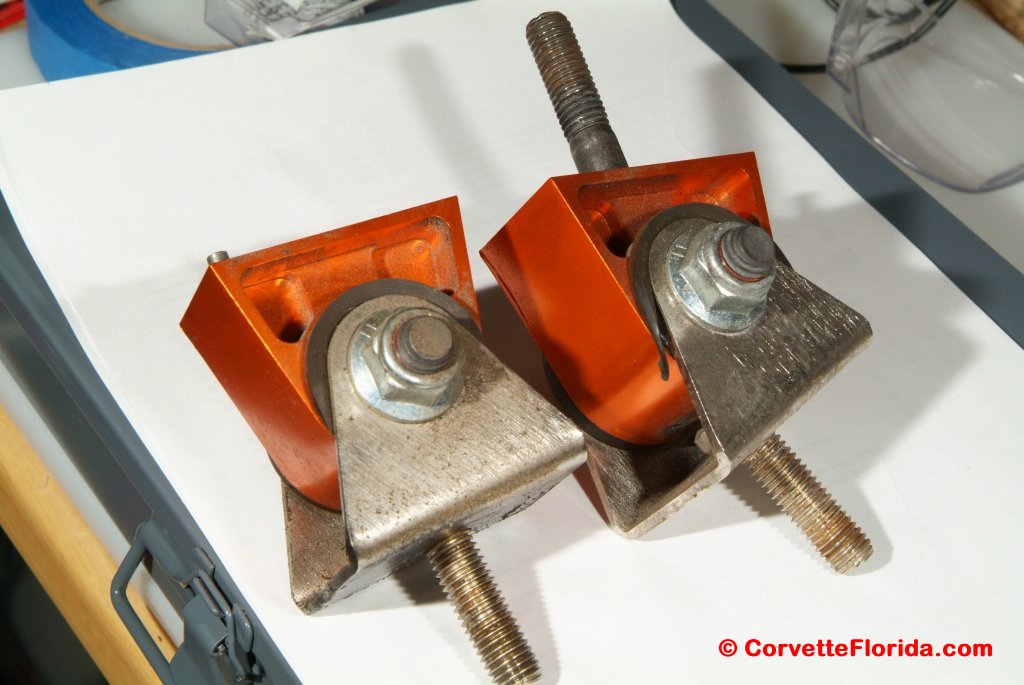
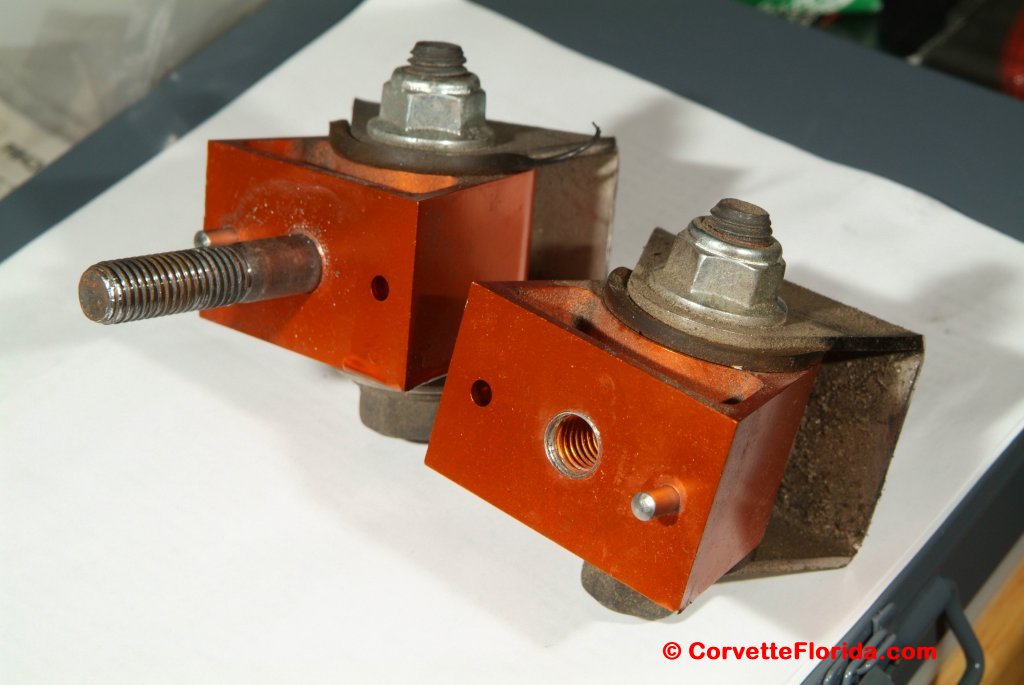
Probably was a lot easier installing the mount that way, I suppose.
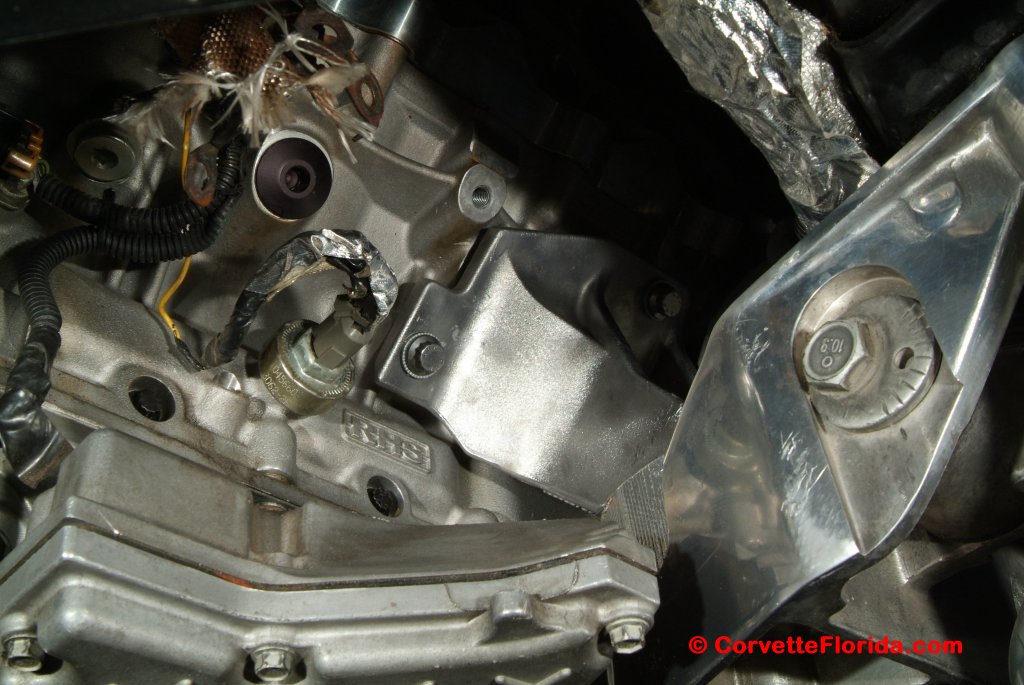
The driver's side looks like there was definitely damage done, and some metal to metal contact.
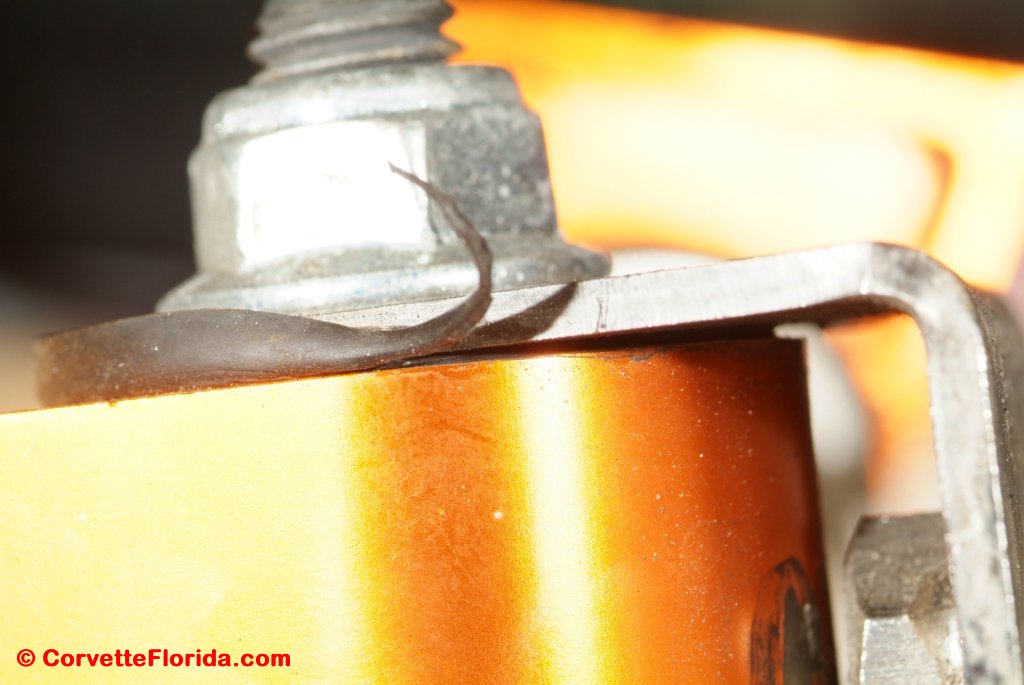
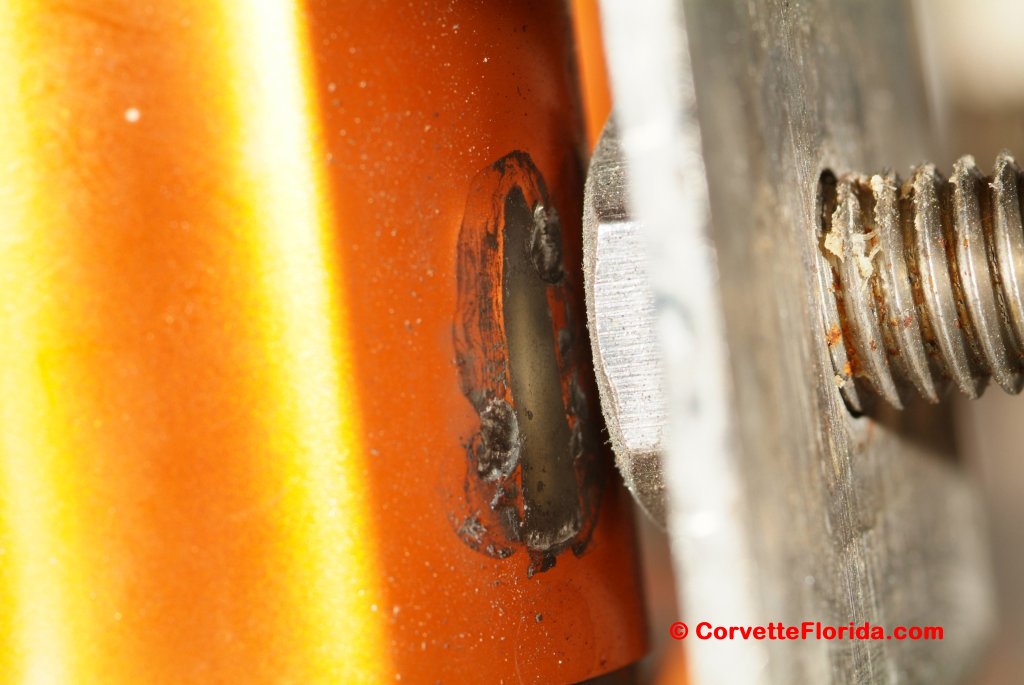
Sure would be EXCELLENT if that was causing the intermittent "drivetrain" noise I have been hearing. But I should be that lucky....
I pulled off all the insulation on the headers and noted that some of the ceramic had flaked away in a couple of places. I guess maybe that is why the header manufacturer's recommend that you don't wrap headers.
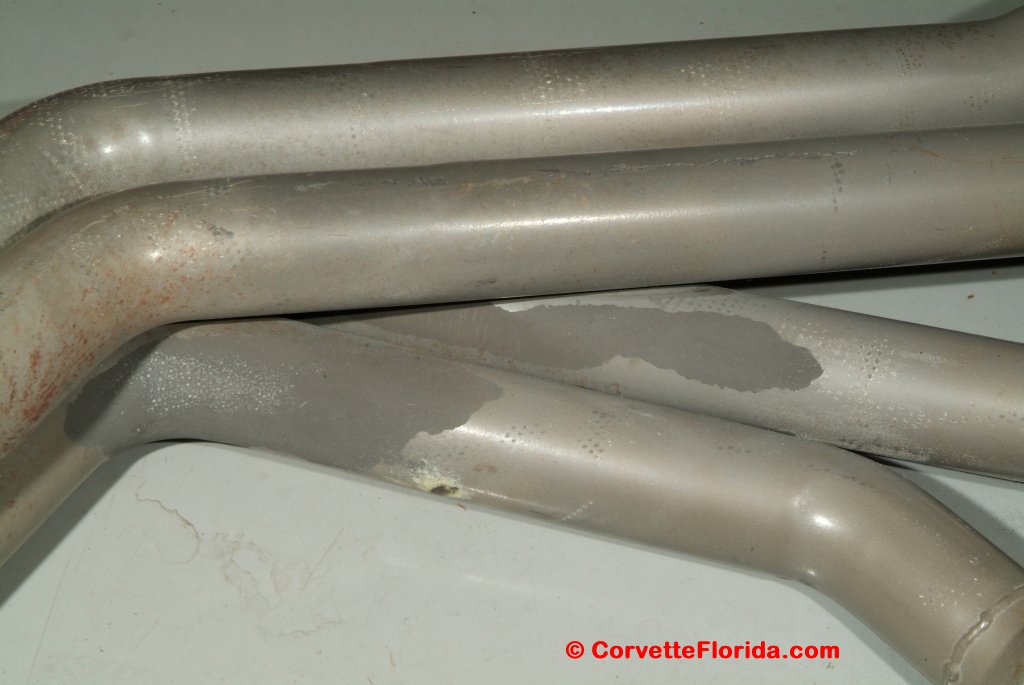
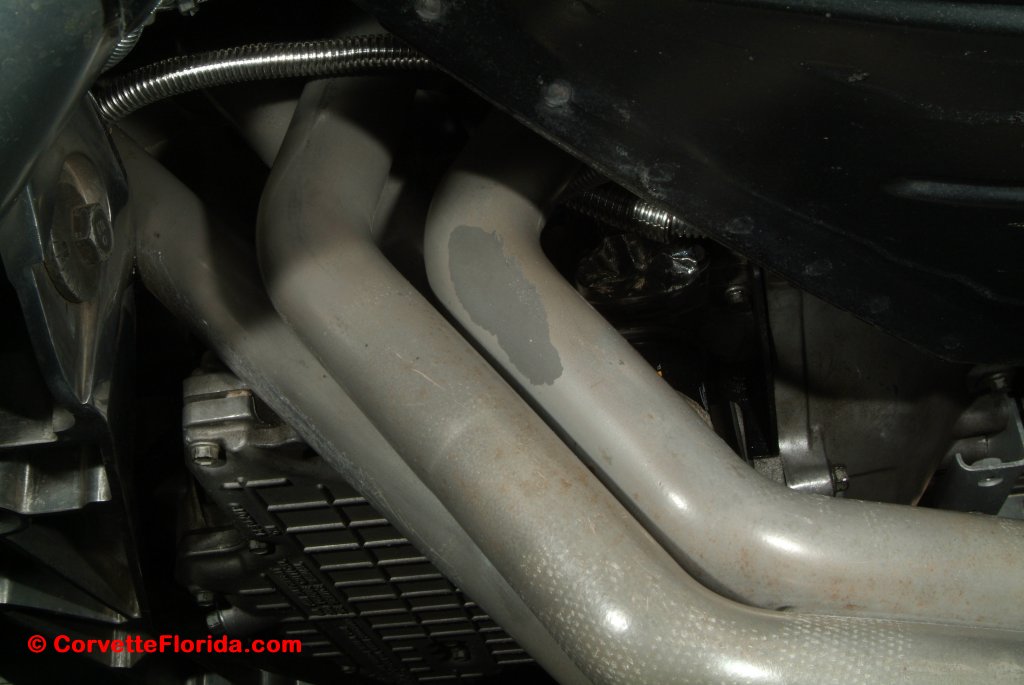
I guess I'll probably get some new ceramic coated headers *sometime* down the road, but not right away. Maybe if that driver's side header was easier to pull out of there, but obviously that will take more work to get 'er done.
So now I just have to put in the new starter, and then I can start putting it all back together again. Hopefully it will be smooth sailing from here.
__________________
|
|
|
|
|
04-08-2016, 01:28 AM
|
#2224
|
|
Internet Sanitation Engineer
Join Date: Mar 2006
Location: Crawfordville, FL
Posts: 15,125
Name : Rich Zuchowski
|
Oh, by the way, I used the Nord-Lock locking washers on the motor mount studs and the motor mount brackets mounting them to the block. I had to break loose the passenger side motor mount from the bracket because the heat shield had shifted slightly when I was torquing the nuts. I found it interesting that it took substantially more effort to break that nut loose than it did tightening it to torque specs. I used a 3/8ths inch torque wrench to torque them down, but had to break out a 1/2 inch breaker bar to get that one nut loose. When it broke loose, it did so with a sharp *snap* and I thought I had actually broken the motor mount stud.
I noticed when I was removing the bolts on the header flanges that many of them were relatively loose and required relatively little effort to loosen them. So I'm thinking these Nord-Lock washers might be helpful to keep them tightened up without having to retighten them periodically.
__________________
|
|
|
|
|
04-10-2016, 01:52 AM
|
#2225
|
|
Internet Sanitation Engineer
Join Date: Mar 2006
Location: Crawfordville, FL
Posts: 15,125
Name : Rich Zuchowski
|
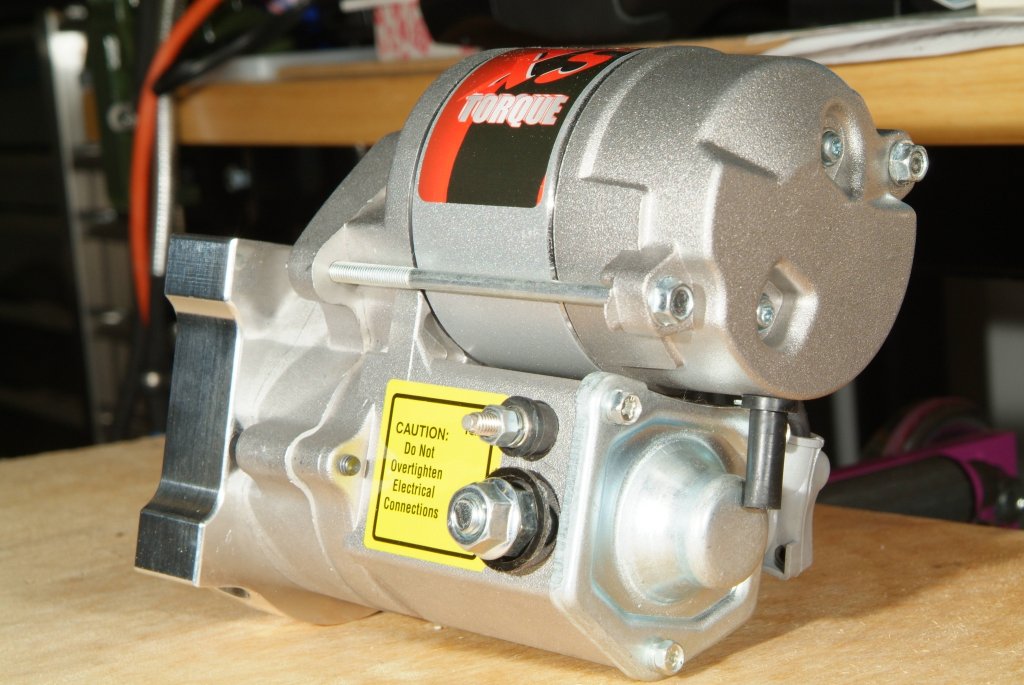
Well, today didn't go nearly as well as I had hoped. I figured installing the new PowerMaster starter would be the easiest between the motor mounts and the starter, but nope, the starter turned out to be a problem.
I didn't have any problems getting the starter bolted to the block. And when I checked the clearance and alignment of the gear to the flywheel it was pretty much dead on without needing any shims. But when it came time for me to put the electrical leads onto the studs, that is when I hit the brick wall.
On the stock starter, the electrical studs are in the back of the solenoid, up at top of the starter. On the PowerMaster 9509, the studs are on the side facing away from the block. Now this doesn't sound like any real big problem, except for the fact that the wires and leads just will not reach those studs on the starter. I tried moving the wires around and checking to see if there was some way to get a couple more inches out of them, but it was just no-go. I really didn't want to tug on the wires a whole lot and break a wire someplace completely inaccessible without pulling the engine. But still, I did try my best with a gentle hand to coax just a little bit more reach out of the wires.
So that basically put a screeching halt on things until I can get another starter. This time with the electrical studs in a place where the wires can actually reach them.
Been reading that the starters for trucks in the same time frame as the C5Z have the two long bolt mounting points, so I'm going to be looking into that route.
Back to the drawing board on starters..... 
__________________
|
|
|
|
|
04-10-2016, 03:27 PM
|
#2226
|
|
Senior Member
Join Date: Mar 2007
Location: On the road
Posts: 2,115
Name :
|
Can you just change out the solenoid?
__________________
I Have Noticed That A Lot Of People Demanding Free Stuff Are Not Wearing Work Boots.
|
|
|
|
|
04-11-2016, 03:41 AM
|
#2227
|
|
Internet Sanitation Engineer
Join Date: Mar 2006
Location: Crawfordville, FL
Posts: 15,125
Name : Rich Zuchowski
|
Hmm, not sure how easy that would be on this type of starter...

Hopefully Summit Racing will take this one back and I'll just stick with the more traditional style OEM starter.
I can't figure out why none of the reviews I have read about this Powermaster starter mentioned anything about the wiring issue I ran into. It's not like I chose this starter blindly. 
I'm sure I could find another aftermarket starter with the same sort of terminal stud location as on the stock starter, but heck, no telling what other surprise might be in store for me if I continue along that route. So I think going with and AC Delco truck starter that has two long bolt mounting flanges might be the best thing to do right now.
__________________
|
|
|
|
|
04-16-2016, 01:57 AM
|
#2228
|
|
Internet Sanitation Engineer
Join Date: Mar 2006
Location: Crawfordville, FL
Posts: 15,125
Name : Rich Zuchowski
|
Got the starter and the new heat shield I needed after butchering the one I had for that Powermaster starter I returned.. I ordered a new flywheel dust cover because I had to butcher the one I had to fit without taking the starter out. But the people who shipped it must have thought I was kidding when I included my PO Box along with the physical address. I don't get mail delivery to the home, and you never know these days how something is going to be shipped, much less make the final leg of delivery. Sometimes something shipped via UPS or FedEx will actually go to the post office for actual delivery to the destination (me). So I include both addresses to play it safe. But since they didn't include the PO Box, it got returned to them. Oh well. Guess I use the old cover now. The starter is in, as I certainly was not going to wait for another $10 piece of plastic to show up before getting moving on this.
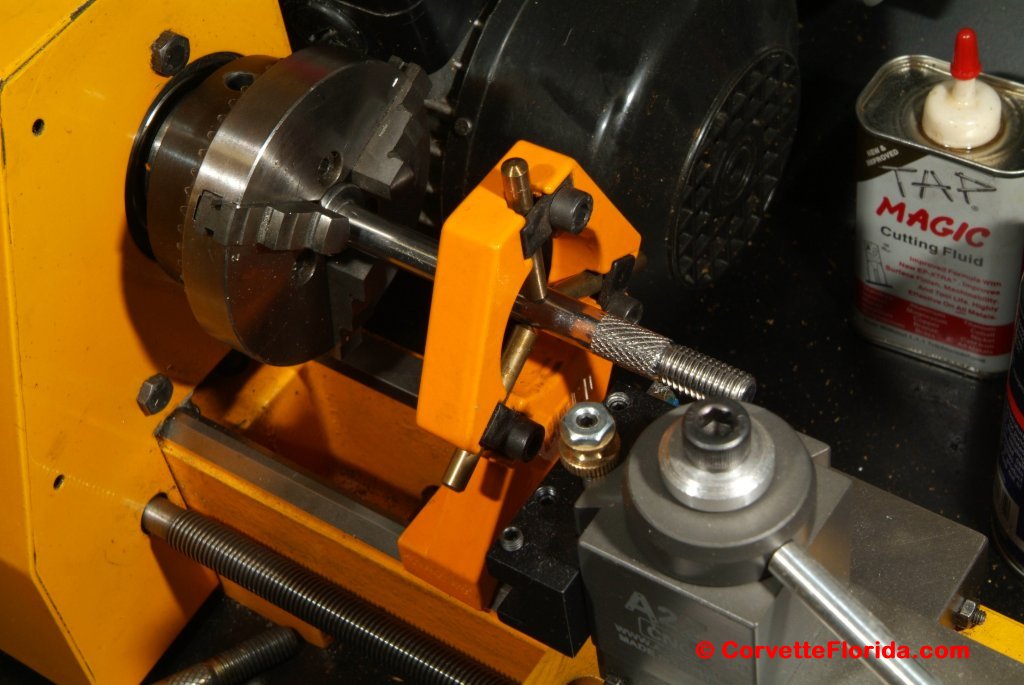
Wasn't too bad now that I had a starter that would actually fit properly, but I found that the ARP starter bolts I bought wouldn't fit within the starter mounting holes. Wouldn't work in my old starter neither, so it was definitely a problem with the bolts. The starter bolts are knurled on the end to help get a more precise fit on the engine block. Apparently they went too aggressive with the knurling and exceeded the tolerance of the holes. So I had to chuck the bolts up in my little baby lathe (sure wish I had gotten that big one I wanted) and trimmed a bit of metal off of the knurling till they fit. No big deal but sucked up an extra hour or two just doing that.

Then when I put on the heat shield around the starter, just on a hunch I broke out my multimeter and sure enough, that reflective coating is conductive. So I had to trim away the shield to make sure it wouldn't contact the hot leads on the starter. Would have been an interesting "smoke test" when I hooked the battery back up.
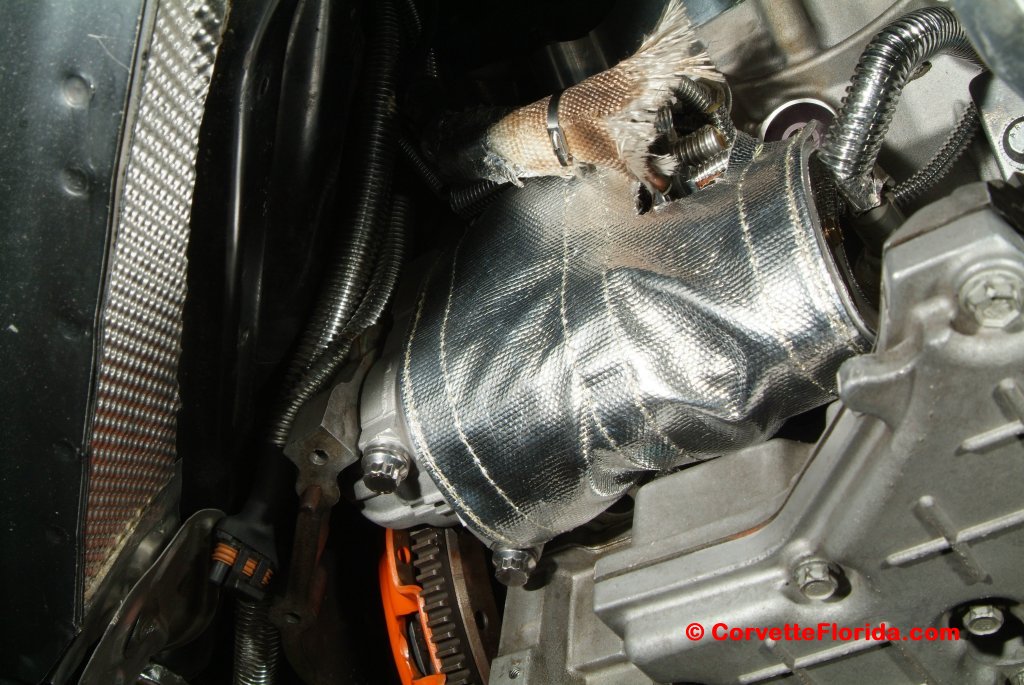
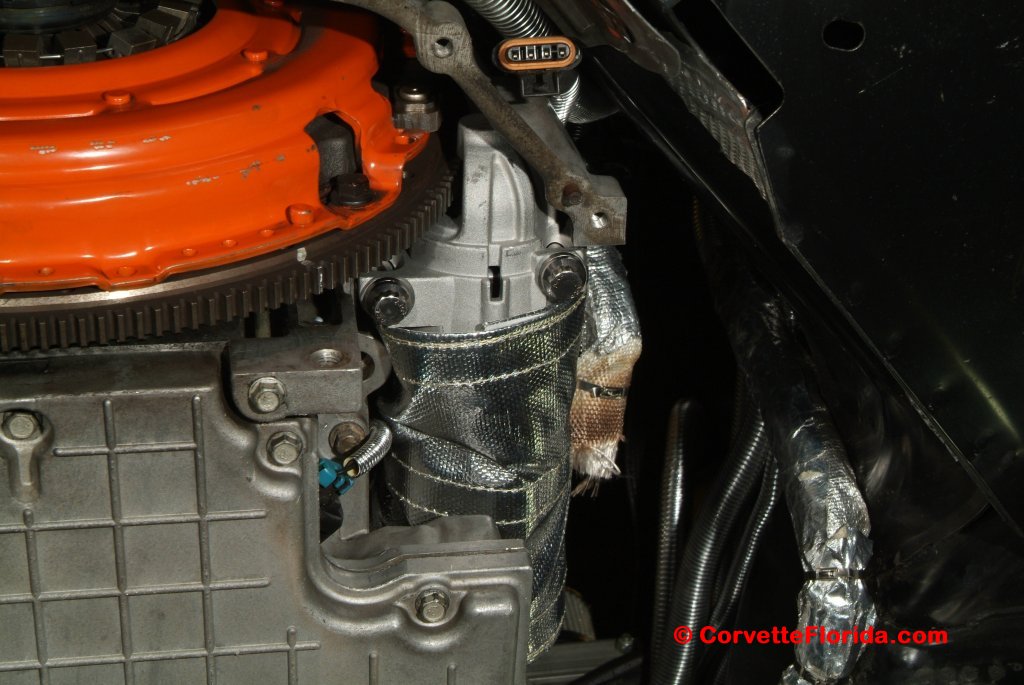
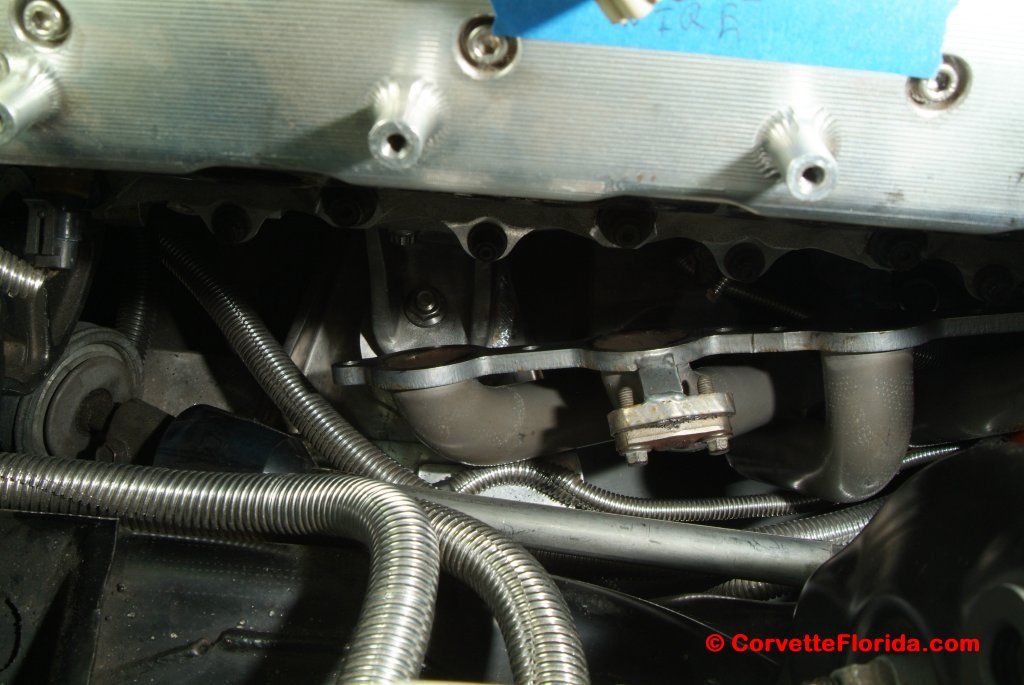
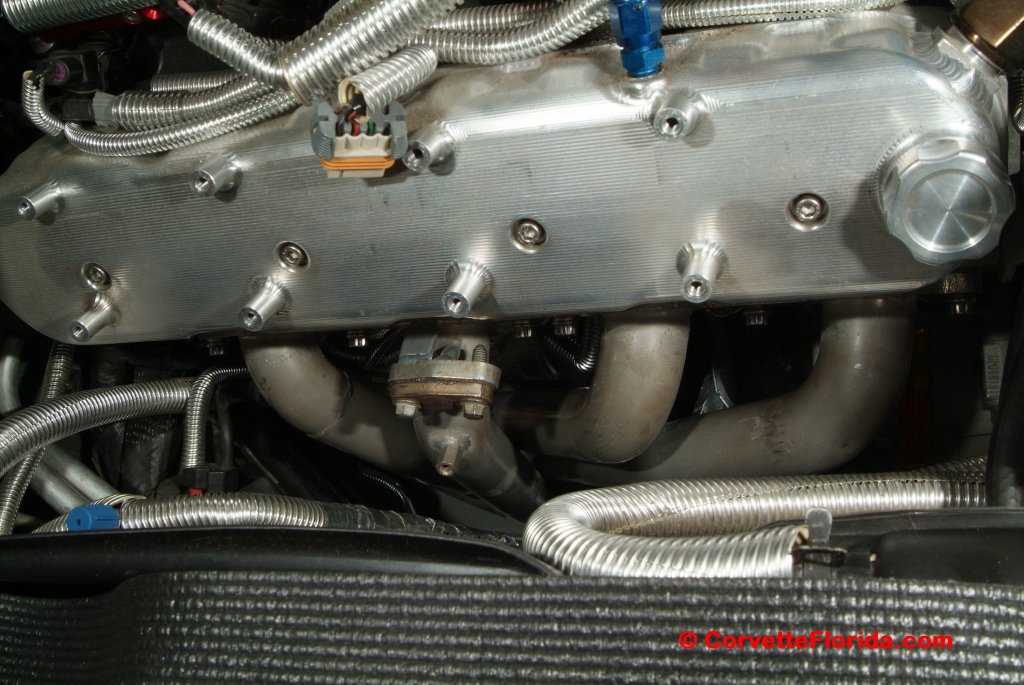
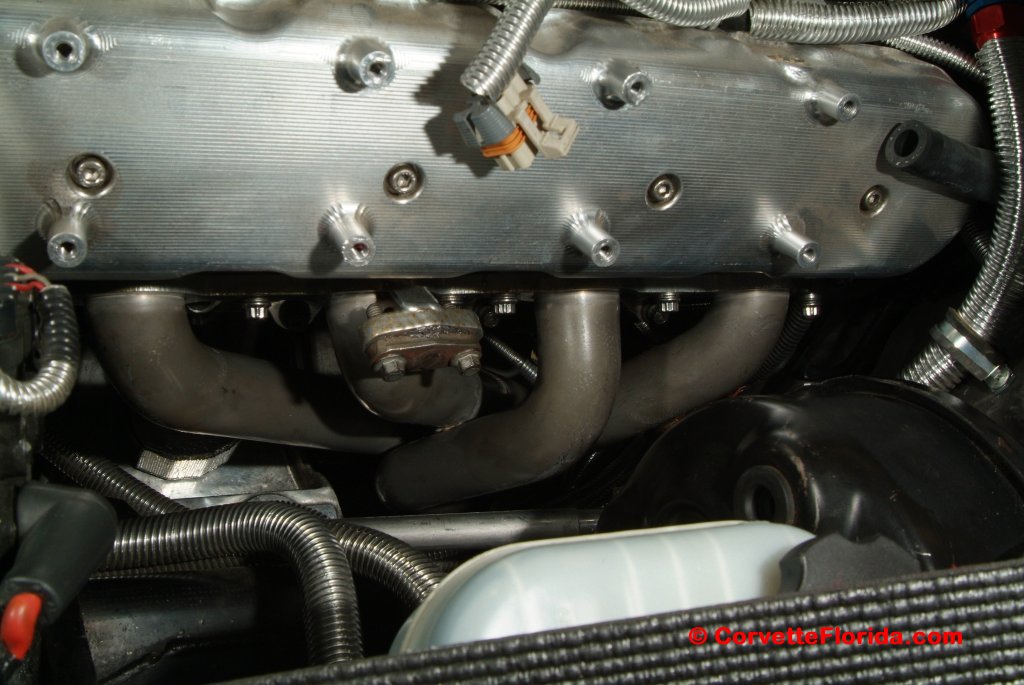
So the starter is in, and I also decided to go ahead and tackle bolting the headers back up. I really was not looking forward to putting the passenger side back in, figuring it was going to be a pain in the butt, with maybe the starter getting in the way and I would have to loosen it up or remove the heat shield just to get the header back up there. But easy as pie. I was actually shocked.
So I am looking at the new header gaskets I bought from Summit Racing, trying to figure out how they need to be oriented, and something just didn't look right about them.
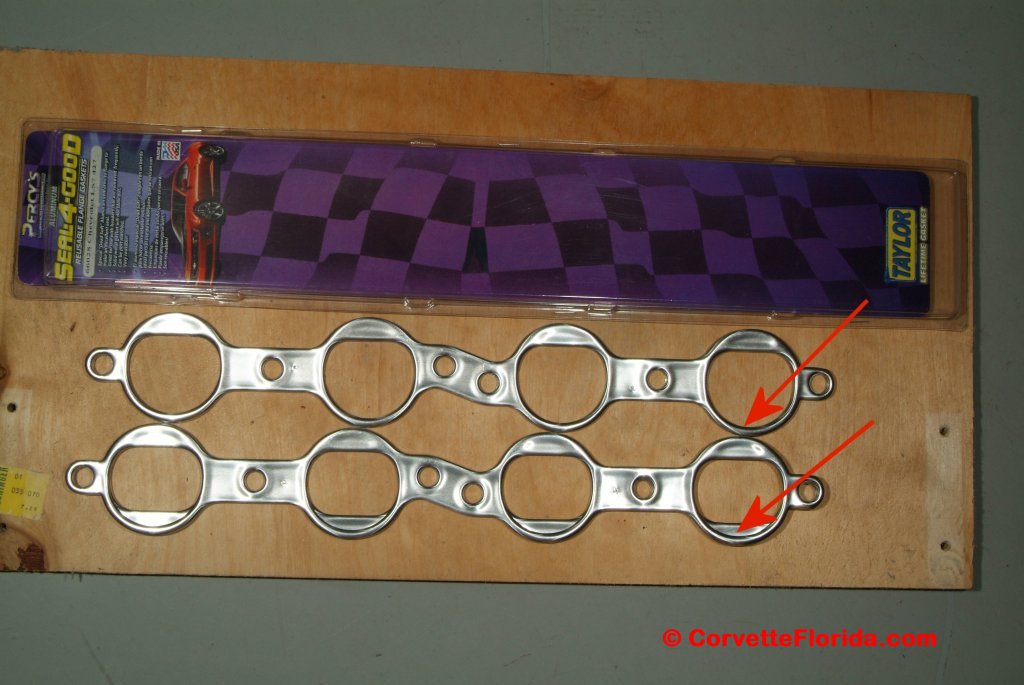
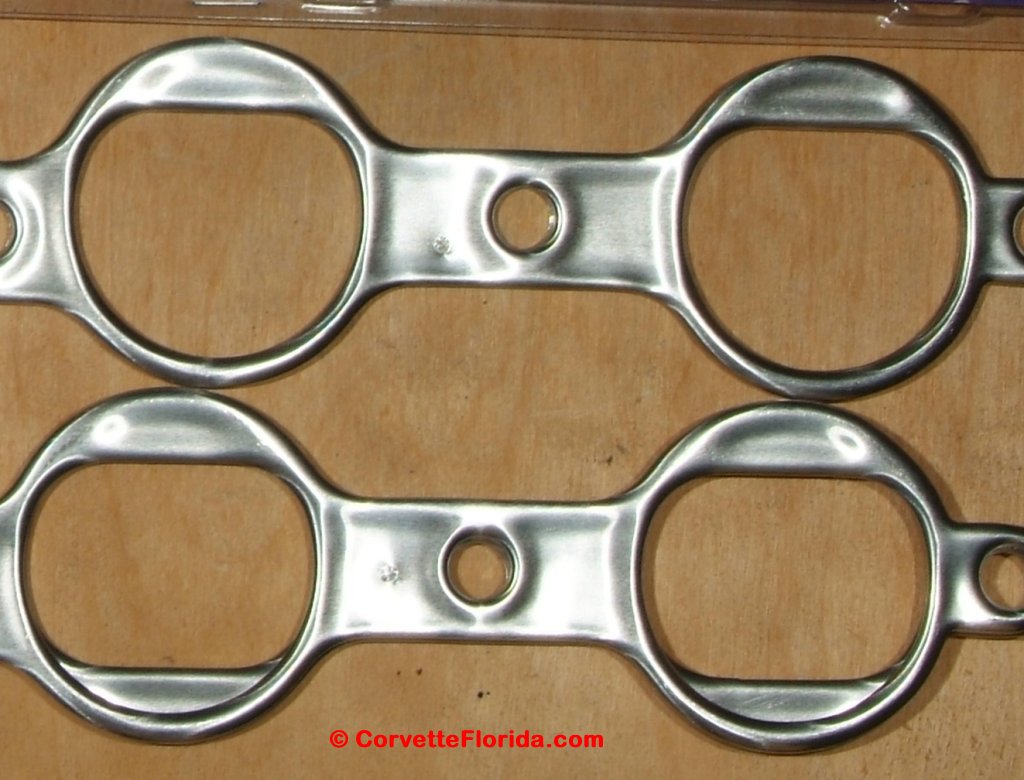
Maybe it's me, but those two CAN'T be for the same engine. The LS7 exhaust ports are "D" shaped, which is why I bought them. Fortunately I had purchased a set of regular LS1/LS6 exhaust gaskets too, so those are the ones I had to use.
It was a struggled getting the bolts into the headers by myself, as it sure would have helped to have Connie maneuvering the lower end of the headers for me while I struggled getting the bolts in. But she is up in Delaware visiting family, so I was on my own with this. By using a jack to lift underneath while I worked from the top, I was able to get it done. Of course the most inaccessible bolt out of all of them was the most difficult. That's the one back near cylinder #7 at the very rear of the head. I was afraid I was cross threading it putting it in, but damn, that's the only way it was going in. It just felt harder to turn than the other ones. It's tightened down at 18 ft. lbs with Nord-Lock lock washers, so it should certainly be OK. I'll just check the torque on them later on, but those Nord-Locks are supposed to be THE things to use on stuff like this.
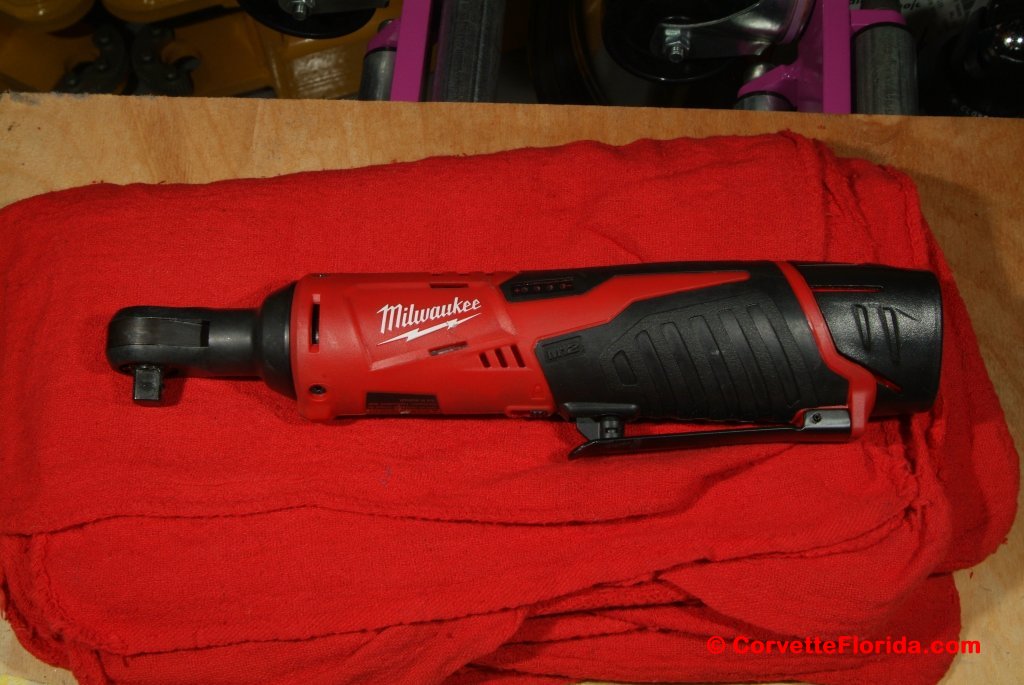
Oh yeah, and that Milwaukee battery powered ratchet is worth it's weight in gold in tight spots where you really can't turn a wrench very easily. 
So anyway, tomorrow I'll either hook up the rest of the exhaust, or put the ignition stuff back in. Or maybe both if things go smoothly enough. So I'm thinking I'll be cranking it up maybe Sunday or Monday. Hopefully the smoke test won't actually produce any smoke and flames.... 
__________________
|
|
|
|
|
04-16-2016, 08:41 AM
|
#2229
|
|
The Alignment Guy
Join Date: Aug 2007
Location: orlando, fl
Posts: 1,337
Name : Robert J Hinton
|
Well glad the headers were easy to go back in.
__________________
the alignment guy
|
|
|
|
|
04-16-2016, 09:11 PM
|
#2230
|
|
Internet Sanitation Engineer
Join Date: Mar 2006
Location: Crawfordville, FL
Posts: 15,125
Name : Rich Zuchowski
|
I decided to put the ignition stuff back together today, and if I had enough time, work on the exhaust. But before doing that I spent a lot of time wire tying up stuff to keep the wiring away from the headers. Also put some new heat reflective loom on wires that were exposed. Man, this is a real test of patience. Trying to connect wire ties with one hand and in areas that you can't even see while your hand is up there is quite the challenge. My arms are all marked up with pre-bruises from struggling to get my arms where GM engineers never intended arms to go.
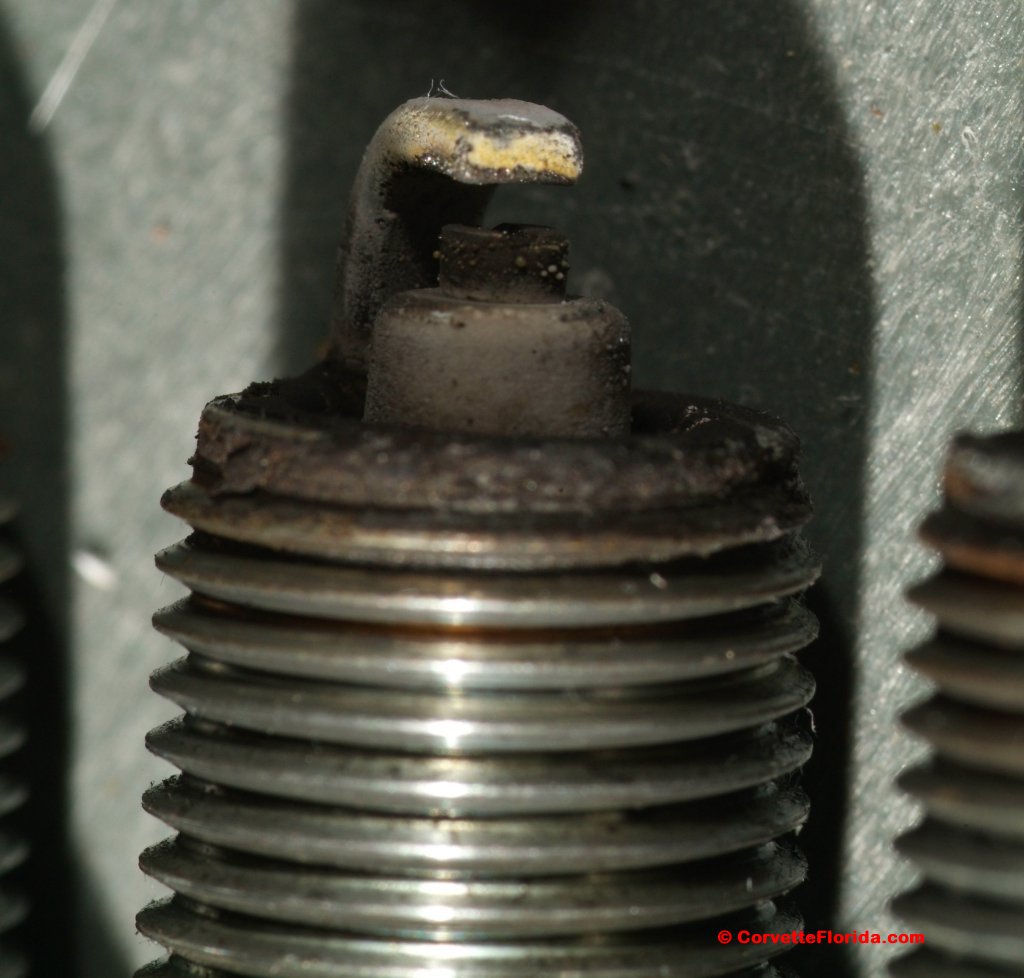
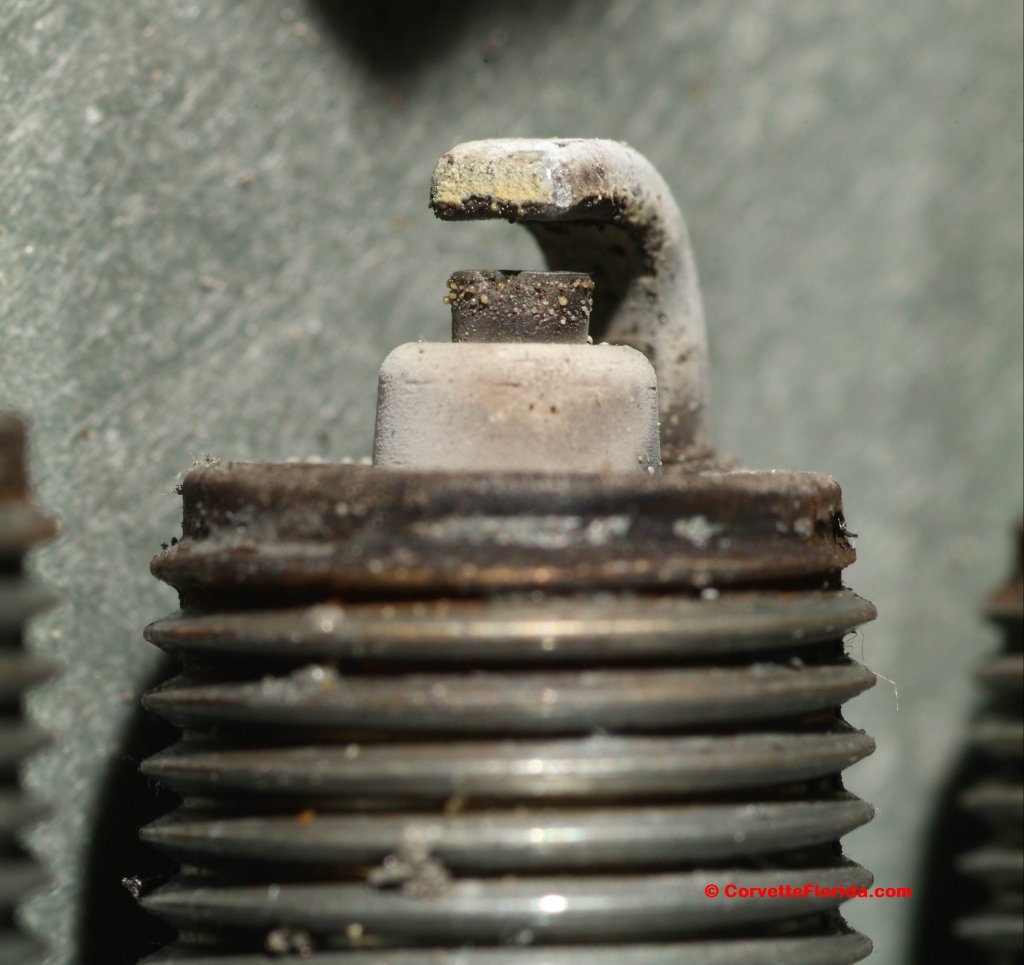
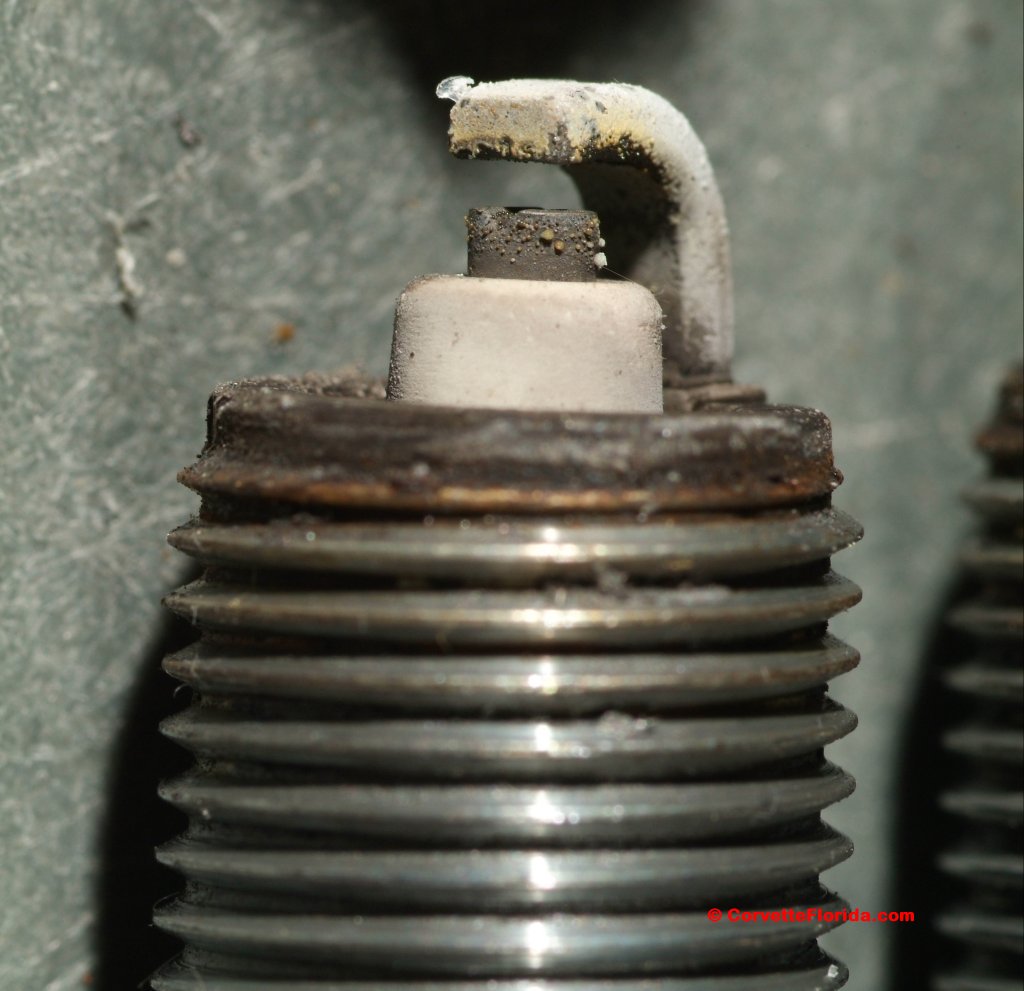
Anyway to back up a bit, I took some pics of the spark plugs when I pulled them out just for reference. Here they are in cylinder order:
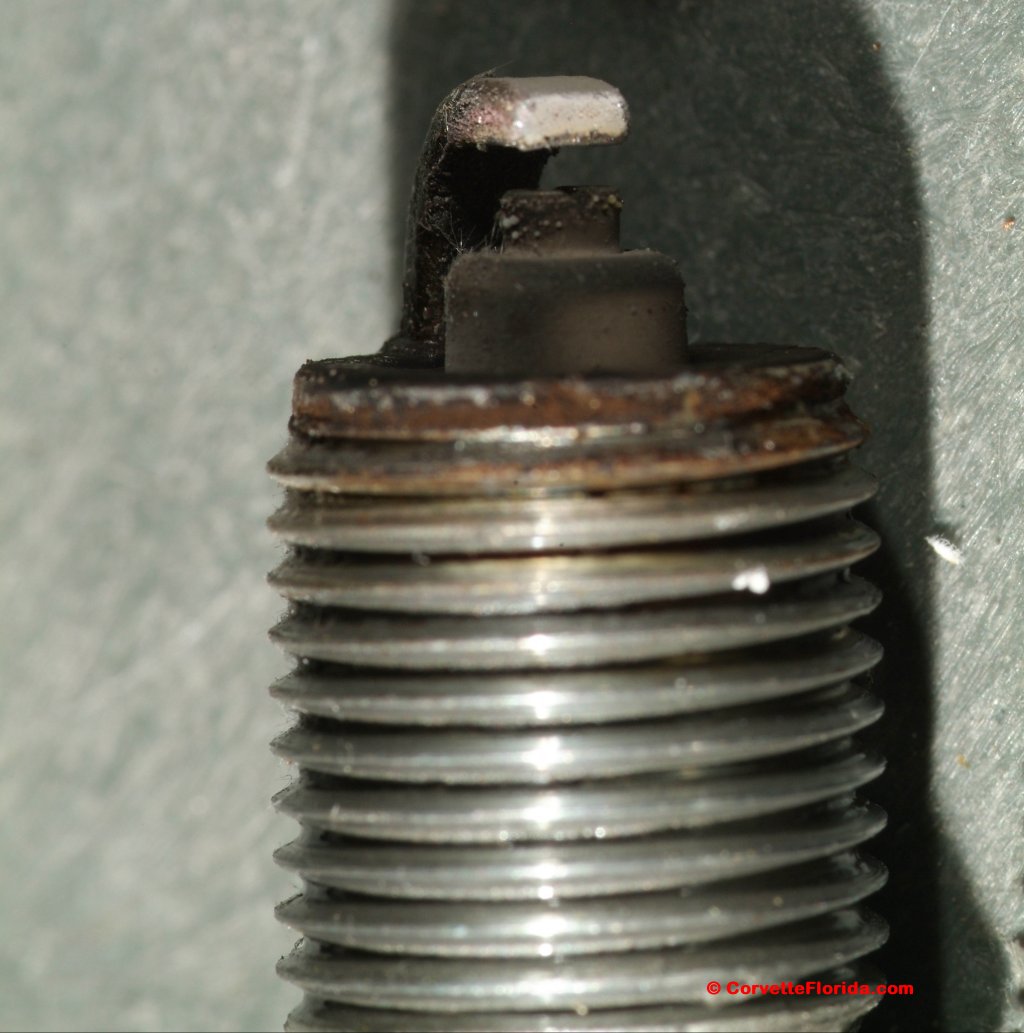


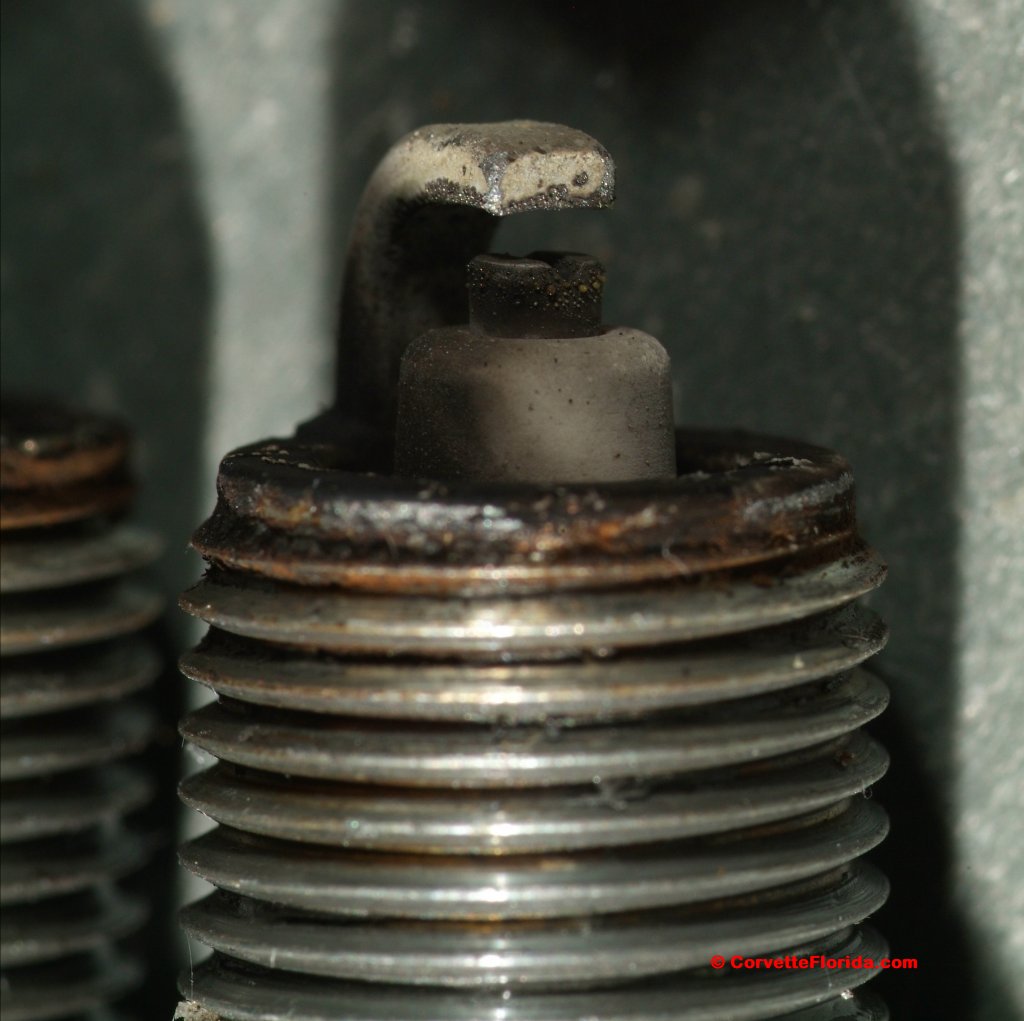
I decided to just go ahead and replace the plugs, but this time around I chose the AC Delco Iridium plugs that are standard on the LS9 engine. These are the same heat range as the ones I have been using, and from what I have been reading, this actually may be a better choice for me.
I've been reading some stuff about people going to the standard plugs of yesteryear for our vettes, and some people have complained about getting fault codes indicating alternator issues. Well, what some people apparently figured out is that the old style plugs just take more current to fire a spark, and at low engine speed this affects the output of the alternator. Looking at the pics below, you can see that the iridium tip of these plugs is much smaller in diameter, and people are saying that this helps produce a much hotter spark using much less current.
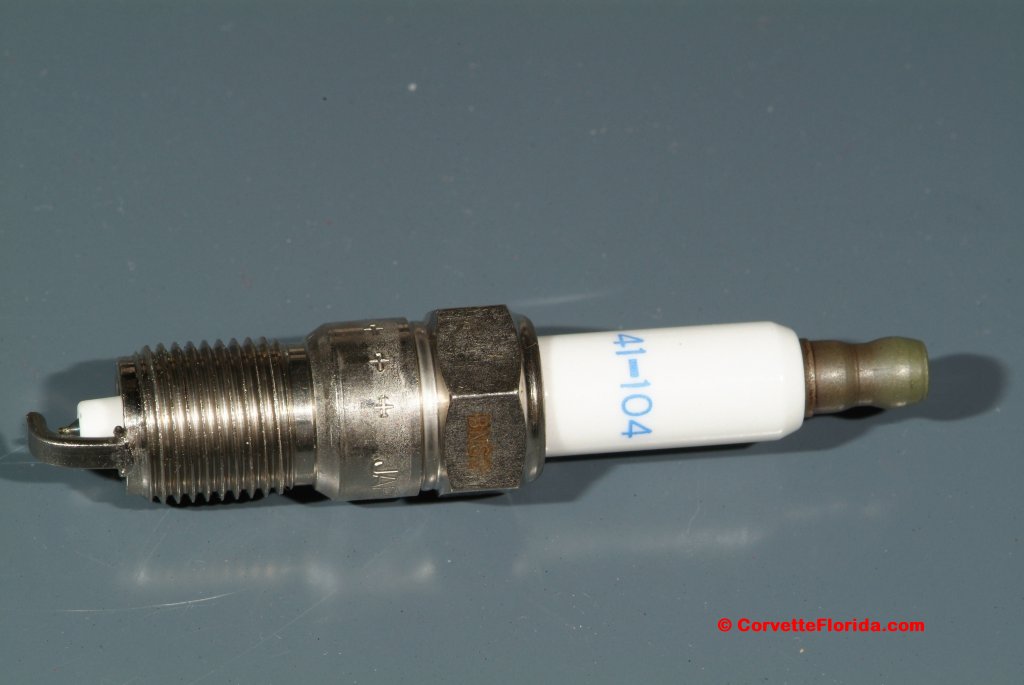
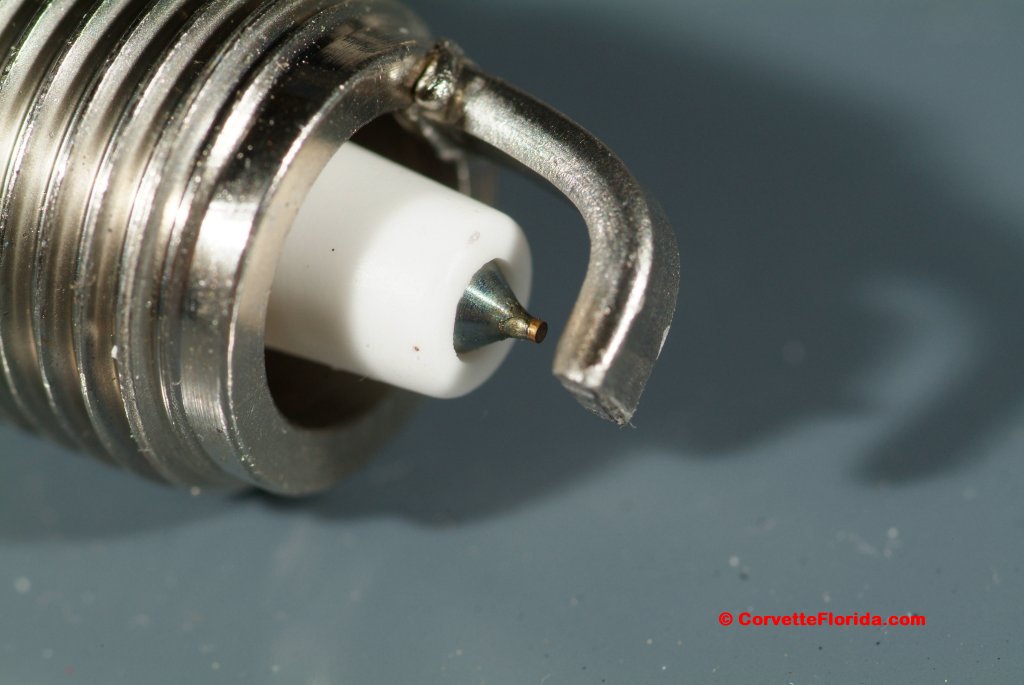
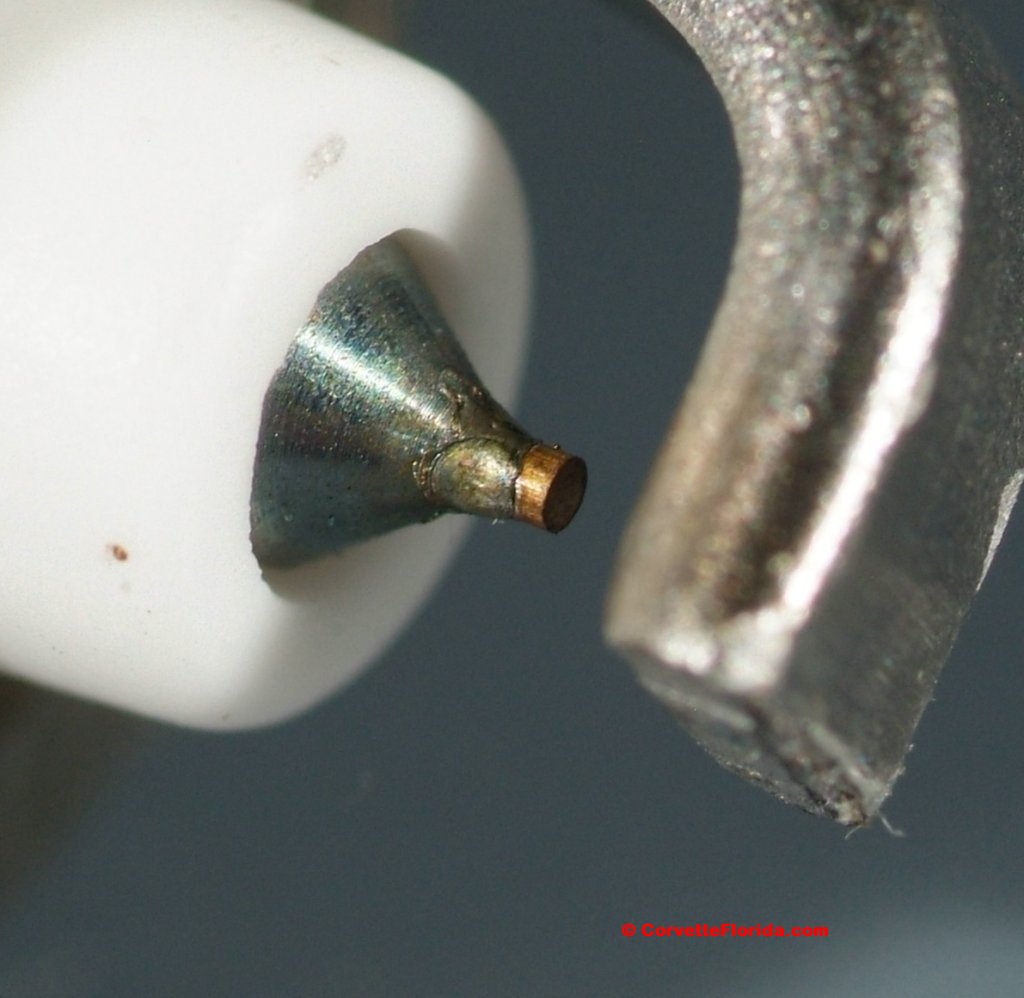
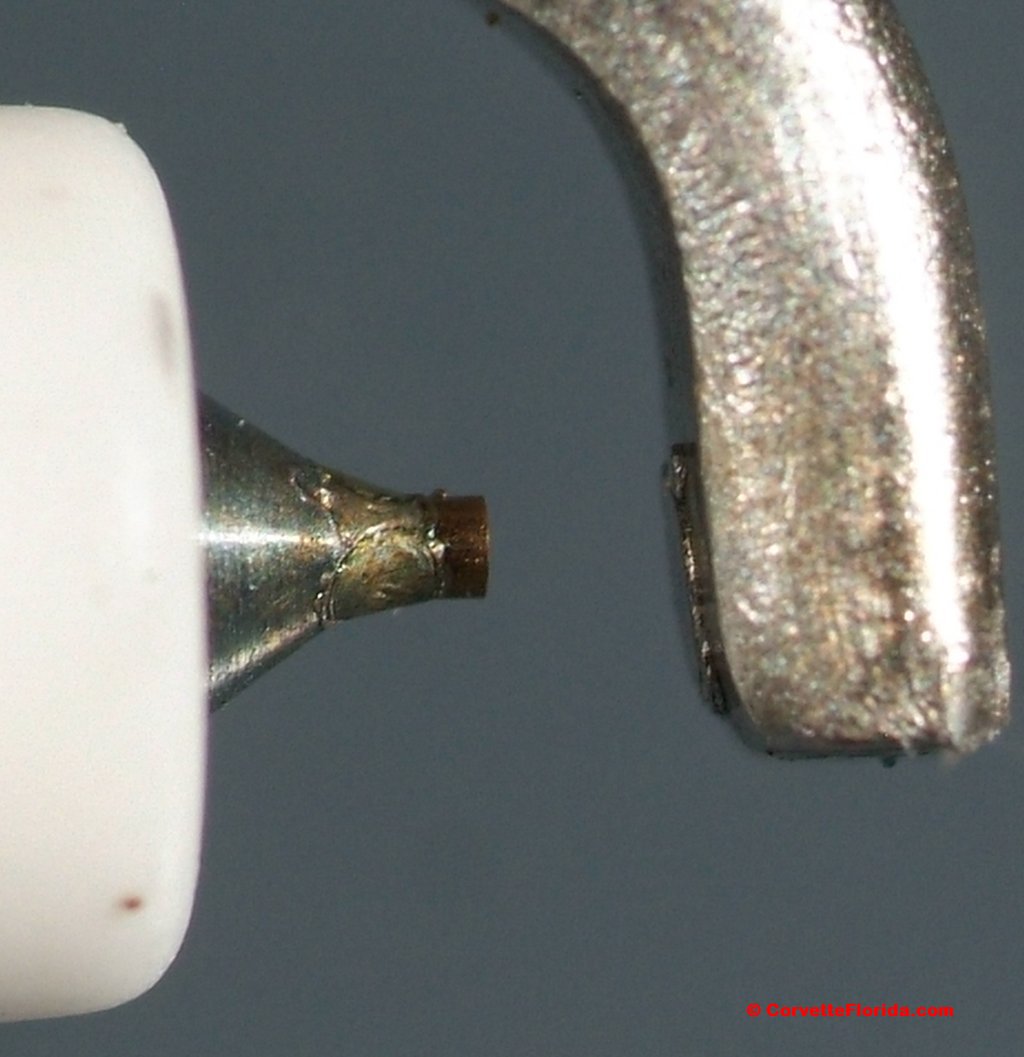
These are supposedly pre-gapped at 40 thousandths, and when I checked them they were actually somewhere between 35 and 40. I didn't have any feeler gauges between those two points, but I figured they were OK since they all felt the same on my gauges.
__________________
|
|
|
|
|
Currently Active Users Viewing This Thread: 5 (0 members and 5 guests)
|
|
|
| Thread Tools |
|
|
| Display Modes |
 Linear Mode Linear Mode
|
 Posting Rules
|
You may not post new threads
You may not post replies
You may not post attachments
You may not edit your posts
HTML code is Off
|
|
|
All times are GMT -4. The time now is 12:01 PM.
|