
|
| Paint & Body Work Forum For those people interested in the specifics of doing paint and body work repairs and/or enhancements. |
 |
|
 03-07-2013, 12:50 AM
|
#1
|
|
Internet Sanitation Engineer
Join Date: Mar 2006
Location: Crawfordville, FL
Posts: 15,138
Name : Rich Zuchowski
|
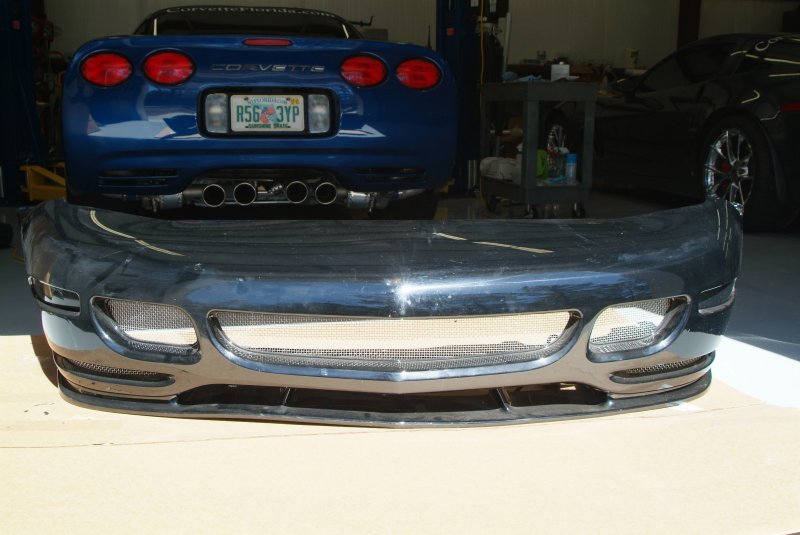
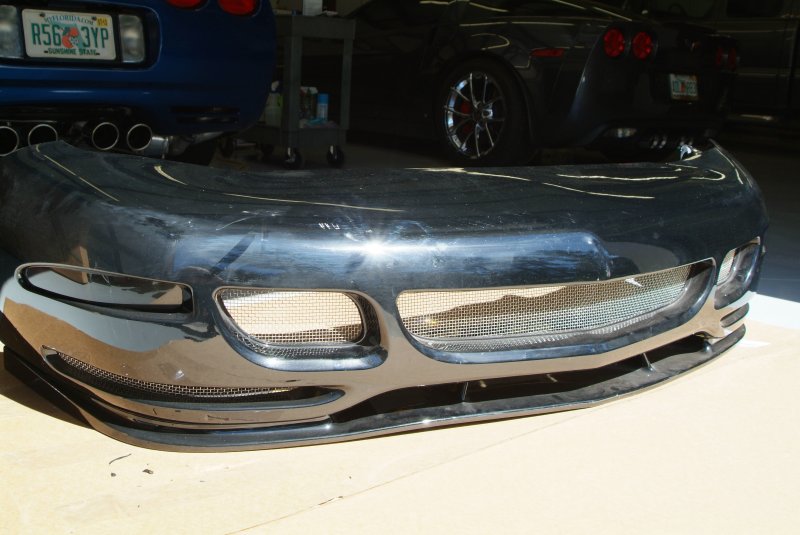
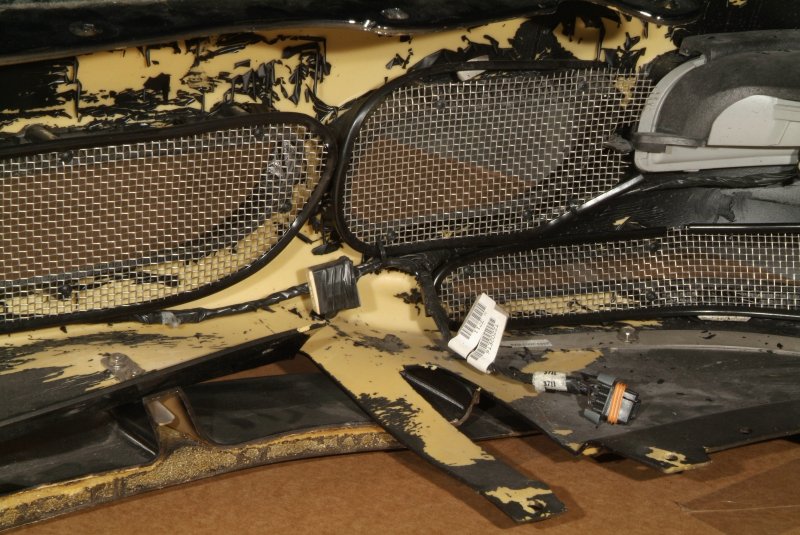
 Tiger Shark front bumper
__________________

|

|

|
|
03-07-2013, 12:57 AM
|
#2
|
|
Internet Sanitation Engineer
Join Date: Mar 2006
Location: Crawfordville, FL
Posts: 15,138
Name : Rich Zuchowski
|
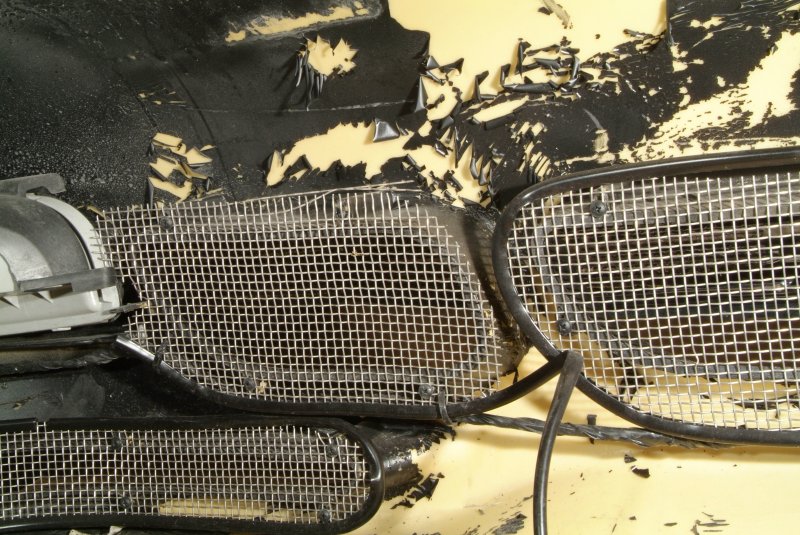
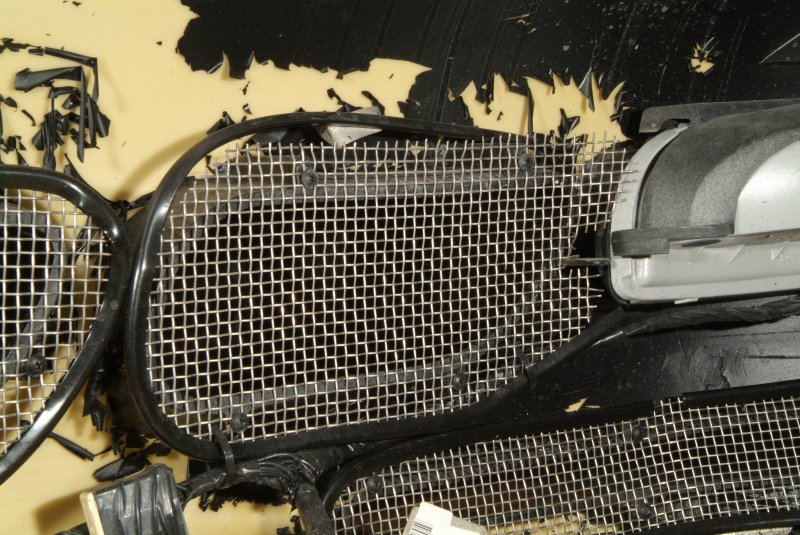
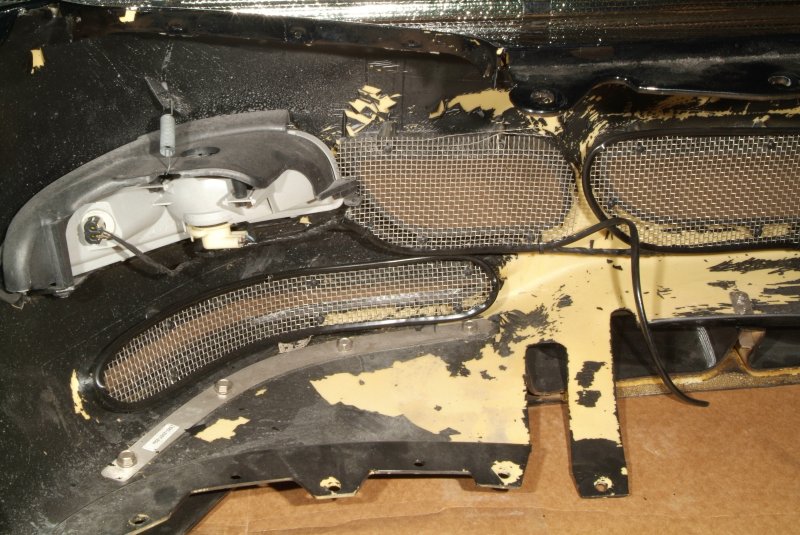
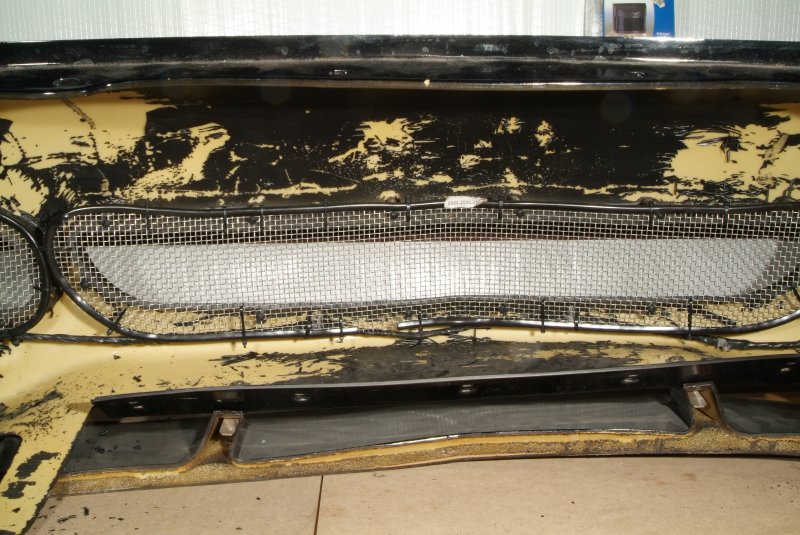
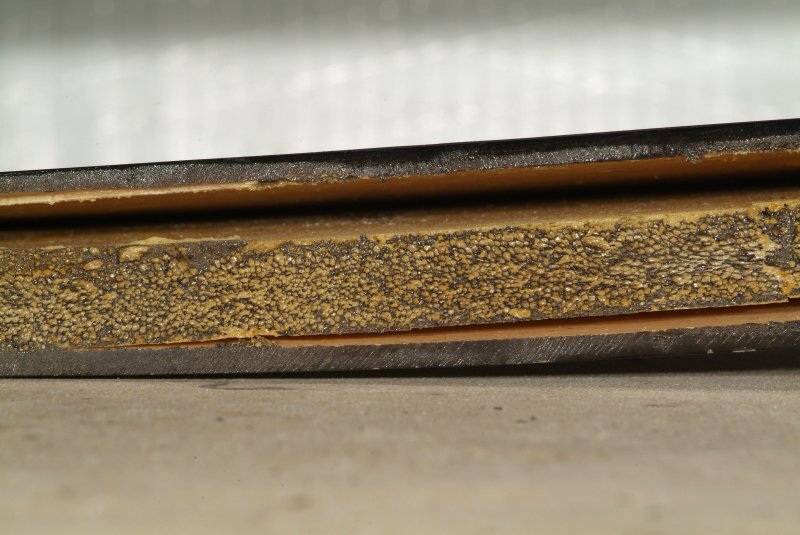
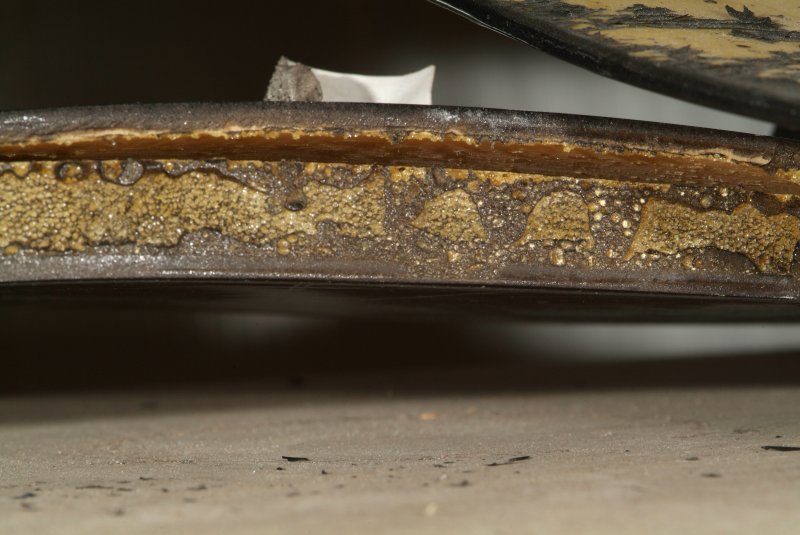
And it looks like I'm going to have to fix some of those screens, particularly the rubber molding around the edges of them.
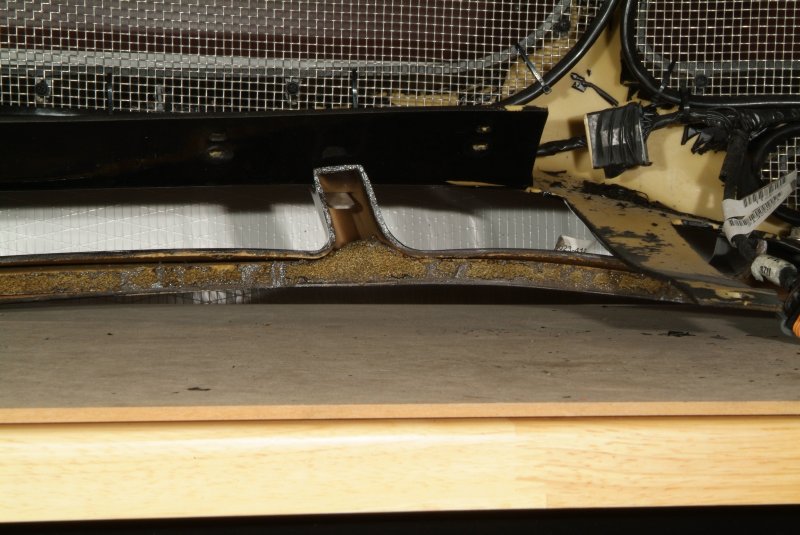
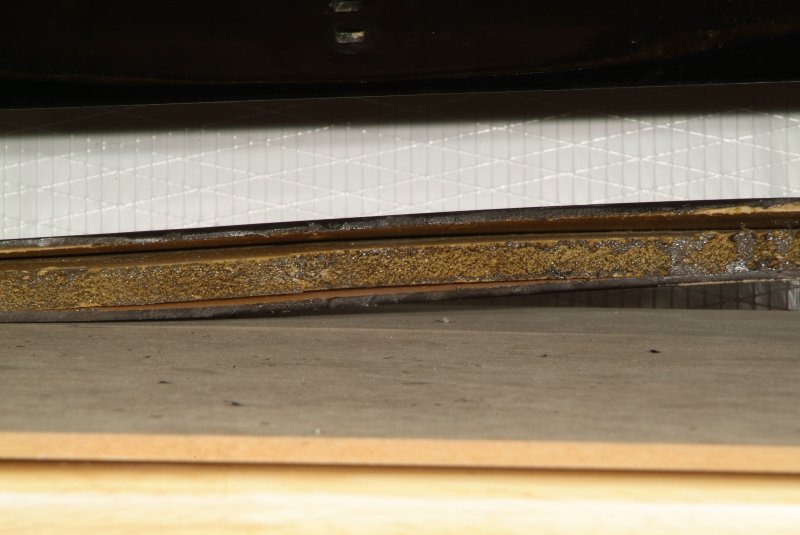
Looks like the splitter, if I decide to put it on the car, is going to need to be fixed too. Looks like it might have gotten pushed up a bit on the passenger side, as it appears bowed in the pictures at the beginning of this thread.

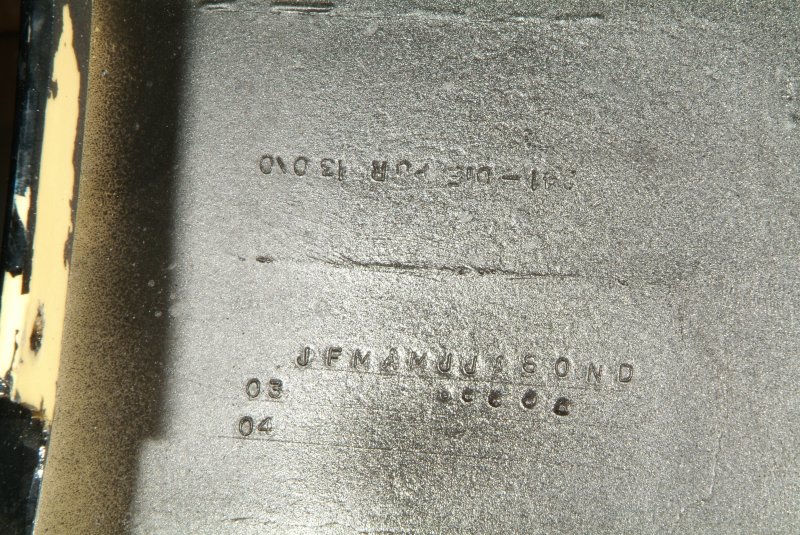
I'm trying to figure out who manufactured this bumper, but this is the only sort of identifying number or any sort I can see on it.
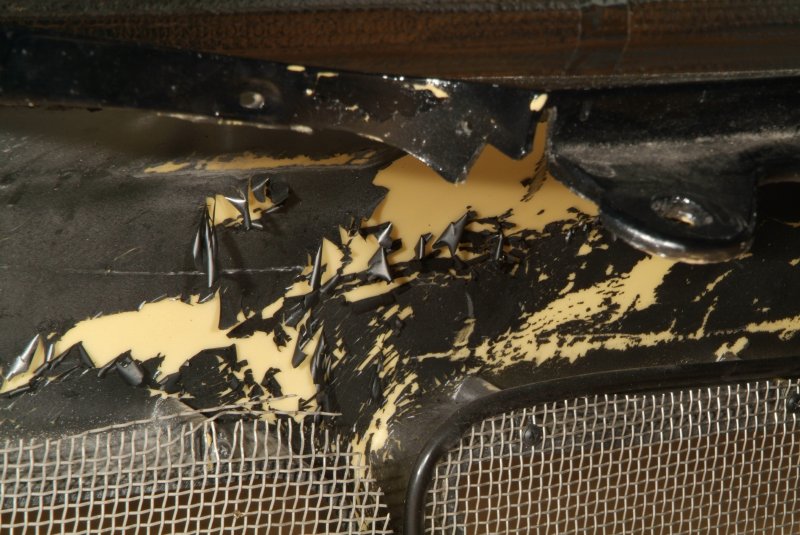
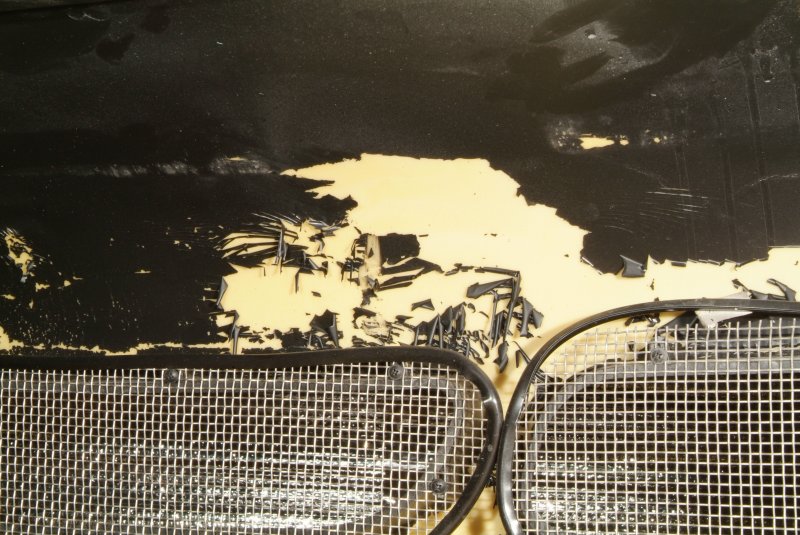
Well, I'll scrape what paint I can get off of the back of the bumper and fix anything that I think I can tackle to have it ready for whenever I want to face the paint job. I'm still playing around with the paint on the blue car, and having pretty good luck with the results I'm getting from my efforts. But I think the hood cracks will be the deciding factor as to whether I get the entire car repainted or just try to get the TS bumper painted to match the rest of the car. Still waiting for some stuff to come in before I tackle trying to fix those cracks. Having never done this before, I don't have a clue about what to expect.
__________________
|
|
|
|
|
03-07-2013, 08:13 PM
|
#3
|
|
Member
Join Date: Mar 2013
Location: Vancouver Bc
Posts: 1
Name :
|
TIGERSHARK
Hi,I also bought a used tigershark ,the same one that you bought.In fact the paint was pealing off the back.
I use a compresser with a air gun.It removed 80% of the pealing paint.Then I used scotch bright pads to scrub off the rest.A orbital sander will go threw it very easily.
If you don't want to have a disaster when you paint the bumper be sure to sand off all the paint and primer as it is most likely the same crap as on the back.
Then prim it .with bumper primer.
ps be sure to have cold beer on hand as you will need a few.
Cheers Darren
|
|
|
|
|
03-07-2013, 08:22 PM
|
#4
|
|
Internet Sanitation Engineer
Join Date: Mar 2006
Location: Crawfordville, FL
Posts: 15,138
Name : Rich Zuchowski
|
Quote:
Originally Posted by europlateconcepts

Hi,I also bought a used tigershark ,the same one that you bought.In fact the paint was pealing off the back.
I use a compresser with a air gun.It removed 80% of the pealing paint.Then I used scotch bright pads to scrub off the rest.A orbital sander will go threw it very easily.
If you don't want to have a disaster when you paint the bumper be sure to sand off all the paint and primer as it is most likely the same crap as on the back.
Then prim it .with bumper primer.
ps be sure to have cold beer on hand as you will need a few.
Cheers Darren
|
Thanks for the tips. I'm not going to remove the paint from the front of the bumper, but will instead leave that for whoever I get to paint it for me. I'll just take the garbage off of the back and tidy up whatever I can.
BTW, I contacted Starcraft and asked them if they could identify the bumper for me from the pics I took. Here's the reply I got.
Quote:
On 3/7/2013 4:05 PM, Cheryl Pauff wrote:
> Rich,
>
> Yes this does appear to be a genuine Tiger Shark front fascia. It was
> manufactured in Troy Michigan.
>
> Thank you,
> Cheryl Pauff
> Starcraft Distribution
> 28255 Charlotte Ave Bldg 1
> Elkhart IN 46517
> (574) 970-5597
> www.starcraftparts.com
|
__________________
|
|
|
|
|
03-08-2013, 08:01 PM
|
#5
|
|
Internet Sanitation Engineer
Join Date: Mar 2006
Location: Crawfordville, FL
Posts: 15,138
Name : Rich Zuchowski
|
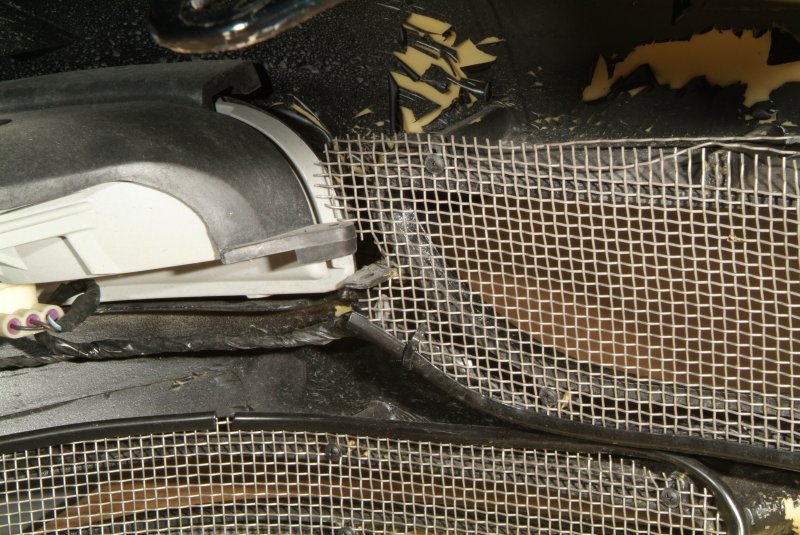
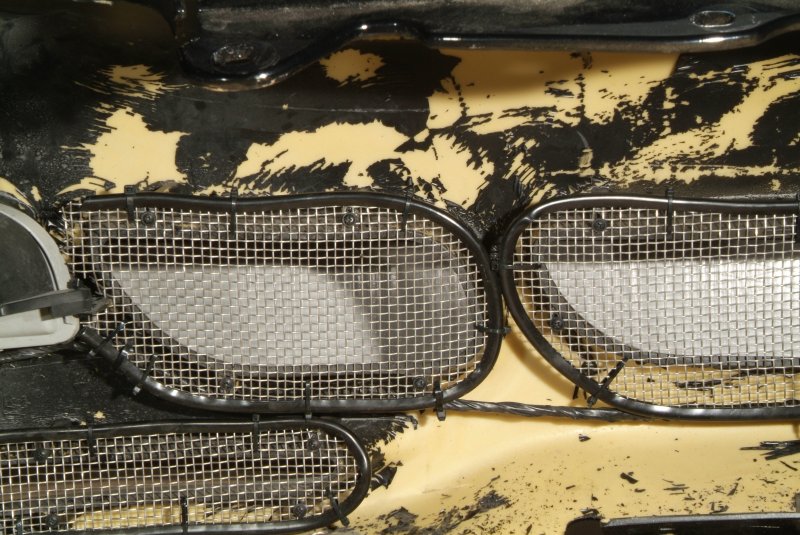
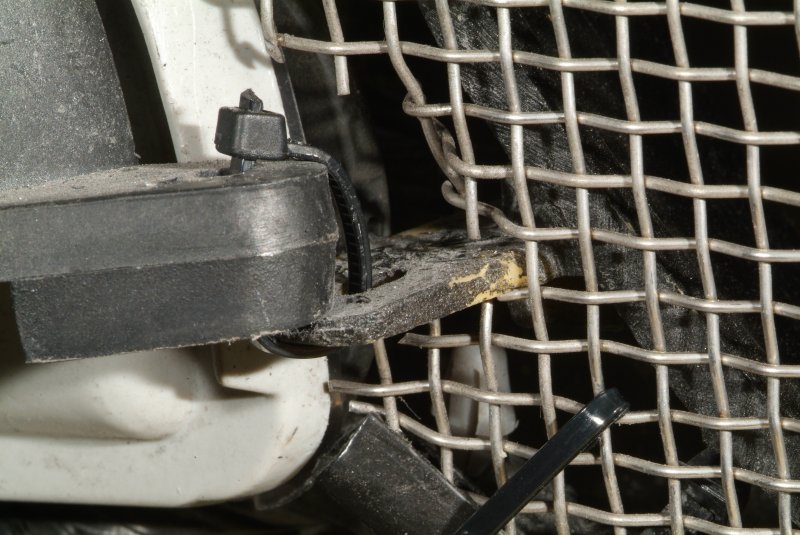
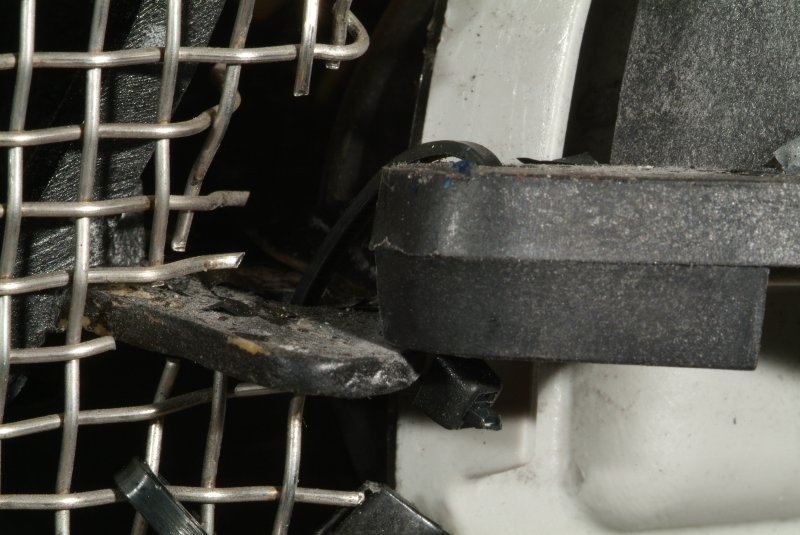
The black rubber molding around the screens was tougher to work with than I thought it would be. It's very rigid plastic, not rubber at all, and the slit for the screen to go into is razor thin and tight. I had to use a thin flat bladed screw driver to pry the edges open while trying to shove the screen in one wire at a time. Meanwhile the wire is pretty darn sharp, so I got jabbed a few times in the process. All in all this was a bugger to work on. I would imagine trying to do this with the bumper still on the car would have been pretty much impossible to do. Having it sitting on my workbench was tough enough doing it. I wire tired the moldings to the screen, so hopefully I won't have to do this job ever again.
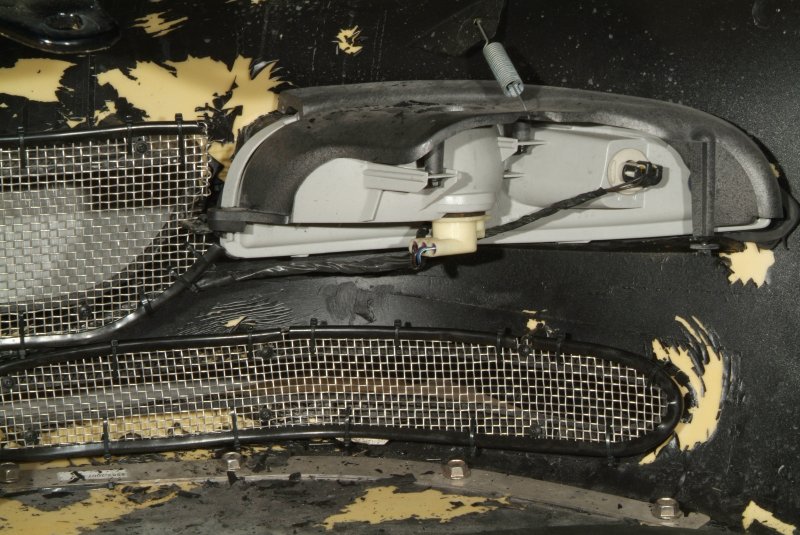
Also found that the front of the turn signal lamps weren't bolted into the mounts for them at all. The mounting holes on the lamps don't reach the tabs on the bumper, so I just wire tied them in place. Maybe whoever I get to do the mounting and painting of the bumper can fix that for me.
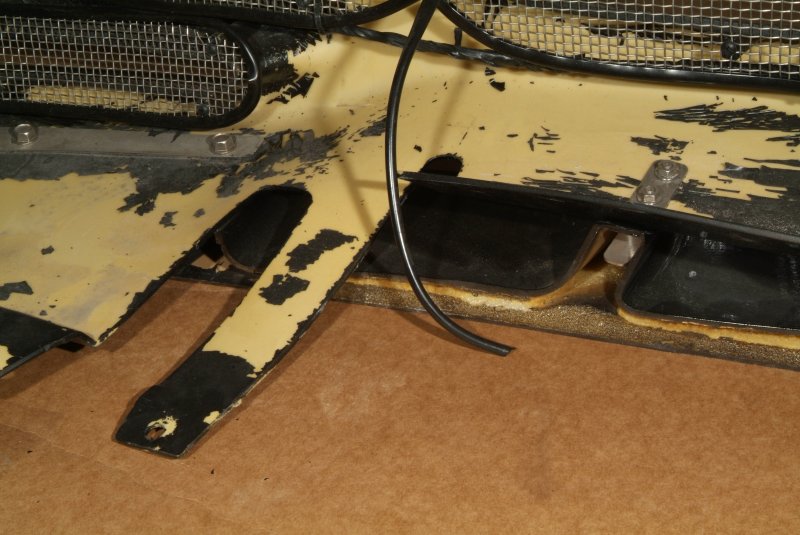
The black paint on the inside was just falling off while I was working on those screens, so I guess it won't be very tough at all getting it all off. If I felt like cranking up the pressure washer it would probably make short work of getting that crap off.
__________________
|
|
|
|
|
03-08-2013, 09:29 PM
|
#6
|
|
Senior Member
Join Date: Mar 2007
Location: On the road
Posts: 2,131
Name :
|
Try using a heat gun on that molding Rich. Just don't get it too hot.
__________________
I Have Noticed That A Lot Of People Demanding Free Stuff Are Not Wearing Work Boots.
|
|
|
|
|
03-08-2013, 11:48 PM
|
#7
|
|
Internet Sanitation Engineer
Join Date: Mar 2006
Location: Crawfordville, FL
Posts: 15,138
Name : Rich Zuchowski
|
Yeah, I thought maybe heat would make it more pliable, but then I couldn't see how you would be able to handle that hot plastic. It's too fine of work to use gloves with.
Well, it's done now anyway. But thanks for the suggestion.
__________________
|
|
|
|
|
03-12-2013, 01:06 AM
|
#8
|
|
Internet Sanitation Engineer
Join Date: Mar 2006
Location: Crawfordville, FL
Posts: 15,138
Name : Rich Zuchowski
|
__________________
|
|
|
|
|
03-12-2013, 04:04 PM
|
#9
|
|
!ereH nI depparT m'I pleH
Join Date: Jan 2007
Location: 25 miles south of Boston, MA. Also have a house in Dunedin FL.
Posts: 1,927
Name : Andy Anderson
|
2 suggestions.......first, go around the edges of the wire/plastic molding with some
black RTV sealant. That will probably eliminate the need for ZIP ties. Second,
maybe a "U-BOLT" of the proper size with a piece of flat metal on top to use
on the front of the turn signal lights. 
Looks like you've been doin' some work on it though, and it's getting better
and better. Get some before and after shots of the front of the C5Z, cause
I want to compare looks. I think it will look better in my opinion. Anything to
get rid of the front license plate mount.........UGH!
Andy 
|
|
|
|
|
03-12-2013, 04:26 PM
|
#10
|
|
Internet Sanitation Engineer
Join Date: Mar 2006
Location: Crawfordville, FL
Posts: 15,138
Name : Rich Zuchowski
|
Quote:
Originally Posted by navy2kcoupe
2 suggestions.......first, go around the edges of the wire/plastic molding with some black RTV sealant. That will probably eliminate the need for ZIP ties.
|
Heck, those moldings are pretty tight as they are on the screens, but they are also stiff enough that I'm afraid they might come loose just because they are being forced around those curves. Especially when they are pulled off to paint the bumper itself. I had originally thought of putting some sort of adhesive into the molding itself and then put the screens into them to hold them together, but they really are a bugger bear to work with. So I would be playing beat the clock to try to get the screens in before the sealant hardened up on me. I don't think the wire ties are going to be visible from the front at all, so this will probably be fine for me.
Quote:
Originally Posted by navy2kcoupe
Second, maybe a "U-BOLT" of the proper size with a piece of flat metal on top to use on the front of the turn signal lights. |
Yeah, I can visualize what you mean. I could probably fabricate something myself on the milling machine. Thanks for the idea. I'm thinking I might need to just pull those lamp assemblies out and LOOK at them. Might be a fixable reason why those mounting holes aren't lining up properly.
Quote:
Originally Posted by navy2kcoupe
Looks like you've been doin' some work on it though, and it's getting better and better. Get some before and after shots of the front of the C5Z, cause I want to compare looks. I think it will look better in my opinion. Anything to get rid of the front license plate mount.........UGH!
Andy |
Been working on the paint job on the hood of the C5Z lately, so this bumper is mostly just on the back burner right now. But it is taking up a good chunk of real estate on my work bench. I need to figure out if I will have to get the whole car painted, or if I'll be able to squeeze a couple more years out of the current paint job before really needing to do that. If that works out hopefully I can get someone to do a real good color match when painting and installing that tiger shark for me. I'm also hoping they can fix that front splitter too. I'd be tempted to try gluing it back together myself, but I'm afraid I might just make matters worse by not knowing what the hell I am doing. Does urethane become more pliable when heated so I could bend it back in shape? And how close is the bendable stage of heating to the MELTING stage? 
If I ruin this one, it's going to probably be pretty darn tough to find a replacement.
Heck, maybe when mounted that will pull the shape back the way it should be enough so that it doesn't matter.
Yeah, I will be taking pics. Don't I usually? 
__________________
|
|
|
|
|
Currently Active Users Viewing This Thread: 7 (0 members and 7 guests)
|
|
|
 Posting Rules
|
You may not post new threads
You may not post replies
You may not post attachments
You may not edit your posts
HTML code is Off
|
|
|
All times are GMT -4. The time now is 11:09 PM.
|


 Linear Mode

