OK. I am done. I like the way it came out. Much simpler to install than un-install.
Sorry about the first picture, very blurry. These are the steps I followed to replace the console on my '06 convertible, manual top, manual transmission with F55 option.
==================================================================
Open the center arm rest and with a small flat screwdriver, pop up the F55 option knob trim plate and remove the two 7mm screws. The trim plate is there whether you have the F55 option or not.
Pull down the Emergency Brake Boot at the front and remove two 7mm screws holding the side trim plate on.
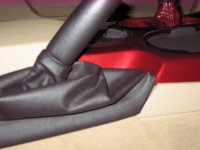
Push the Shift Boot down to reveal a Torx #20 screw. Remove the screw and pull the Shift Knob out.
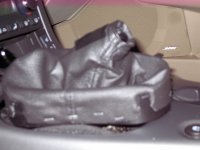
The boot is attached to an oval plastic box with five tabs. One in the front, one on each side about two inches back and two on each side towards the back. Push down at the bottom of the boot to get your fingers between the boot and the housing. Pull towards you to expose the right front tab and carefully move your fingers along the edges to get all tabs out of the opening. Pull Shift Boot out.
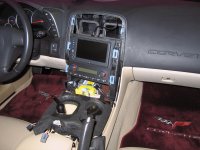
You are now ready to pull the console off. There are six tabs on the console. One each side of the Vents, one each side of the Navigation and one each side of the Radio (these are the approximate locations).
Very carefully, using a butter knife or something similar, pry out the console a little bit at a time at each tab. The console will only come out about two or three inches. This is where the fun begins.
There are six pieces of electronics that need to be disconnected in order for the console to come off.
I learned that by disconnecting in the following order, it gave me more room a bit at a time and made it easier as I went along. Flasher – tab on the bottom, Passenger side seat temp control – tab on the bottom, Cigarette lighter – tab on the bottom, Driver side seat temp control – tab on the bottom, 12V outlet – tab on the top (I used a long thin flat screwdriver and disengaged the tab through the opening from the F5 option know trim plate) and Traction Control switch – tab is a black metal clip on the switch itself.
At this point, you should be able to remove the console from the car and begin removing the vents and electronics. You can remove them in any order but I found it easier to remove the vents first to give me more room to access the flasher switch.
Vents – four clips each. Flasher – remove by prying out both sides of metal seat. Ash tray, Lighter, Seat temp control – two Phillips screws each side of box and one bottom left underneath of cup holders. Cup holders – two Phillips screws. Traction control switch – press one tab each side and push out. 12V outlet –it took me a while to figure this one out. With a pair of pliers, carefully turn the outlet until one of the plastic tabs aligns with a notch on the console. Twist, turn and push out.
Transfer vents and electronics to the new console in a reverse sequence of removal. Also follow reverse sequence of console removal for installation on the car.
Wallah, your are done. Pat yourself on the back, start that baby up and take it for a ride. :yesnod::dancer01: