• Got the Contributing Memberships stuff finally worked out and made up a thread as a sort of "How-To" to help people figure out how to participate. So if you need help figuring it out, here's the thread you need to take a look at -> http://www.corvetteflorida.com/forums/showthread.php?t=3581 Thank you, everyone! Rich Z.

427 engine (part 2) - RHS block

That pic was just for reference, as I said to check the inducer and exducer of the compressor side since I knew you wanted to just remove the compressor housing. they are commonly measured in MM.

the labeling would be too easy and would accommodate the end user if they forgot exactly what they had later on down the road.

that being said, there are WAY too many different combinations of turbos out there, between using a bigger exhaust wheel to eliminate back pressure to smaller wheels for better spoolup, then the trim of the compressor side for flow and pressure, there are likely endless combinations that could be had. even if a turbo had an ID tag on it, what if someone changed out stuff and had the housing machined to accept a bigger wheel, then the tag would be invalid for that turbo.

even in my job, the most logical things are never the norm.

Well, I've been learning that when you trade a headache now for one later on, the "later on" headache is usually much more painful. Even if the turbo came with a card you could put in a folder, and update it as necessary, it would be a WHOLE lot better than having to pull the housings off just to measure things to see what you have a few years down the road when you have completely forgotten the specs. If you even knew them from the beginning.

Imagine the headache I would have dodged had Pfadt put some sort of identifying tag on their carbon fiber driveshafts indicating it's length and/or specified application? :rolleyes:
 
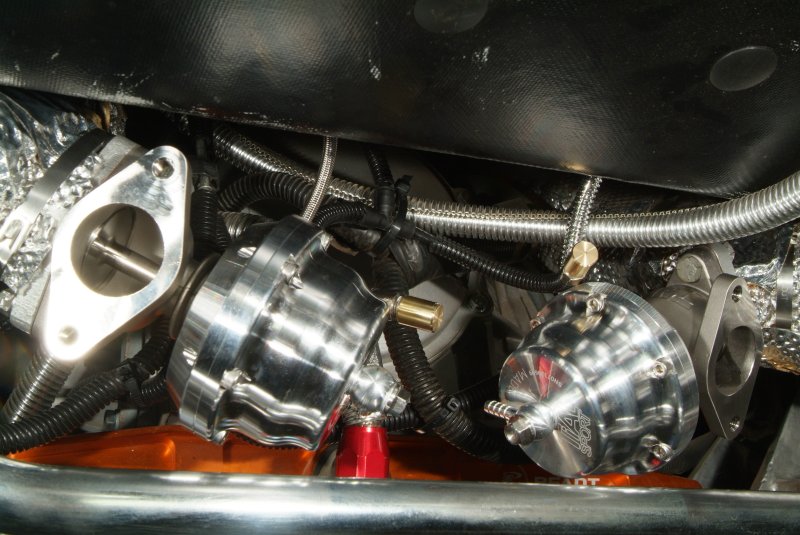
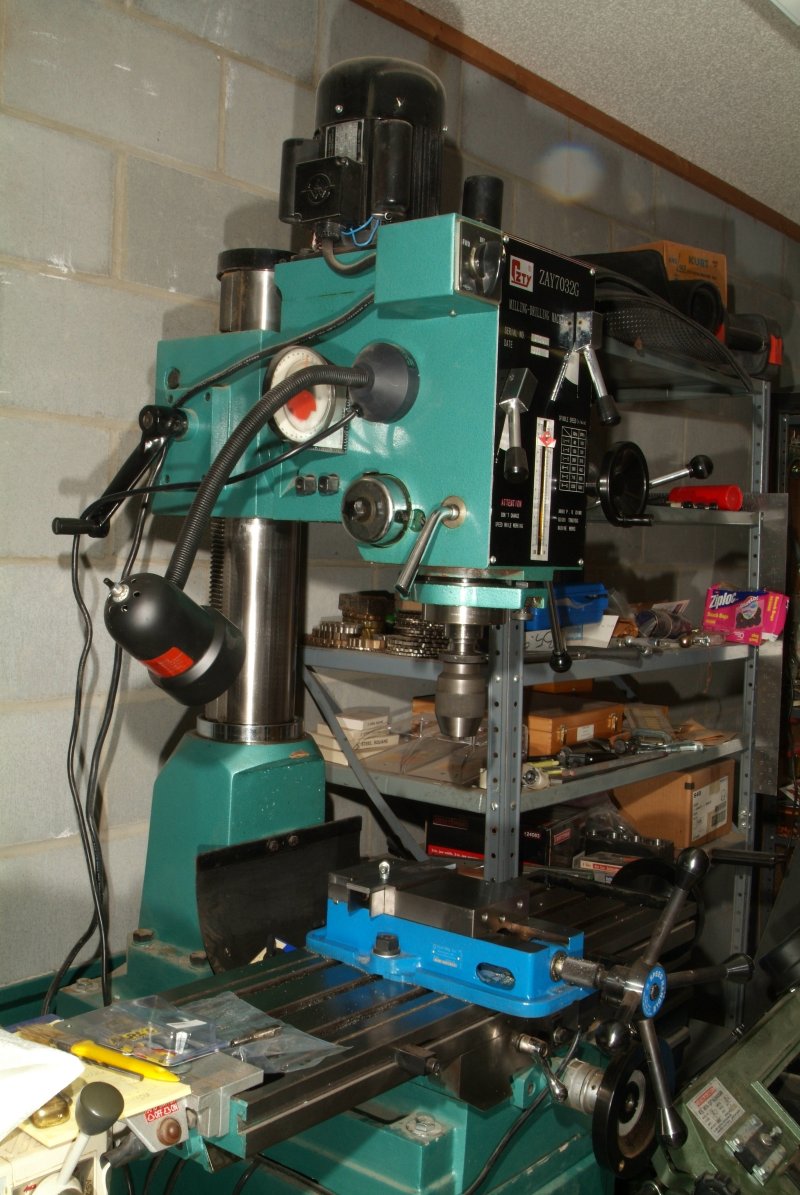
Well the larger drill chuck I was waiting for to use with my baby lathe came in today, so I decided to work on those end caps for the old wastegate lines I wasn't going to be using any longer. Needed to cap them off so they wouldn't be sucking air and losing boost pressure.

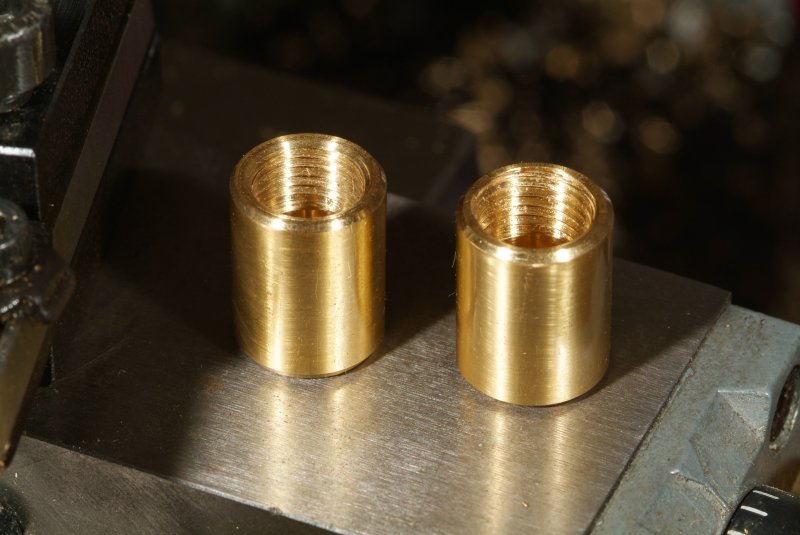
They didn't turn out too bad, I guess....
vacuum_fitting_11.jpg


I was going to cut flats on the sides of them so I could more easily grip them with a crescent wrench, but I decided to not complicate it and just use pliers to hold them in place when I screwed them onto the fittings. So I put them on and while looking at them, something just didn't seem right to me.
vacuum_fitting_12.jpg


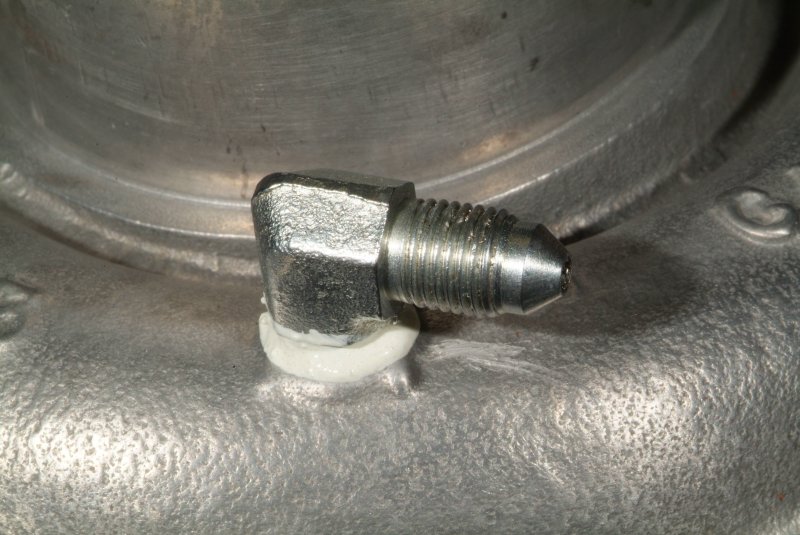
Well, those caps SHOULD have fit onto those plug fittings a LOT better than that. Should have pretty much buried the threads, but that was as far as they would go. Too much thread was showing, it seemed to me.
vacuum_fitting_15.jpg


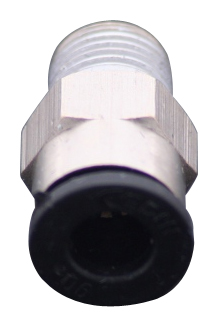
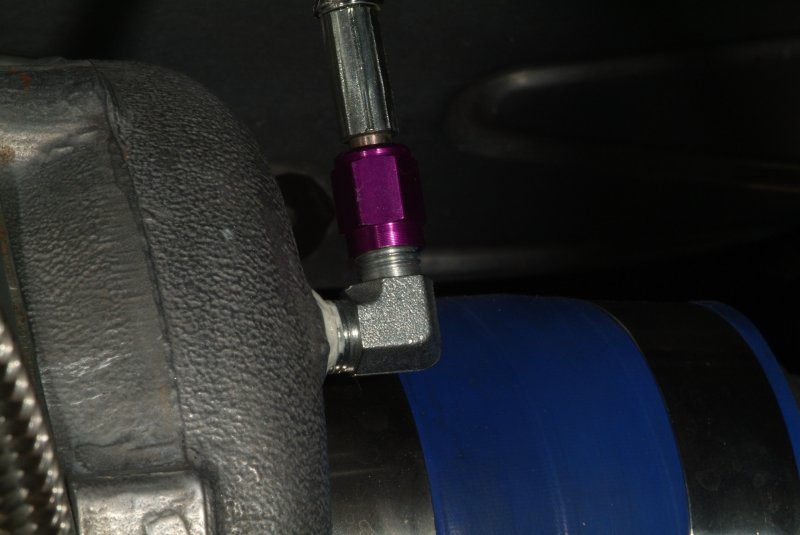
There is another issue I will get to in a bit, but while I was looking on the net to see what sort of fittings they are, I found this product that looks pretty much like what I originally had screwed into those wastegates.
vacuum_fitting_10.jpg


Here's the description of them:
Synapse Boost Connect Low Temp. Straight Fitting 1/8 NPT w/ 12mm Hex (3 Piece Pack)
Source: http://www.verociousmotorsports.com...t-Connect-Low-Temp-Straight-1-8-NPT-Connector

Well, that explains the problem, I think. Anyway, to back up a bit, I decided to take those caps off to look more closely at the threads on those plugs. While doing that, on the first one the WHOLE THING came off the hose pretty easily. I tugged on the other one, and that one didn't struggle much neither before popping off the hose. Well isn't that special? I had put some teflon tape on those plug fittings back when I was checking the springs in the wastegates, and since I couldn't see the darn things when I put them back in, (the holes in the wastgates are on top) I didn't realize they weren't going all the way into the wastegate's threaded holes.

Anyway, I thought maybe the teflon tape was binding up the threads (yeah, not likely, but SOMETHING was), so I decided to take a die and use that to clean up the threads the easy way. Well, I couldn't do it with just my fingers like I thought I could to clean out the teflon tape. So I had to put a little bit of leverage behind it. And darn if it didn't seem to me that I was taking metal out of those threads! :eek: How could that be?

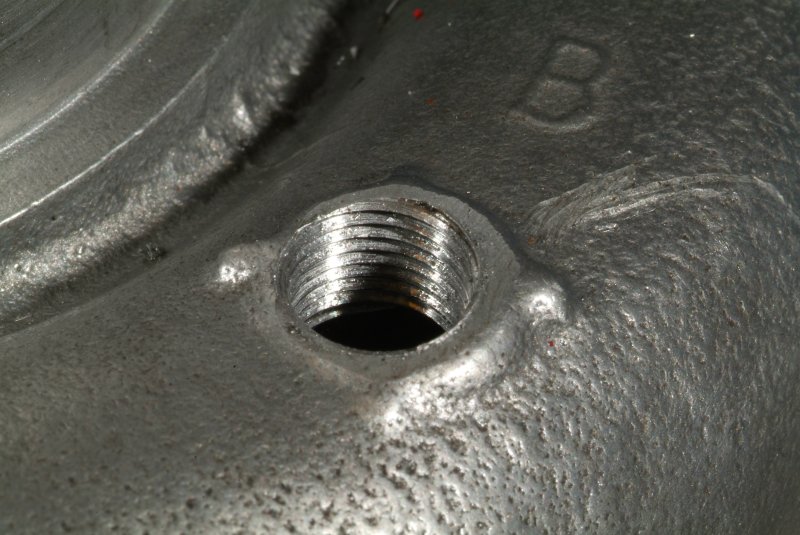
Well that description of the fitting explains it, I think. Those fitting ends are 1/8 NPT. The holes in the wastegates are 10mm x 1.0mm. They are VERY close, but definitely different. That's why the male fittings wouldn't go all the way into my female endcaps. Those male fittings are a tapered thread, and my female caps are a straight thread. The holes in the wastegates are also straight threads. Of course, the plugs aren't a tapered thread any longer, because my die took care of that. And now the caps fit on them perfectly.

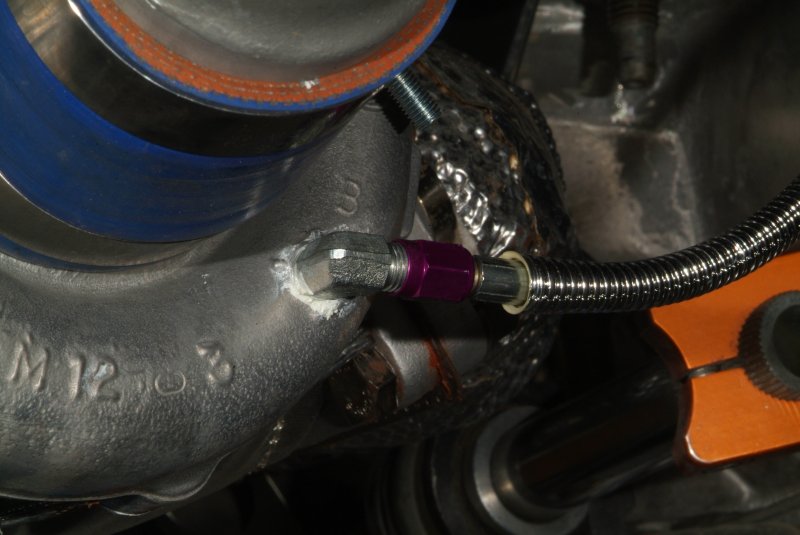
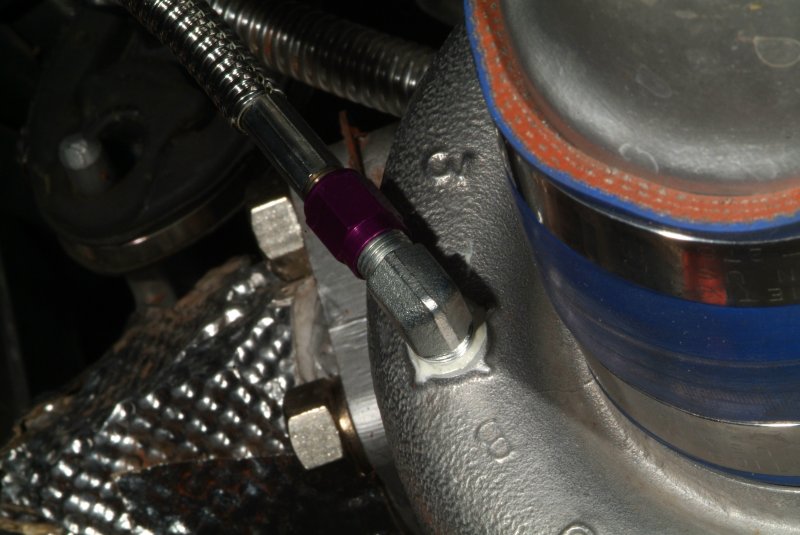
As for those fittings just popping off of hoses so easily, I tried really pushing them onto the hose and I could hear them click into place, but it really didn't take much tugging and wiggling on them to pop them right off again. They might be OK for vacuum, but boost? I don't THINK so! I really didn't want to just plug up the hoses (hey, I just made those caps, and I was going to USE them, dammit!), so I just got some plastic adhesive and smeared that on the hoses and inside of the plastic lock (supposedly) part and am letting them bond overnight.

So not only were those fittings loose on the hoses, but the fittings weren't even the correct thread for the wastgates. Ain't that just ducky?

Anyway, I'm curious now about how those two different types of fittings (1/8 NPT and 10mm x 1.0) will play together in a pinch. They are close enough where they might ALMOST work, I guess. But I certainly don't think it is correct to intermix them like was done on my wastegates. Heck, had I known this while making those endcaps, I could have just tapped them for 1/8 NPT instead of 10mm x 1.0. I have the taps for both of them. :banghead:

Ah well, yet another lesson learned today.
 
While I had the camera over in the workroom, I took a pic of my milling machine. I'll be using this to work on the turbo compressor housings over the next couple of days.

milling_machine_20.jpg
 
That pic was just for reference, as I said to check the inducer and exducer of the compressor side since I knew you wanted to just remove the compressor housing. they are commonly measured in MM.

I've got the compressor housing off of one of the turbos so I measured those blades. The narrow end is 56.65mm and the wide end is 74.98mm.

I was able to get the 1/8 NPT hole drilled and tapped and the fitting should point in the direction I want it. I almost went to far with the tap. I tested the fit and there were a lot more threads to go, so I made a couple of more turns with the tap. It's a rather course thread, so I should have checked after 1 complete turn. I'm OK but there is just a thread or two left showing with the fitting installed. I wouldn't be able to make another complete revolution if I overshot it again. :ack2:

I was surprised at how thick the metal was in that housing where I drilled. Looks like a good quarter inch thick. I was worried it was going to be thin and I might not be able to get the hose fitting pointed where I wanted it to go before I just ran out of tapping room. So there is apparently a narrow limit if you try to tap the hole to get the fitting oriented where you want it. So on the other housing, I'm going to make sure to get it right on the first try.

Just got to clean up the housing of all the drilling and tapping mess and then put it back on the passenger side turbo so I can take the other side apart tomorrow.
 
Got the fitting in on the passenger side turbo compressor housing. Hopefully I'll have the other one done tomorrow.

compressor_fitting_01.jpg


compressor_fitting_02.jpg


compressor_fitting_03.jpg
 
I've got the compressor housing off of one of the turbos so I measured those blades. The narrow end is 56.65mm and the wide end is 74.98mm..

that makes it a 57 trim.

56.65 x 56.65 = 3209.2225
74.98 x 74.98 = 5619.751

3209.2225 / 5619.751 = 0.57106

0.57106 x 100 = 57.109 or a 57 trim.
 
I was thinking, IF the turbo's are a true T-3 / T-4 configuration with the T-3 hot side and T-4 cold side, the T-4 60 trim cold setup does work OK with your numbers, but you could benefit from more boost or less back pressure. it takes more exhaust drive pressure to drive the larger T-4 compressor wheel when using a T-3 turbine and exhaust housing than a T-3 compressor wheel and T-3 turbine and exhaust housing........

View attachment 5740

t-4 57.gif


Still not ideal, it gets even worse when you up the boost as the volume increases exponentially with boost increase. this is assuming a 57 trim T-4 as there is not a listing for a 57 trim T-3.
 
Since this is supposed to be a T3/T4 hybrid turbo, I'm assuming it has a T3 turbine housing and a T4 compressor housing.

Not that I can do anything now, since I already drilled the two compressor housings and have them back on the turbos, but in order to put the turbo into the most optimal operating range, would I use compressor housings with larger trims? With everything being equal, what would larger trims do for efficiency?

Speaking of which.... I drilled and tapped the driver's side compressor housing today The metal was a little bit thinner on the second housing at the same place I drilled the first one, but still plenty of metal to tap the tapered threads. This second one went a LOT faster than the first one.

But two mishaps happened along the way. The first was a dropped the darn housing while trying to fiddle with getting the bolts installed. I was trying to put sealant on the bolts, get the backets lines up and then had to rotate the housing so the bolt I was trying to put in would clear the oil drain fitting. Fell about 5 ft and hit the drain pan I had underneath, which was little to no cushion for the concrete floor. I thought the housing was secure with two bolts loosely screwed in place, but apparently not. I was turning to grab another bolt and the housing waited until I wasn't looking to take the leap. I didn't see any damage but I hope there are no hidden cracks in the housing now. I guess when I put it under pressure it will let me know..... :eek: Ah well, I guess if the compressor housing blows out, I'll have reason to check out larger trim compressor housings sooner than I thought.

The second mishap was that I snapped the bolt off of one of the T-bolt clamps. I noticed yesterday that one of them felt like it was really binding when I went to tighten it after reinstalling the compressor housing, but I was able to get it tight. This time today the first one I tried felt really harsh trying to thread the nut on and the bolt just went and snapped off at the nut. Had to drive the nut out of the socket with a punch. Just so happens when the first one gave me resistance, I ordered a few extras from Summit earlier in the day, so I should have them tomorrow. Not sure why they are binding like that. They didn't come off with any difficulty. I did notice that there seemed to be sand up on those clamps, so maybe sand got into the threads or something. So I didn't mess with the other clamps, figuring I couldn't do anything anyway till the replacements came in. But certainly those bolts aren't hardened very much. It's not like I tried to Hercules that nut on with that short 3/8ths drive wrench.

Oh, one thing that was a pleasant surprise was that there was absolutely NO oil in the compressor housings on either turbo. Not a drop. A while back I found stripped bolts on one of the compressor housings and when I took off the housings there was quite a bit of oil laying in them. It had me worried that my newly rebuilt turbos needed to have the seals replaced again. But I guess that after-run relay I put in to run the scavenge pump after key shut off did exactly what I had hoped it would do. It's removing the excess oil from the lines after oil pressure ceases when the engine is shut off. So that seemed to do the job.
 
Since this is supposed to be a T3/T4 hybrid turbo, I'm assuming it has a T3 turbine housing and a T4 compressor housing.

Not that I can do anything now, since I already drilled the two compressor housings and have them back on the turbos, but in order to put the turbo into the most optimal operating range, would I use compressor housings with larger trims? With everything being equal, what would larger trims do for efficiency?

it would require a compressor housing and a compressor wheel change. that would mean a rebuild is in order.

you'd have to find one that will be in your optimal mapped out area. the reason I would like the RPM points as they match up with boost at WOT is to graph it from 0 psi to 10psi. it will slope up and to the right, from nothing to the max output I graphed on the others, with the compressor mapping. do you would need to find a compressor that maps within that slope and the center island being the focal point of the slope. that way it is at 70+ percent efficient at needed boost/flow rates throughout the RPM band
 
Hmm, it sounds like it would be just as easy and cost effective to just buy new turbos that come with the specs needed. Of course, I'm not in the market yet for new turbos, but I figure when the time comes, the more I know about this the better able I will be to make a decision on what is actually best for my particular application.

Thanks again for your help with this.
 
Gentlemen the language tends to make me think that more is to be said of extra terrestrials among us cause I understand that not at all.:ack2:
 
Got the new clamps in from Summit today, so I was able to put everything back together again.

turbo_compressor_fitting_01.jpg


turbo_compressor_fitting_02.jpg


turbo_compressor_fitting_03.jpg


I took more care tapping the hole for the driver side compressor housing and actually stopped when I had about a quarter turn more to go to thread in the fitting by hand, figuring tightening it with a wrench would snug it up right where I wanted it. I guess the sealant I am using also acts as a pretty good lubricant, because I felt like I could have gone another quarter turn to tighten it real tight. But I left it where it was on my mark. It should be OK. If those NPT fittings loosen up or give me any problems, I guess I can always run a 10mm x 1.0mm tap through the hole and just put banjo fittings in there. Maybe I should have done that from the start. Oh well.

But had another mishap today. Right off the bat I started tightening one of the clamps holding the coupler to the inlet of the compressor housing and the darn clamp was moving all around. So I used my left hand to hold the clamp still while I tightened with my right hand with the socket wrench. The socket was on a longer extension so I could tighten without worrying about my knuckles banging against anything. Not sure what happened, but the socket slipped off of the nut to tighten the clamp and somehow the socket end fell backwards and smacked me right on the right eyebrow. I tried to show Connie how it happened later, and darn if I can figure it out. It appears that the socket had to have fallen upwards and then over, defying gravity, to hit me. Anyway, I thought it was just a bang on the noggin, but my fingers came away bloody when I touched the impact spot on my brow. And how in the world that rounded edge of the socket could bite me like that is a mystery as well. It couldn't have been moving with that much speed to have any force behind it. But in any event, bite me it did, and I guess I'll have a little scar there from it.

I guess I'm just lucky it didn't hit an inch lower and catch me in the eye. That could have turned out pretty ugly since it broke the skin on my eyebrow. Of course I didn't have any safety glasses on, as I wasn't expecting anything to be flying around that could get into my eyes.

Not too sure I'm so thrilled now about the socket collection I have if they are going to be turning mean on me.

Anyway, I guess I can take the car out in the next couple of days and see if I forgot to tighten anything and something falls off. Then get back to trying to finish up the tuning. Hopefully the turbo boost stuff will work OK, and I'll be getting a bit more than the 8 lbs or so that I was getting before doing all this. And hopefully that plastic airbridge won't blow with any increased pressure inside it. I still don't really trust it much.
 
Anyway, I guess I can take the car out in the next couple of days and see if I forgot to tighten anything and something falls off. Then get back to trying to finish up the tuning. Hopefully the turbo boost stuff will work OK, and I'll be getting a bit more than the 8 lbs or so that I was getting before doing all this. And hopefully that plastic airbridge won't blow with any increased pressure inside it. I still don't really trust it much.

DUCT TAPE to the rescue!!!! :rofl1::rofl1::lmao:
Andy :wavey:
If it doesn't move and should ------- WD-40.
If it moves and shouldn't -------- DUCT TAPE! :D
 
Back
Top