• Got the Contributing Memberships stuff finally worked out and made up a thread as a sort of "How-To" to help people figure out how to participate. So if you need help figuring it out, here's the thread you need to take a look at -> http://www.corvetteflorida.com/forums/showthread.php?t=3581 Thank you, everyone! Rich Z.

427 engine (part 2) - RHS block

The throttle body seal is a rubber/silicone reusable seal so if there is no rips, nicks or stretched its fine to reuse.

Yeah, it should be OK, but the BOV o-ring should have been OK as well, and it's only pure chance that I saw it. If I'm going to pull off the throttle body anyway, I might as well just go ahead and replace it. The place I ordered it from said they have them in stock and will be going out in today's mail. I am getting it from ws6project.com, which is located in Iowa, so I should have it by the end of the week. SummitRacing showed a ship date of 05/14, and several other places apparently don't stock it, just order as needed.

In the meantime I can finish up dressing up the cable harness for the fuel pumps and work on the vacuum plumbing that won't affect the pre-MAP relocation startup. And I can put gasoline in the gas tank and run up the pressure so I can adjust that new fuel pressure regulator. I guess if I get to a twiddling my thumbs point, I can always just pull off the throttle body and inspect the seal when I try tapping those threaded inserts (I'm going to assume I need to check all four of them) back into the intake manifold. If the seal looks OK, I can either just wait till the new one shows up, or if I get impatient, put it back together and just keep the new seal for another day's project.
 
Today I just puttered around, not getting too much done on the car. Put some more insulation on some wires and harnesses near the engine.

Put 5 gallons of gasoline in the gas tank and doesn't appear to be any leaks at the pump seal. :thumbsup:

Connected the Racetronix harness to the cable connectors at the pump and dressed that up a bit.

fp_harness_01.jpg


Here's a pic of the fuel pump relays that I mounted in front of the fuel filter a couple of days ago.

fp_harness_02.jpg


And here's those fuel pump fuse boxes that I mounted on the firewall behind the battery.

fp_fuses_01.jpg


Actually I'm just about ready to put the new battery into place and test out those pumps to make sure they are working and then adjust the fuel pressure.
 
Today I pulled off the throttle body again and took a look at those threaded brass inserts in the front of the intake manifold that the throttle body mounts to. Both of the top two inserts were sticking out more than they should have been. So I got out the small mallet with a plastic striking surface and carefully tapped them both back into place. So now they are pretty much flush and the throttle body should fit against the seal a LOT better. Still waiting for the new seal to come in, but if it doesn't show up in a couple of more days, the old one doesn't appear to be damaged, so I'll just run with that.

Mounted the power cable ends to the Racetronix harness for my fuel pumps onto the new top mount battery cable ends I bought. I just need to figure out something to mount those two ends that have either a loop back plug or the cable end running to the Hobbs switch attached somewhere that I can get to them easily and they won't rattle around in the battery compartment.

While I had the throttle body off along with the airbridge, I noticed that the fan shroud just didn't seem to be positioned right. I could push it towards the radiation with my fingers. So I took off the upper radiator support that holds the radiator in place, and sure enough, there is a tab at the center of that support that should have a mating tab on the fan shroud held in place to keep the fan shroud against the radiator. I checked some old photos I took and it was this way when I brought it back home. I guess I'm getting a little better at noticing when something just doesn't LOOK right under the hood.

Addendum: Here's a pic taken back on 12-08-2011 showing that tab I am referring to above that needed to be BEHIND a matching tab on the radiator support.

airbridge_03.jpg
 
Last edited:
I got all the Racetronix harness stuff mounted in the battery compartment today.

racetronix_10.jpg


Also put in the battery and got all the cables hooked up to it, as well.

racetronix_11.jpg


I figure tomorrow I'll turn on the ignition and run up the pressure from the fuel pumps. I'm going to test both pumps individually to make certain they both work. Not sure how to test that Hobbs switch, though. And I need to check all the fuel line connections again and hope nothing is leaking fuel. After that, I'll need to adjust the fuel pressure regulator.

The seal for the throttle body hasn't come in yet, so if it doesn't show up by tomorrow, I'm going to go ahead and just use the old one. I need to start up the car to make sure it idles OK and everything is basically working as is before doing the vacuum plumbing changes. Hopefully tuning in earnest will begin next week if everything goes OK the next couple of days.
 
:banghead:

Just got a phone call from the guy I bought that throttle body seal from. He said that he just got it sent back to him in the mail. Apparently the post office trashed the bubble envelope it was in and decided to send it back to him rather than forward it on to me. He said the seal is fine, just the envelope got destroyed. Sheesh..... He offered to refund my money, but I told him to go ahead and send it to me anyway. I'm going to reuse the old one and just put the new one on a shelf in case I need to pull the throttle body off again sometime.
 
So, did I pay attention to that bad omen and just stay the heck out of my garage today? Nooooo, I had to go in there thinking I might as well put that throttle body on and get some work done. I mounted the throttle body and took some pics of the insert so I could show the difference. Hmm, didn't appear to BE any difference and I could see the edge of that brass insert again. So I took off the throttle body again and sure enough, I had to tap that insert back in. The one in the left upper corner needed to be tapped in a bit as well. So I put the throttle body back on and used an extra washer just in case those bolts were bottoming out. BTW, I did measure the bolts and put them into each insert to note how far they go in, and they shouldn't have bottomed out at all. But just in case, I did use another washer.

I tightened them down gently, actually leaving that problem one in the upper right hand corner for last to tighten down fully and darn if I didn't see the insert just pull right out to butt against the throttle body instead of the throttle body being pulled tight against the manifold. Dammit.....

So I used a small socket for a support and pulled ALL of the inserts out of the manifold. The top ones came out VERY easily, and the bottom ones only with slightly more resistance. So I cleaned up the inserts and the holes in the manifold to make sure there is no oil or crap in them, and am now waiting for that to all dry thoroughly. Than I'm going to permanently JB Weld those bitches into place and be done with them. BTW, I took a straight edge and ran it across the throttle body mounting surface on the intake, and it didn't seem to have any high or low spots on it. Based on that gap I see, I would think a warped surface would show up easily that way.

Anyway, I should have known today wouldn't go well. I guess I'd better tell the guy that it's not looking real good to start tuning next week. I'll probably want that JB Weld to set a good 48 hours before putting that throttle body on......... :banghead:
 
Got the inserts JB Welded in, and I didn't even break the intake manifold doing it.

insert_jb_01.jpg


insert_jb_02.jpg


insert_jb_03.jpg


insert_jb_04.jpg


Now I just need to let the JB Weld harden up. Then I'm going to check them with a straight edge, and any that are not PERFECTLY flush I'm going to take a fine toothed file to them and MAKE them perfectly flush. I want to put this problem behind me PERMANENTLY.
 
I checked the JB Weld packaging and it said that materials joined with it can be handled in 6 hours, and is fully cured and hardened at 15 hours. So after about 22 hours, I started filing down the brass fittings that were not flush with the manifold surface the throttle body mounts to. I took it real slow and checked my work very often, so it was pretty tedious going. But I got all four of them as flush as I could get them. Vacuumed up the brass dust (I sealed off the throttle body hole with masking tape beforehand) and set the throttle body in place to check the fit. Oh, I had already removed the rubber TB seal to inspect it, btw, so I was checking the throttle body fit directly to the intake manifold mounting surface.

Hmm, seemed like the throttle body was high centering on the mating surface of the manifold. Like the mounting surface wasn't perfectly straight. Seemed like there was a high spot at the 12 o'clock position, and slightly so also at the 6 o'clock position, so the throttle body rocked left to right, but not up and down. So I took the file and again slowly passed it over the mounting surface at the 12 and 6 o'clock positions until it too was flat and the throttle body wouldn't wobble when I put it in place. In any event, this explains why those threaded brass inserts got pulled out like they did. Obviously the four bolts weren't tightened down carefully in a round robin sequence, so whichever was the last bolt to be tightened, likely the one at the 2 o'clock position (since that was the worst one), had stresses applied to it that caused it to be pulled out of it's mounting instead of the throttle body being pulled closer to the intake manifold surface.

But anyway, that's fixed now. The throttle body doesn't mount completely flush with the intake, but I think that's because the seal only compresses so much and no more. I tightened the TB down carefully, and there was NO give from any of the inserts, so this should be behind me now.

I also started getting ready for the tuning stuff by pulling out the wideband sensor, harness, and display and began putting that stuff together. I had originally wanted to get power from the cigarette lighter, but the instructions said to get a ground from the battery directly, or as close as possible otherwise the readings will suffer. So I affixed insulated spade connectors onto the new battery cable ends I put in for the fuel pump system that will allow me to simply plug in the power harness directly to the battery. Also got the wideband interface signal wires hooked up to the terminal block on the HPTuners interface cable, but haven't taken a look at the program to try to figure out how to interface the program with the new connection. All in due time, I guess.

Anyway, got everything put back together again, and I'm ready to start the fuel pumps and test them individually, and at the same time run up fuel pressure into the fuel lines so I can check for leaks. If that goes OK, then I have to adjust that new fuel pressure regulator to 59 psi. If everything looks green across the board, then I do the smoke test by trying to start the engine.

Let's see, new throttle body, new fuel pumps and harness, new fuel pressure regulator, new wiring to the STS scavenge pump, repaired ports on the turbos, new O-ring on the blow off valve, and new battery. What could possibly go wrong...... :ack2:
 
Well today started off pretty good. Ran up the pressure in the fuel system and there were no fuel leaks. Tested both new fuel pumps and both work. Connie helped me adjust the fuel pressure regulator so that is OK.

So with everything looking good, I decided to do the smoke test.


I thought the car might have some trouble idling with that new throttle body since Aaron evidently had to drill a hole in the throttle blade, which I assume is for an idle problem, but it idled just fine when it started up. I only goosed the gas pedal lightly as I didn't want to push things until the tune actually gets worked on and I know air/fuel is OK. The car is still running in open loop mode.

So I let it run for 6 or 7 minutes to burn off any condensation inside the engine and exhaust, and I'm thinking things are really looking up. I can do the vacuum plumbing changes and we should be ready to get to the tuning in another day or so.

Well, I talked to Ed on the phone and referencing a photo I sent him of the spot where he said we need to relocate the 2 bar MAP sensor, I asked him how exactly I should do that. Here's a pic of what I have.

vacuum_fitting_01.jpg


I'm not sure exactly why Aaron relocated the vacuum fitting for the blow off valve there, but it kind of gums up the works for relocating that MAP sensor. First off I needed to make sure that the fitting was threaded in and not epoxied in, which fortunately appears to be the case.

map_sensor_03.jpg


But Ed tells me the best way to do this is by filling in that threaded hole in the manifold with some sort of plastic epoxy and then drilling it out for the MAP sensor. Now this is when I find out that there is some sort of grommet that needs to be used with the MAP sensor. Great..... I could have ordered this LONG ago had I known about it. But it gets even better. I asked Ed how I would mount that MAP sensor in such a way that it doesn't blow out of that hole in the manifold under boost. And this is when he tells me there is some sort of tab on the MAP sensor that bolts into that threaded insert right next to the vacuum hole...... Eh?

map_sensor_04.jpg


If you can see some way to bolt this thing where it needs to be, then you are a better man than I. :crazy03:

So anyway, had both an upswing and a crash in my mood today. This car is making me bipolar, I think. I hope it's not going to be permanent.... :banghead:
 
Another way to fill that hole would be to get a solid rod and a die to cut threads on it to make a plug for the hole. Then you can drill the exact hole in the plug for the map sensor.

Sure sounds good to me I did not hear any hesitation on the slight throttle blips.
 
If I can find a MAP sensor seal, I just might epoxy that sucker into the hole and be done with it. Or just put that threaded fitting back in, cut the hose, leaving about 2 inches on it, and just fit the MAP sensor onto that hose and relocate the other end to the vacuum manifold block. There has to be a "good enough" solution to this problem that is easier than plugging up that hole and redrilling it.
 
Well, Champion Chevrolet's streak remains unbroken for NOT having anything in stock I have needed for my cars. :rolleyes: So I had to order a couple of seals (always have a backup in case one gets screwed up!) from a place in Ohio.

And evidently you CAN get a bolt to hold down that MAP sensor in that threaded insert if you position it right. Looks like a darn kluge, though.

Oh well, guess I'm dead in the water till a seal shows up.
 

Attachments

  • seal_01.jpg
    seal_01.jpg
    29.9 KB · Views: 92
Wednesday I got impatient waiting for the MAP seal to show up, so I started rooting around in all of the accumulated stuff I have for working on the vacuum lines, and I noted that one of the rubber fittings I got from Oomph Labs looked like it would be a real good fit for that drilled and taped hole in the intake manifold. I eyeballed it a LOT and tried some test fittings, and it looked like it would do the job for me without any modifications and just some persuasion with a mallet to fit into the manifold hole. It looked like it would fit into the manifold snugly and the MAP sensor plugged into it's hole very snugly as well so it looked like a workable solution. So I decided to NOT wait for the stock MAP sensor seal and proceed. Good thing, anyway, since I got the seal in yesterday and it would have been too small for that drilled and tapped hole I needed to work with. So I would have had to modify the manifold hole to use it, and that could have gotten messy, likely requiring me to pull that throttle body yet again.

Anyway, I put a light coat of RTV high temp silicone sealant in the threads in the hole and around the rubber fitting and pressed it into the hole, leaving a little bit of a lip above the manifold surface to help it seal against the body of the MAP sensor.

After looking at the method that seemed to be the recommended manner to hold the map sensor down with a single bolt in the provided brass threaded insert next to the hole, I wasn't real keen on relying on that to do the job. much less impressed with the way it looked. So I went into my work room and cleared a path to my milling machine. I hadn't used it in years, so that took longer than I care to admit just to get to it. Had to do some prep work (oiling the moving bed and cleaning up the vise, etc.) but it seemed to work OK. So I did a bunch of measurements (unfortunately I didn't have any sort of CAD program to use ((I actually have a version of AutoCAD that is about 100 years old and I think came on 5 1/4 diskettes)) so I just had to wing it with a rough drawing and rechecking my measurements a bazillion times. Had a piece of aluminum bar stock that was about right for the width of the bracket I had in mind, so I cut it off with my metal cutting band saw (had to dust that off as well) and then spent several hours making the bracket I had envisioned for that MAP sensor. Most of the time was actually spent measuring and squaring up the piece in the vise but it didn't turn out too bad, I guess....

map_bracket_01.jpg


map_bracket_02.jpg


map_bracket_03.jpg


map_bracket_04.jpg


I have one more change I want to make on it, though. I couldn't find any M4 stainless bolts with allen cap heads on them locally, so I just used a hex head for now. I've got a couple of what I want on order, so when they show up I will countersink that hole on top so that the bolt head fits flush with the top of that bracket. I was going to polish out the milling marks, but Connie said she liked the look of it like it was, so I decided to just leave them be.

Next step is to pull off the wiring harness from the stock MAP sensor and put the extension on to reach the 2 bar MAP now in place at the front of the manifold. Then cut into the vacuum line going to the brake booster and run a hose from a "T" there to the vacuum manifold block. Relocate the tube going from the blow off valve there, then have a tube ready from the fuel pressure regulator when needed, and I think I am DONE.

Oh, I do want to shorten that Racetronix wiring harness underneath the car for the fuel pumps, as it's too long by about 6 or 7 ft., and I don't want to have that coiled bird's nest tied up underneath the car. So I'm going to cut a section out of it and solder the wires together to make certain I have good connections on all four wires. But that's no big deal to do, and doesn't really impact the tuning process, so I can do that anytime before I actually put the car onto the road.

So if Ed is available, I should be able to start on the tuning this upcoming week. :hurray:
 
BTW, for comparison, this is the prescribed way to mount a relocated MAP sensor. You can probably see why I wasn't all that crazy about that.
 

Attachments

  • map_sensor_relocate_ugly.jpg
    map_sensor_relocate_ugly.jpg
    120.9 KB · Views: 79
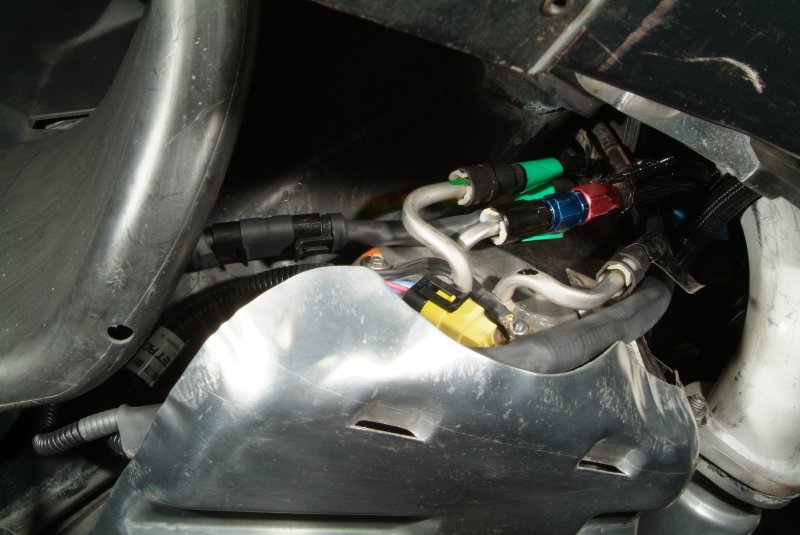
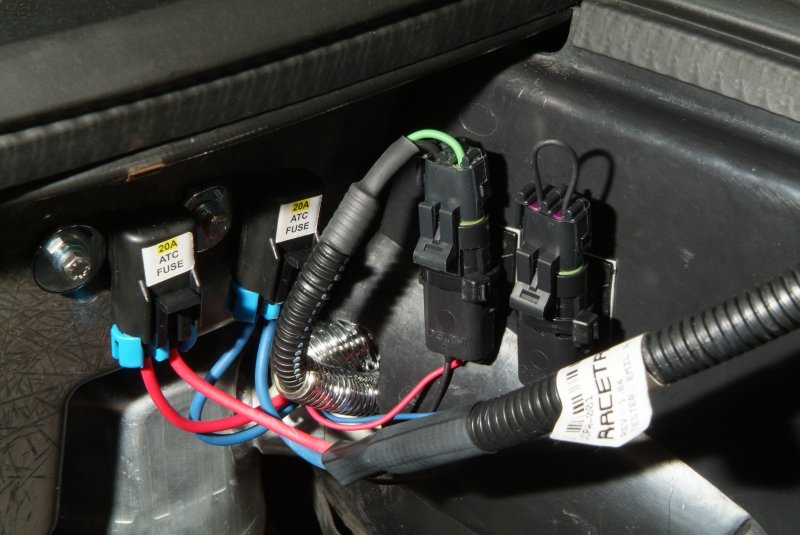
Decided to work on the vacuum plumbing today (Saturday), and the first thing I did was to pull off that vacuum hose going to the brake booster check valve. Uh oh... Here I was thinking this was a 3/8ths ID hose, and it's a 1/2 inch ID line. Rats... Of course I didn't have a "T" fitting for that size hose, but up to my eyeballs in all kinds of 3/8ths fittings. Not only that, but I needed a "T" fitting with the two straight sides being 1/2 inch, and the bottom part being 3/8ths inch to run to the vacuum manifold block. Sheesh, I thought there was just no way in hell I was going to be able to find something like that. I searched around on the net and found a couple of sources after a lot of digging, but was pretty darn surprised when I discovered that Home Depot carried exactly what I wanted. Was even made out of brass. So I called over there with their part number, and was amazed to find that they actually had one in stock. Will wonders never cease. So Connie and I drove on out there to pick it up. On a whim I also picked up a 90 degree elbow 1/2 inch fitting as well, as I didn't like that sharp bend in the rubber hose going to the check valve, and I thought this might be a better solution.

Well, after cutting up that check valve hose and putting in the fittings, I decided I just don't really like the way it looks with all those clamps there by the booster. I didn't realize it was a molded hose, and thought it was just a standard hose bent at that sharp 90 degree angle. So there are two clamped hose connections more than I really like there. It will work, but I'm going to try to locate a new molded hose and just use the end from the check valve to where I put that "T" fitting in place. Duh.... Live and learn, I guess... Seemed like a good idea at the time, though.

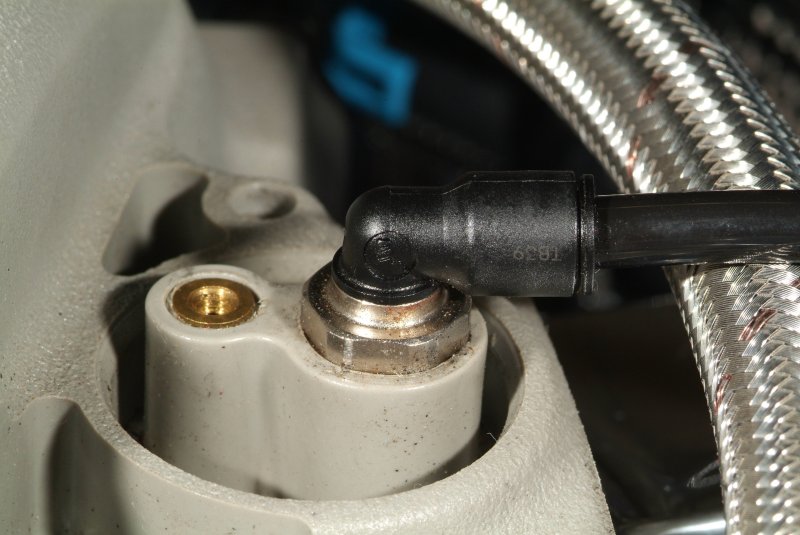
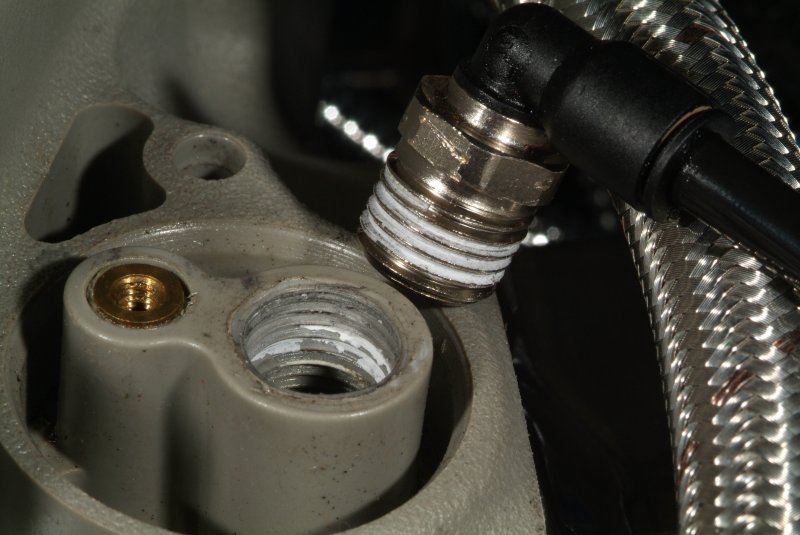
Anyway, got the hose ran from the brake booster "T" to the vacuum manifold block, and just had to add a short section of additional hose to get the hose from the blow off valve to reach the vacuum manifold. But I'm going to take another look at that one, as I'll explain. I was trying to get a short length of hose to run from the fuel pressure regulator to the vacuum manifold using these fittings I got from Oomph Labs called "Hose Candy". The idea seemed good to me, as I wanted to be able to easily take off that hose in case I needed to fiddle with adjusting the fuel pressure regulator at anytime in the future. Since you should really adjust the fuel pressure with the vacuum hose OFF, I figured an easy way to do that might be advantageous. But I must have been doing something wrong, because although the ends that screw together seem solid enough, the ends that actually fit into the hoses and rubber adapter on the vacuum manifold fitting just came apart way to easily for my comfort. If I can pull a hose fitting apart with just a modest amount of tugging, then I really don't feel comfortable that the hose will stay in place when 10 psi of boost is running through it. So I need to check that hose fitting on the blow off valve, as I used a "Hose Candy" fitting there as well. Yeah, I guess I could but wire ties or hose clamps on those ends, but then, did I really make things all that much easier on myself?

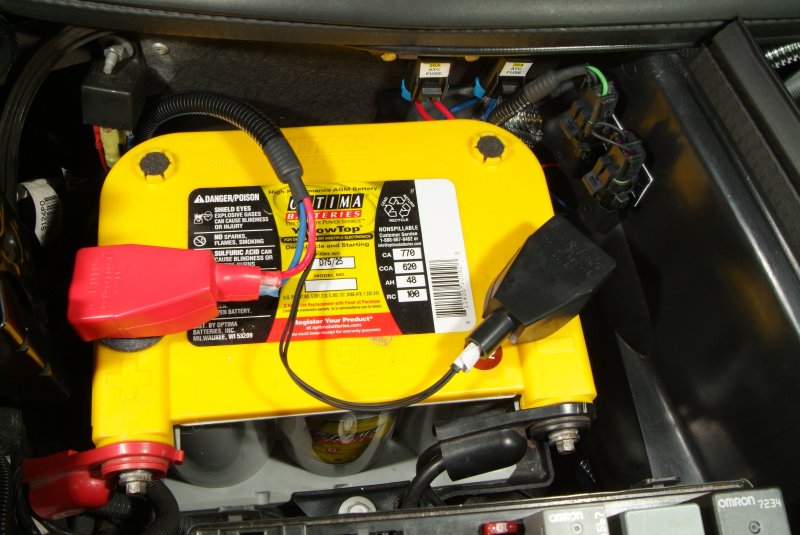
Anyway, I just attached one end of the vacuum hose on the fuel pressure regulator and left the other end open, as I need to adjust the pressure down to 55 psi (it is now set at 58 psi) with the vacuum line open to atmosphere. I couldn't do that today, as I am planning on pulling off the passenger side fuel rail tomorrow so I can get to that stock MAP sensor wiring harness to disconnect it. I wanted pressure to be bled off of the fuel lines as much as possible so I wouldn't have gasoline spraying all over the place when I disconnected the fuel rail.

So tomorrow the game plan is to:
  1. pull off the passenger side fuel rail,
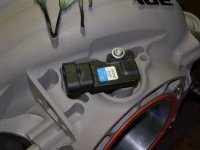
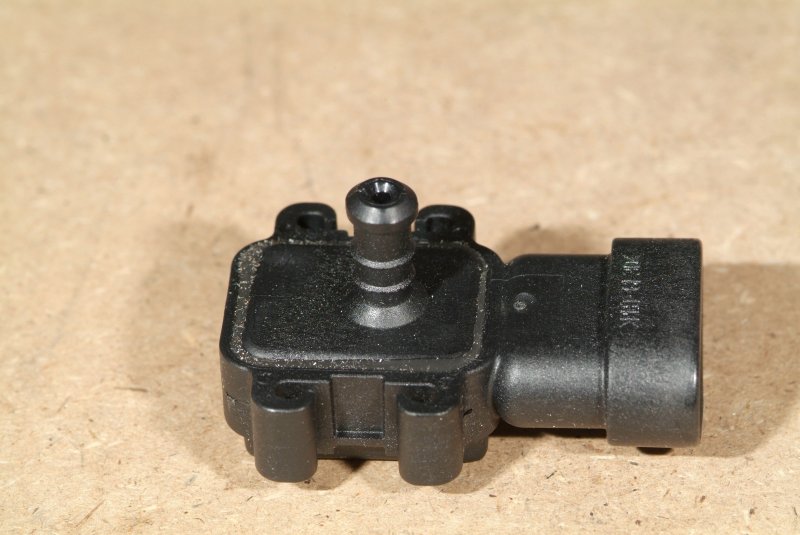
  2. disconnect the stock MAP sensor harness connector (hopefully without too much cussing),
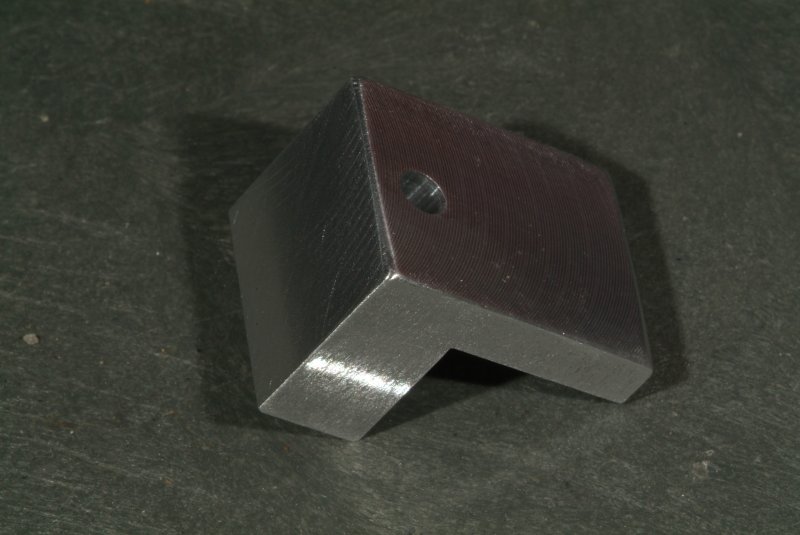
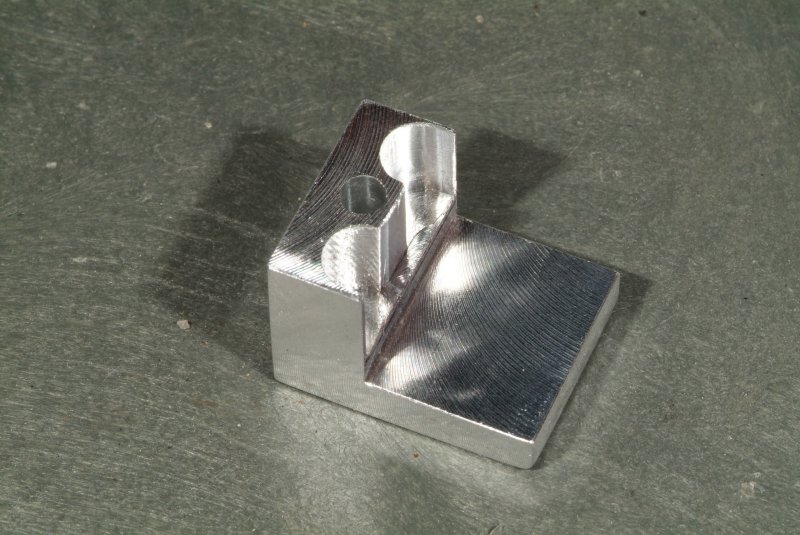
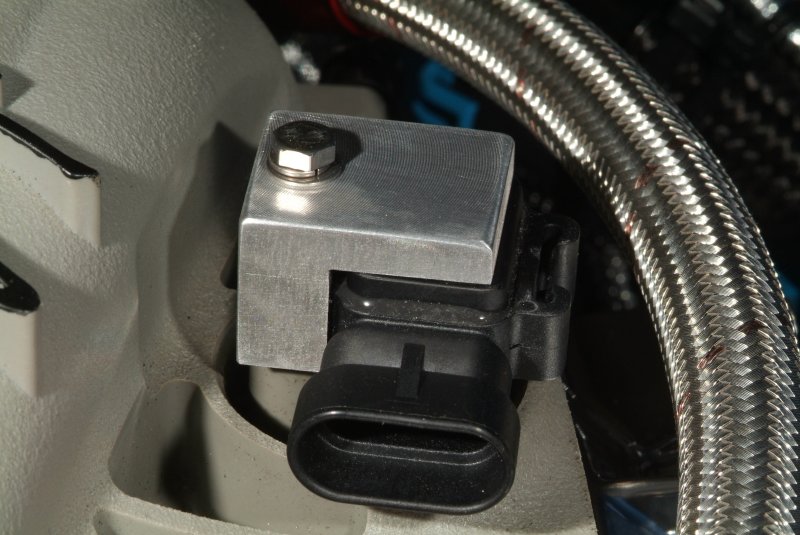
  3. install the MAP sensor harness extension to the 2 bar MAP sensor now at the front of the intake manifold,
  4. put the passenger side fuel rail back on.
  5. run up the pressure on the fuel pumps and check for leaks again,
  6. adjust the fuel pressure regulator to 55 psi,
  7. put the fuel pressure regulator vacuum hose onto the vacuum manifold block,
  8. try to think of anything I might be overlooking that needs to be done.

If that all goes well, all of the hardware stuff is done, I think. Just some minor cleanup to do, like shorten that fuel pump harness, put some access panels back on the car, and put the wheels back on.

Oh yeah, need to figure out that wideband controller and how to get HPtuners ready for that custom operating system that is needed for the 2 bar MAP tune. But hopefully Ed will give me detailing instructions on how to do that.

Only got a 1/4 tank of gasoline in the car, and I'm hoping I'll be able to drive it to the gas station when I want to put more in it..... Trying to hold that 5 gallon gas tank to pour it into the car's gas tank was about to throw my back out of whack. :ack2:
 
I just cannot believe I did this. I was able to pull the connector off of the stock MAP sensor, relocated it with the extension cable and had everything dressed up all nice and neat. Put the fuel rail back on the passenger side, and figured I would put some permatex on those two bolts holding it down. I was ready to put pressure back on the fuel system and check for leaks, then readjust the fuel pressure regulator and I was DONE. What the heck, figured I should permatex those bolts on the driver side fuel rail as well since I was at it. Did the front one, and God strike me dead on the spot if I didn't get distracted and loosened up the bolt NEXT to that fuel rail bolt. The one holding the top half of the F.A.S.T. manifold to the bottom. From what I remember those bolts are held in place by a nut and washer UNDERNEATH of the intake manifold itself. So yeah, I SCREWED UP and not have a loose washer and nut underneath of the intake manifold.

Why my heart didn't explode or my head burst I just don't understand. But I'm pretty much screwed. Have to pull off the intake manifold to fix this now. After ranting and raving for a good half hour, I felt I had calmed down enough to go over to the garage and get started. But honestly, I looked at the car and just turned around and walked back to the house. I just can't face this right now. I'll admit that this is the closest to being in tears that I have been in a LONG, LONG time....

God PLEASE let me wake up and this was just a nightmare...
 
Sometimes when that happens the nut just falls straight down and if you can see it laying in the bottom you might be able to get a longer bolt and go in the hole and capture the nut by very carefully applying downward pressure on the longer bolt and turning it to start the threads. If you are lucky and trap the nut this way then mix up some jb weld and put a dot or two on the face of the nut and bring it up to the bottom of the housing. When it sets you can the remove the bolt carefully and insert the correct bolt. better still if you have the space for the longer bolt to stay in then just tighten it down and walk away.

I see a problem in my idea that is how to get the jb weld on top of the nut. Before starting spray the bolt with WD 40 or something like that and then if you are lucky enough to capture the nut you might try running some super glue or maybe a locktight liquid down the threads to the top of the nut.
 
I've been looking over the install instructions for the manifold, and it appears that the nut is fitted into a hex shaped opening underneath the bottom half of the manifold. And this opening appears to be flush against the head, so it doesn't appear that the nut can really go anywhere but straight down and lay against the head surface. This it the second bolt from the back on the driver's side, so it appears that if I do have to take off the intake, sliding it forward would make that nut fall into a slot cut for a head bolt instead of falling into the intake port on the head itself. Man, I will tell you I was sweating it even THINKING about that happening. That would be ALL I need. Have to pull off that head too because of this boneheaded lack of concentration.

Here's a pic showing the underside of the intake manifold and that hex shaped hole that the nut goes into to tighten down the upper part of the manifold to the lower part.

manifold_bolt_01.jpg


It looks to me that it will be flush against the head so that nut can't wander around anywhere.

Now this is a pic of the mounting hole layout of the intake with the bolt hole where I screwed up indicated by the arrow. This is on the driver's side, btw.

manifold_bolt_layout_01.jpg


Damn I wish I had just been paying attention.... :banghead:

Now here's a pic of the head itself with the spot I believe that loose nut will be laying against the head.

driver_side_head_01.jpg


So if worse comes to worse and I have to pull the manifold, it appears that my dragging the manifold forward to clear the cowl of the firewall will pull that nut towards that slot cut into the head for the head bolt, and NOT towards an open intake port in the head itself.

Anyway, I found a longer M6 bolt and was actually able to catch that nut on the thread and start threading it. Unfortunately that bolt is WAY longer, so I figured I would unthread the nut again and put a bunch of spacers on that bolt so I could actually tighten it down. Would look like hell sticking up like that, but at this point it doesn't matter to me. I do NOT want to have to pull off that manifold. Anyway, I put those spacers on the bolt and so far I have not been able to catch the threads on that nut again. I guess I'll just keep at it, running through every curse word I know and hopefully I can get it to catch eventually. From what I can tell the nut really doesn't have anywhere else to go so perseverance is going to be the word for today. And maybe the next couple of days. But if I was able to catch it once, then I should be able to catch it again. At least I hope so. Have I mentioned that I REALLY don't want to have to pull off that manifold? :banghead: :banghead: :banghead: :banghead:
 
Well, I tried everything I could to get that bolt to thread into that nut, and just flat out failed. I've tried looking down that hole to see what the heck is going on, but I just can't see. I have a flexible shaft inspection scope but the hole in the manifold is to small for the sensor. Tried eyeballing it with a small flashlight, and I just can't see what is going on down there. Maybe the nut can, and did, move out from underneath the manifold hole, because it just doesn't make sense that I got it to thread onto that bolt the first time, and never could again. Man, I'm so pissed at myself I can't see straight. Looks like the intake has got to come off. Now if Murphy's Law plays it's normal tricks on me, that nut is going to drop right smack into the head and down into a cylinder for certain.

In any event, I disconnected the battery in preparation for tomorrow, as there is no doubt now what I need to do. I was scoping things out for what I need to disconnect (nope, never pulled an intake manifold off of a LS engine before) and noticed a hose that runs from a tube underneath the intake to a nipple on the intake itself to the side of the throttle body.

intake_pcv_01.jpg


I guess this is the PCV valve, as there is a metal plug in going into the hose between those two points. Odd thing is that I just barely gave it a tug and it popped right out of the hose. So I'm not sure what the heck it is. I can't imagine that thing being able to stay in place with 10 psi of boost in the intake manifold as easily as it popped out into my hand. I mean I could pull it out of that hose with a thumb and forefinger easily.

I think there is a vacuum connection in back of the manifold that goes to the power brake booster to, and I also believe that the vacuum line for the turbo wastegates hooks up back there somewhere. Of course, NOW I have to pull the manifold after already pulling that connector off of the MAP sensor back there. Sheesh.....

Ah well, DEFINITELY not the best day I've had. This time the goal posts moved WAY down field on me. And no telling what surprises await me when I pull off that manifold. And guys, if you don't hear from me again, well that means that nut dropped into the head intake port, the valve was open, and it dropped down into the cylinder. Not a chance my head and heart won't just explode, or I just break out the 50 caliber rifle and shoot the damned car and be done with it....
 
Back
Top