• Got the Contributing Memberships stuff finally worked out and made up a thread as a sort of "How-To" to help people figure out how to participate. So if you need help figuring it out, here's the thread you need to take a look at -> http://www.corvetteflorida.com/forums/showthread.php?t=3581 Thank you, everyone! Rich Z.

427 engine (part 2) - RHS block

Hi Rich,
At the back of the pop up lights is a small motor. It has an adjustment screw to raise the lights manually. Hope this helps you.

I read about that somewhere. Meant to try that today. Isn't there some sort of rubber boot overtop of that knob?

Thanks....
 
Didn't really do a lot today. I felt kind of accident prone, like Murphy was sitting on my shoulder or something, so I didn't want to chance a screw up. Well ANOTHER screw up, anyway. I had already tipped a bit of paint out of the can accidentally when painting that bracket for the catch can, so I took that as a warning..

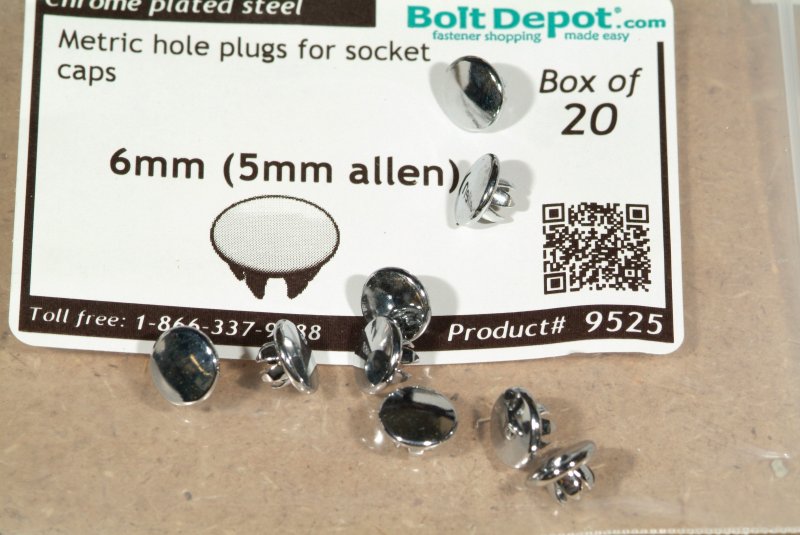
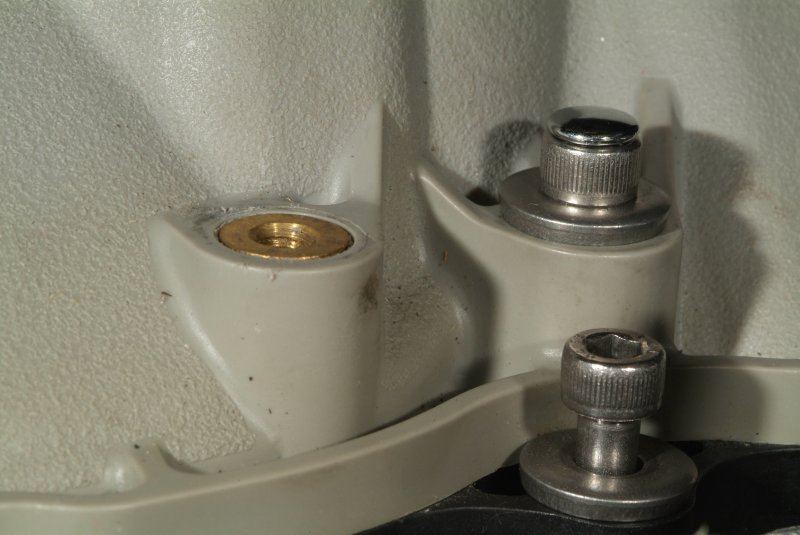
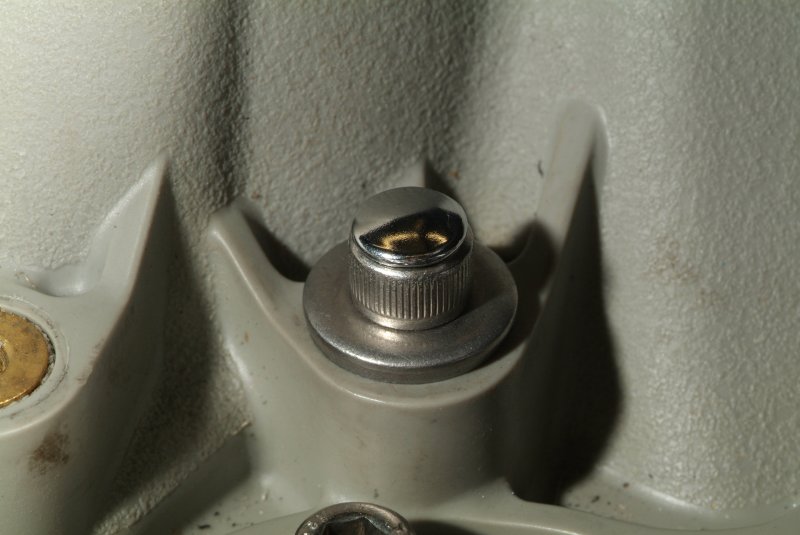
But I did get in those hex bolt caps I've been waiting on, so I decided to put them in place. Of course, when I was doing that, I glanced down and saw those yawning open fuel injector ports on the intake manifold staring me in the face, and I thought "Oh no, I'm not going to allow Mr. Murphy THIS shot!". So I stuffed them with pieces of paper towel to keep one of those caps from leaping from my hand right into one of those holes. Anyway, that should do the job to keep me from accidentally loosening one of those wrong bolts again. I even permatexed those caps in place, as there is absolutely NO reason at all to do anything with them unless the intake manifold is completely off of the engine..... Lesson learned....

bolt_covers_01.jpg


bolt_covers_02.jpg


bolt_covers_03.jpg
 
Well, I saw today that Mr. Murphy has a sense of humor. I'll bet he is still laughing his ass off at me..... I'll get to that in a minute.

The brake booster vacuum hose showed up Friday, so I had what I needed to get the stuff done so I could start putting the top of the engine back together again. I wanted to replace that hose because it had just too many splices in it. Come to find out that the one in the back of the manifold that I thought was a smaller hose inside of a larger hose turned out to not be the case after all. It was two of the same size hoses (1/2 inch) clamped to a metal tube. Just looked the way it did from the angle I was seeing it. I guess at some point in the past there must have been some other vacuum line connected there.

Anyway, I pulled out the bolts that I just had sitting in the holes holding the intake manifold loosely to the heads, and pulled out the manifold far enough to get to that small vacuum hose in back that only has a few inches of play on it. Anyone know what that is for, btw? It's got a 90 degree rubbed fitting on it. Which, btw, I secured down with a wire wrap tie so it doesn't pop off sometime down the road. So I got that hose fitting off and pulled the manifold out a bit further so I could get to that hose clamp holding the hose to the nipple on the back of the manifold. At first I thought I would cover the couple of exposed intake ports, but since I wasn't going to have anything near them smaller than a pair of pliers or a section of hose, and I cleared EVERYTHING from the engine compartment that could even remotely be a danger of falling into a port, I decided it was safe enough like it was. Ding dong, this is where Murphy comes in. I was fiddling around with that spring type clamp with a pair of Craftsman pliers made specifically for these kinds of hose clamps. Picture below...

hose_clamp_pliers_01.jpg


I had to tilt the manifold over on it's side so I could get underneath to grab the spring clamp with the pliers and as I did so and just slid the clamp off of the nipple, keeping it on the hose itself, I heard something go *ping* and then heard something hit the valley cover below me. My damned heart just STOPPED and I'm sure my eyes nearly popped right out of my head as I saw this metal "thingie" bouncing around on that valley cover plate. I had NO idea where the heck it had come from, but God had mercy on my soul and remaining sanity, as it didn't take a leap into one of those opened head intake ports. Then on the other side of the valley cover plate, I see one of those little darn "e" clips laying there. If you look at the picture above, you can see one of those "e" clips, as what it does is to hold that end piece of the pliers so you can rotate that piece to line up with the "handles" of the spring hose clamp. Apparently the clip just decided to come off, and that metal end just dropped off of the pliers. Now, seriously, what are the CHANCES that this would have happened to me? The darn tool just BROKE right in my hands! But at least Murphy apparently was just satisfied with scaring the hell out of me, and didn't want to TOTALLY mess up my fragile mind. Seriously THAT was REAL close. I believe I was in shock for a while after that, as I didn't even mention it to Connie when she came in to help me a little laterl. Obviously I stuffed rags in all of the exposed ports then, even if I was only planning to be handling nothing smaller than a wheelbarrel over my engine. Sheesh.....

Well, even after that near disaster, I kept at it. I got the new vacuum hose in place to the brake booster, put a "T' in it for the vacuum line going to the vacuum manifold block, got the intake manifold all torqued down, put the fuel injectors onto the fuel rails and installed the fuel rails onto the manifold, installed the throttle body and air bridge. Got the wiring to the fuel injectors back in shape, and things are pretty much in "good to go" condition.

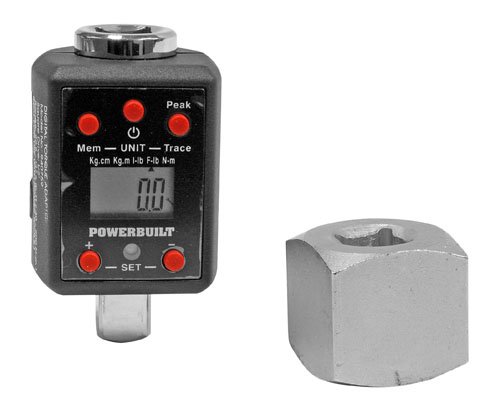
Oh, speaking of torquing down the intake manifold, those bolts were no where NEAR torque specs when I brought the car back home. After I snugged them up by hand, the specs call for a particular pattern with the first pass at 45 in/lbs. Then the second pass at 89 in/lbs. Well honestly when I was doing the first couple of bolts at 89 in/lbs, it just seemed to me that I was tightening down those bolts WAY more than I should. So I started wondering if my torque wrench was accurate. Fortunately I bought a calibration tool when I first started getting the tools together I needed to work on my car. I had a few torque wrenches, but honestly they were kind of old, and I had no idea if they were still any good. So I bought this to test them with.

torque_calibration_01.jpg


BTW, this is a great little gadget in that it can actually be used to make any wrench (with appropriate adaptors) into a torque wrench.

Anyway, the calibration tool didn't do in/lbs, but it's simple enough to convert in/lbs to ft/lbs by simply dividing in/lbs by 12. So I checked out my torque wrench and it was dead on at 7.3 to 7.4 ft/lbs according to the calibrator. So good enough........ But in any event, a while back when I just happened to check those bolts on the intake manifold holding it to the heads, I could turn those bolts a good two turns EASILY to tighten them down. And even then, they were still no where NEAR as tight as they are now being properly torqued down. Probably a good darn thing I didn't torque them down as probably those two shorter bolts would have just stripped out the thread in the process.

So, after putting that stuff back together, I wound up playing around with that catch can. The more I looked at it sitting cocked at an angle underneath the driver's side headlight, the less I liked it. Plus it's about 7 ft. of vacuum hose run each way, some of which makes a sharp turn upwards at spots, that I just was not crazy about. I was afraid any fluid in the lines might wind up STAYING in the line before even getting to the catch can and eventually gunking it up to where it closed off. So I pulled off the panel beneath the passenger side headlight and scoped that out.

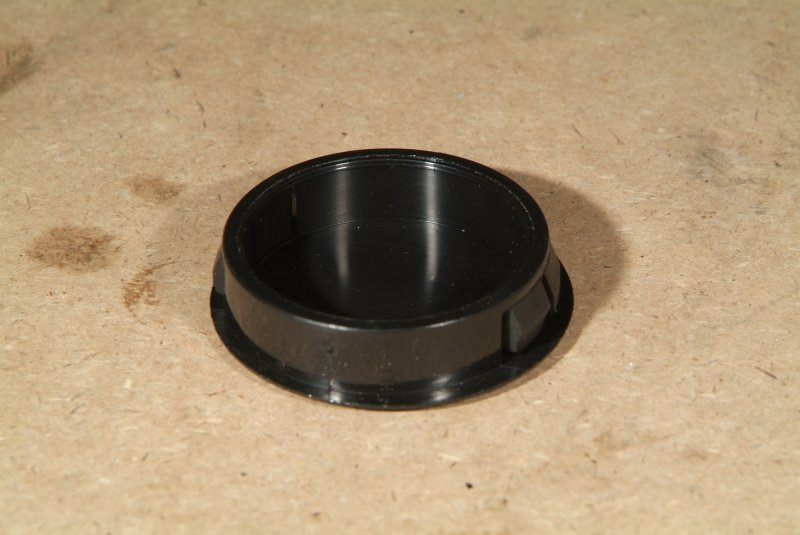
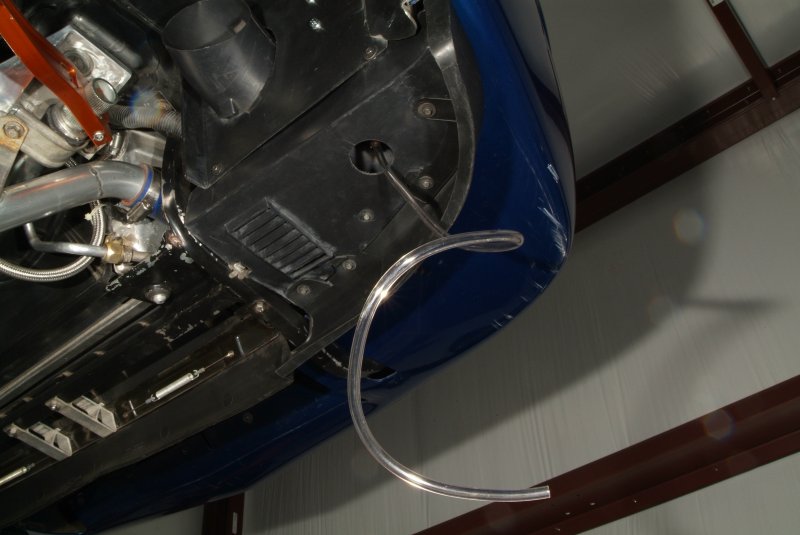
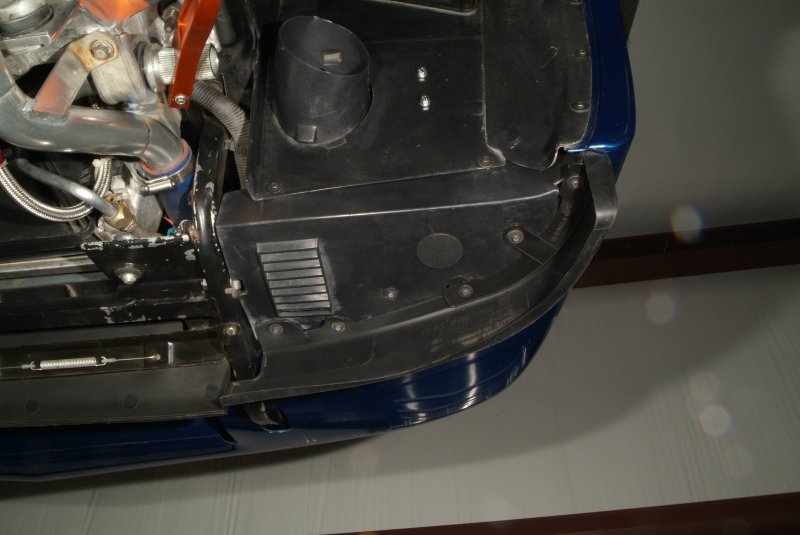
And I think I can make that work. I can mount the can on the front inside of the wheel well panel, directly under the passenger side headlight and I will have plenty of room. The hoses will run along the frame and pretty much be all down hill to the catch can itself. Looks like about 4 ft. runs for the vacuum hose that way. I will need to cut a hole into that plastic panel underneath so I can get to the drain fitting for the can, but I'm thinking I can just put a plastic cap there, similar to what I used for that hole in the firewall above the banjo fitting on the driver's side fuel rail, that I can remove as needed to get to the drain.

So here's the game plan for tomorrow (Sunday).
  • Mount the catch can to the inside of the front wheel well underneath the passenger side headlight.
  • Connect the vacuum hose to the catch can. The hoses are already connected on the other end.
  • Cut a hole in the panel underneath the catch can to be able to access the drain fitting.
  • Hook up the battery.
  • Hook up the laptop and turn on the fuel pump to run up pressure in the fuel system to check for leaks.
  • Check for both fuel leaks and vacuum leaks.
  • Readjust the fuel pressure to 55 psi without the vacuum line hooked up to the fuel pressure regulator.
  • Run the vacuum line from the fuel pressure regulator to the vacuum manifold block.

And I believe that is IT. Should be ready to proceed with the tuning at that point.

So NOW is the time for the car to go into "fireball mode" on me........
 
Then on the other side of the valley cover plate, I see one of those little darn "e" clips laying there. If you look at the picture above, you can see one of those "e" clips, as what it does is to hold that end piece of the pliers so you can rotate that piece to line up with the "handles" of the spring hose clamp. Apparently the clip just decided to come off, and that metal end just dropped off of the pliers.

They're also known as "Jesus" clips, because when they do what they did to you,
you're first reaction is to yell "AW, JESUS"! I learned the term "Jesus Clip" from my Dad LONG before
I found out that they were really named e-clips. :D Thanks, Dad!

Andy :wavey:
 
Well, no more disasters or near disasters took place today. So far, anyway. but I think I'm done everything that I can do on the car. Except for some very minor things. Like put the wheels back on. Still need to drill an access hole for the catch can, but I can do that tomorrow or the next day. I've got a collection of hole saws, but darn if I can find the part that they attach to in order to mount them on a drill. Been DECADES since I've used them, so no telling where that darn thing is.

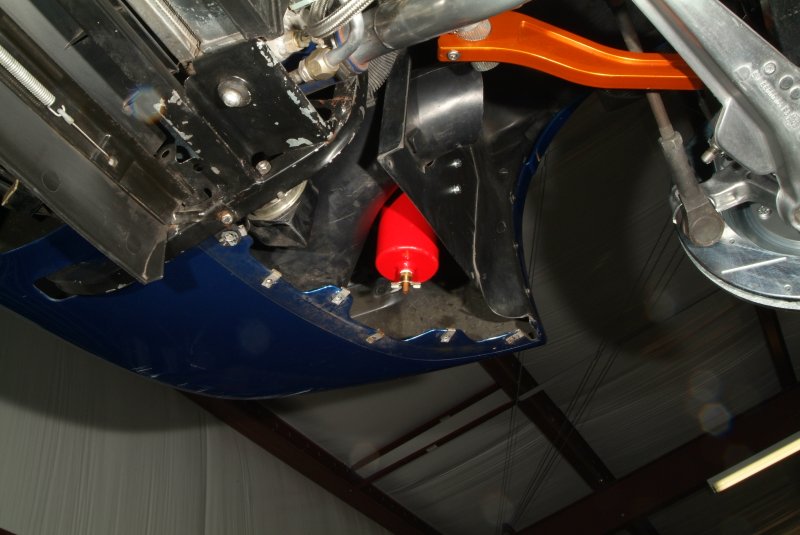
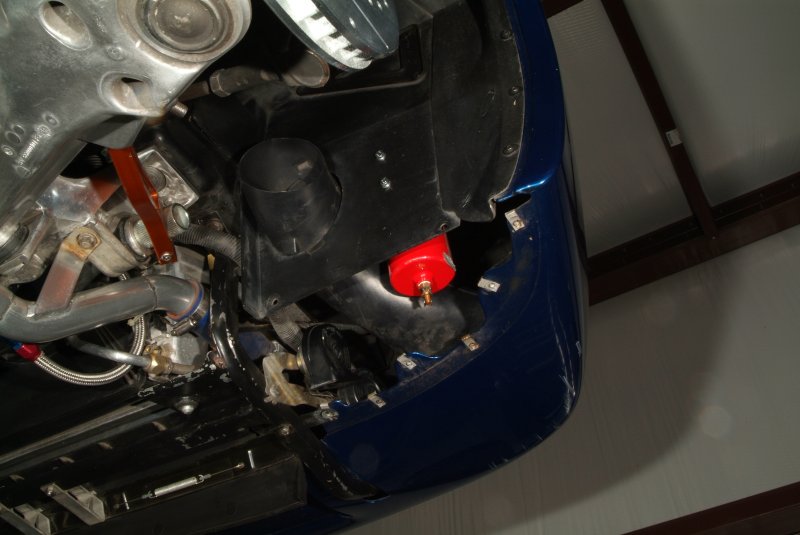
So anyway, the catchcan is now mounted.

catchcan_20.jpg


catchcan_21.jpg


catchcan_22.jpg


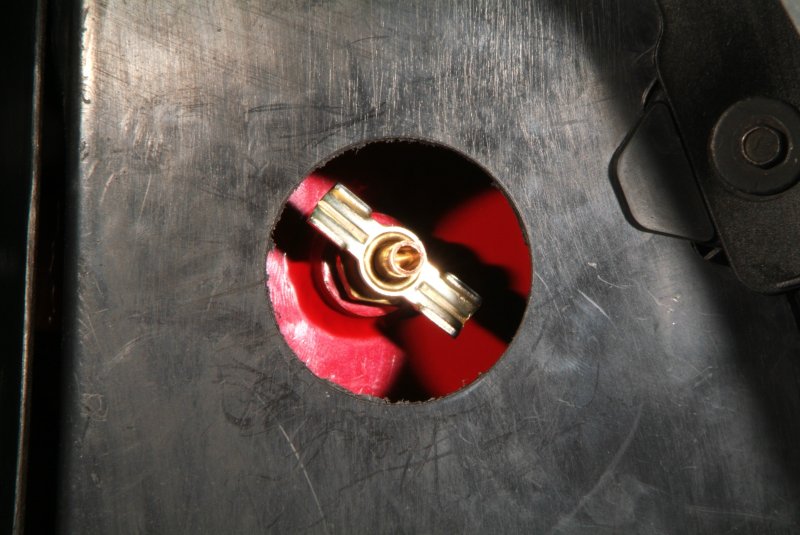
The vacuum hose run from the valley plate and PCV on the intake manifold over to the passenger side frame, under the radiator overflow tank, down under the headlight, and to the catchcan itself. I'll be able to drain it from the bottom when I drill an access hole with a removable plastic plug (1 3/4" diameter). Just put a small tube on it, crack open the drain, and that should do it.

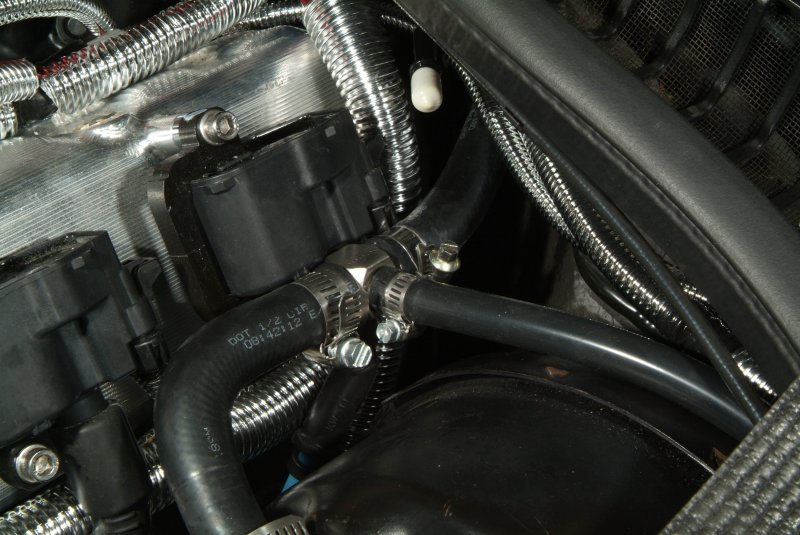
And here's a pic of the stainless steel "T" I put into the brake booster vacuum line.

vacuum_junction_01.jpg


Surprisingly, the stainless steel fitting was larger than the brass ones I had, and actually fitted that 1/2 inch hose MUCH better.

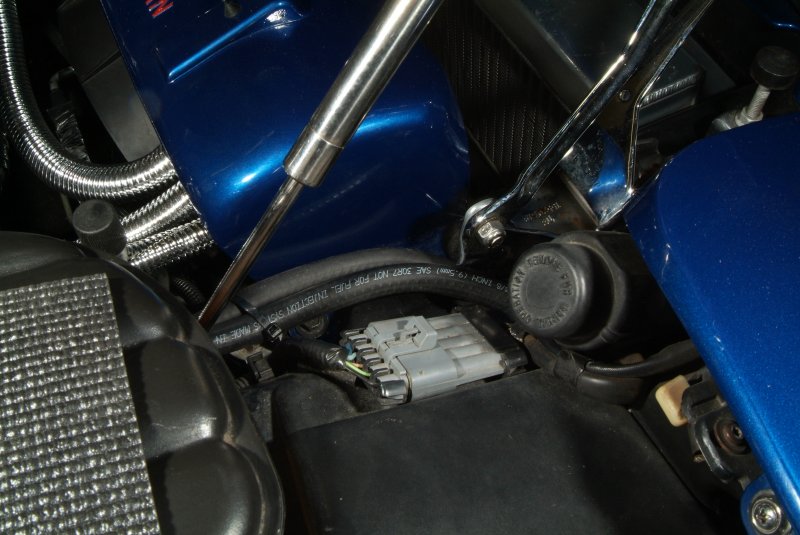
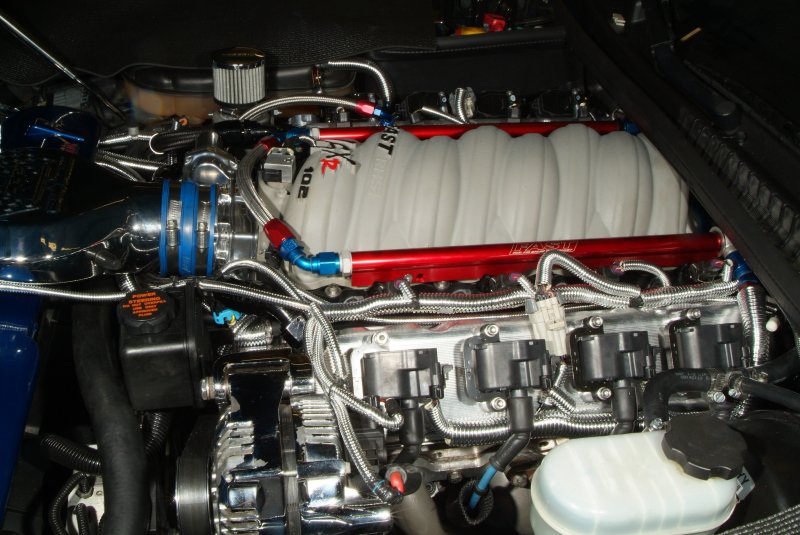
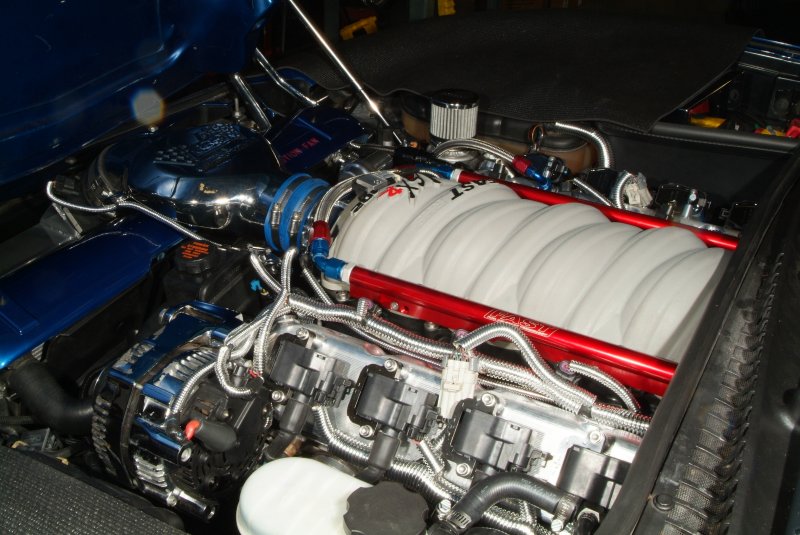
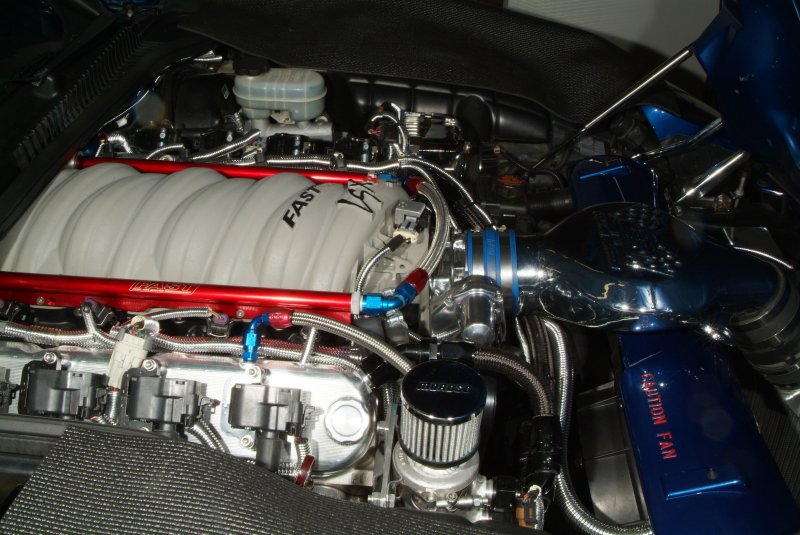
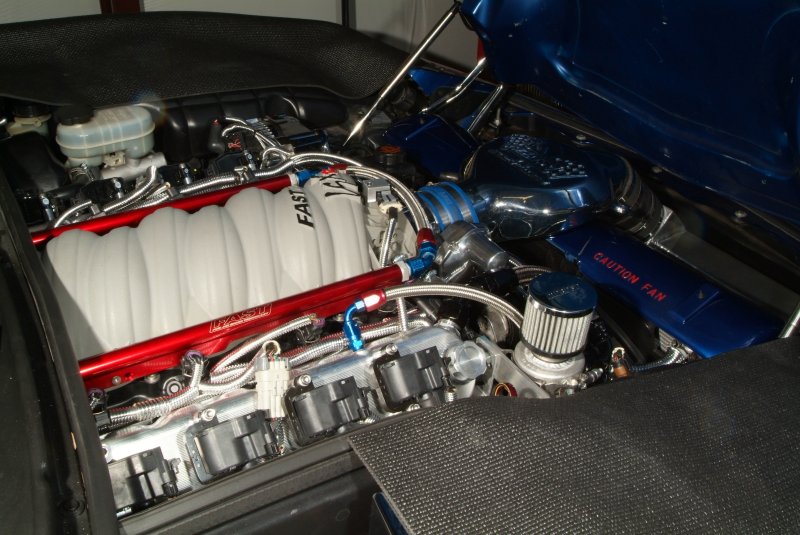
So here's what the engine bay looks like now.

engine_101.jpg


engine_102.jpg


engine_103.jpg


engine_104.jpg


I figured I should take some pics of it before checking for fuel leaks in case it went up in flames. But fortunately everything was tight with no leaks whatsoever. Connie helped me adjust the fuel pressure regulator to 55 psi, and I then ran the vacuum hose from the FPR to the vacuum manifold block.

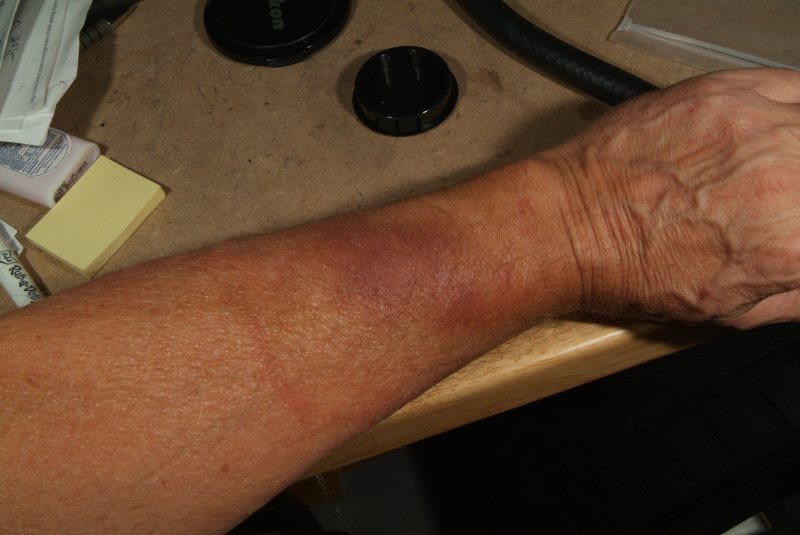
And honestly, I didn't get beat up too badly by the car while doing all this. The worst was actually trying to fiddle with this catch can and getting behind the intake manifold, as I was trying to work in spaces my arm didn't really fit very well. So yeah, this all left a mark...

bad_arm_01.jpg


Looks like a burn mark but it's actually a bruise. I'm sure it will get to looking worse before it looks better.

But I do believe it's all over now but the tuning......... Hopefully......
 
Last edited:
Accidentally posted the above message a second time, and can't seem to be able to
find out how to delete it, so I just changed it to this post!
Andy :wavey:
 
Ed told me that he will send me a preliminary tune tomorrow morning. I don't have any idea what to expect now. Connie's worried that I will need to take the car out on test drives and get a speeding ticket trying to do data logging at speed. I'll just be glad to be able to drive it to break in the new brakes, and then get the gas tank filled up at the local gas station without the car dying on me.

Guess I'd better get that hole saw arbor SOON so I can finish up that panel for drain access for the catch can. Need to do that before I put that wheel back on.

Oh yeah, better charge up the cell phone. I might be needing it to call AAA to bring a tow truck sometime soon....
 
Oh yeah, better charge up the cell phone. I might be needing it to call AAA to bring a tow truck sometime soon....

More than likely, a can of gas! All them ponies, tell me that they'll be needin' to eat
early and often. I would double check on the proper operation of the fuel gauge if it
was me :D:D!
Andy :wavey:
 
Today (Monday) I just spent some time doing minor things on the car. Put the wheel well panel back to cover the fuel pressure regulator and the vacuum manifold block behind the driver's side front wheel. While I was poking around under the hood checking things out I caught a whiff of gasoline. Kind of faint and fleeting, but it was definitely there. So I started looking closer at all of the fuel lines and injectors. Didn't see any visible leaks so I started feeling for anything wet and found that the AN -8 fuel fitting at the back of the passenger side fuel rail coming directly from the fuel filter was noticeably loose. So I guess that was leaking a bit, causing that gasoline odor. Maybe "not tight enough" would be a better description. Then it became "loose" when I took that fuel rail off to get the intake manifold off of the heads. I guess that was the premonition I had of a potential fireball when I would start up the car. Luckily I didn't actually start the engine when I just ran up the fuel pressure yesterday. But anyway I just tightened that fitting up, so that should but that problem to rest.

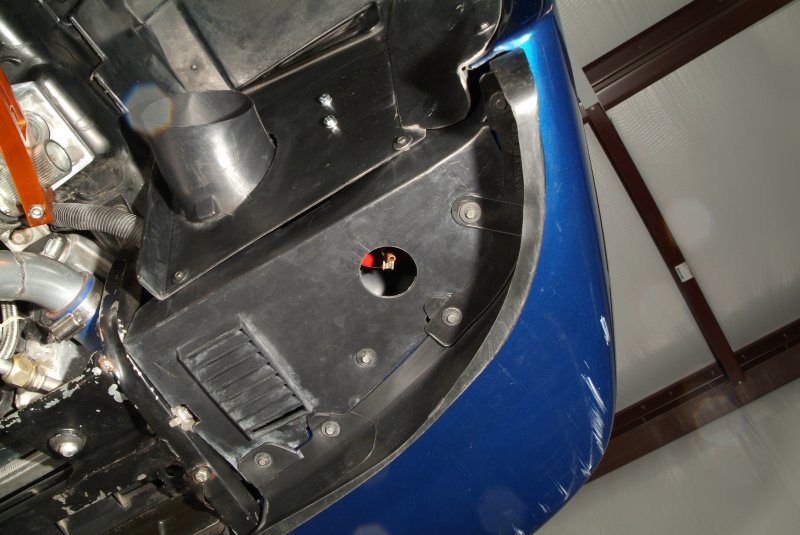
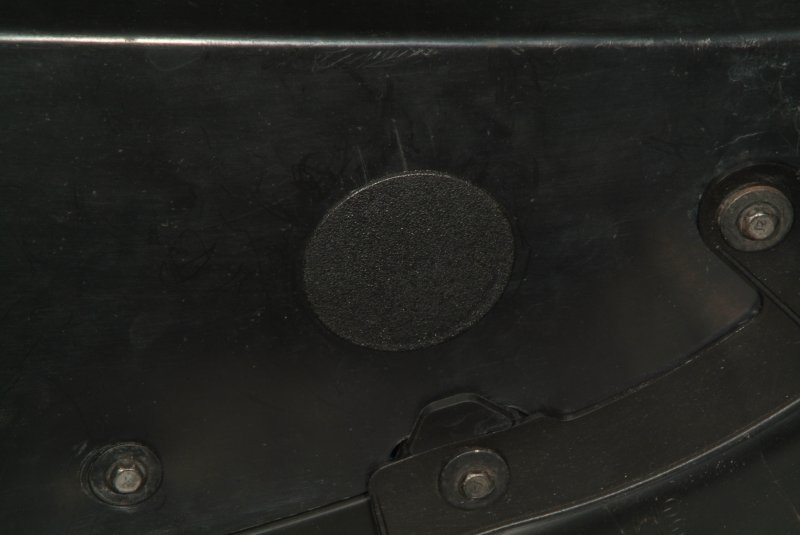
So I was getting antsy to get the car ALL together, and went poking around in the workroom again to try to find that hole saw arbor I had lost. And I found a different style of hole saw I had forgotten about. Two blades set vertically on horizonal posts that revolve around a central point that will cut circles in softer materials. Took me a bit to get it all set up to where I could cut that panel on the car, as I couldn't use the drill press with that particular hole saw on that piece, and had to use the mill. Even at that I had to kluge it to make that work. But work it did, and I got the hole drilled and the access cap fits it perfectly. So I was able to get that panel back on the car and put that step behind me.

catchcan_access_01.jpg


catchcan_access_02.jpg


catchcan_access_03.jpg


catchcan_access_04.jpg


catchcan_access_05.jpg


catchcan_access_06.jpg


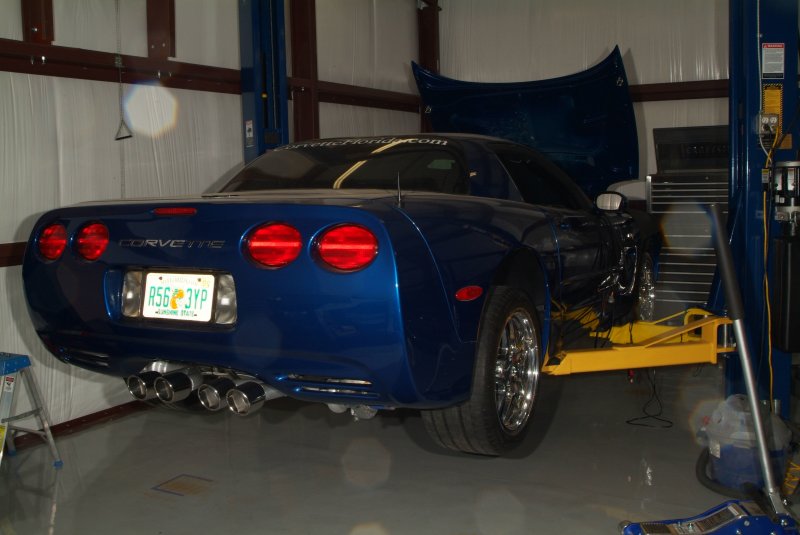
So with that out of the way, I was then able to actually put the wheels back on the car.

wheels_back_on_01.jpg


I don't have them torqued down yet, but at least its beginning to look like a REAL car again now.

I talked to a guy named Justin over on CorvetteForum who offered to help me set up my wideband on HPTuners, and he got me all straightened away with that. And he also gave me some pointers on using the program. I have used HPTuners in the past, but I'm forgotten most of it, and this was a really good refresher course for me. So maybe tomorrow I'll calibrate the wide band in preparation of doing some data logging during the tuning process.

Man, I'm going to be on pins and needles (to say the least!) driving that car expecting it to blow up at any moment. Maybe I need to throw a fire extinguisher in the trunk as well.... Oh yeah, all new brake pads and rotors, with new SS brake lines. Yeah, this could be a REAL fun first trip! A flaming blue corvette with no brakes roaring down route 319 into downtown Crawfordville....... :lmao:
 
Sigh.... I went out to the garage today to capture the tune in the car using EFILive, and lo and behold my battery is dead. This is a brand new Optima Yellow Top that I put in, what, maybe two weeks ago? And most of that time it was disconnected. So did I get a bad battery or is the car still up to it's loathsome tricks?

I put my charger on it and got it up to 70 percent then was able to capture that file I needed. Started to rain outside and when I check the weather radar I see a pretty hefty storm coming. Thunder on the horizon, and I think "Oh no! With the car hooked up to the battery charger, this would be the perfect time for Murphy to KILL my car with a lightning strike." Heck, both Harwood and Aaron's shops got hit by lightning while my car was in them, so I can see where this is leading. So I ran over there in the rain and pulled the charger off of the car. I guess Murphy could still drop a tree on that end of the garage, though....

So now I guess I need to figure out if there is a short or slow drain somewhere in the electrical system or the battery itself is the culprit. Actually that car always has eaten batteries, so maybe it's just the way it is. Not meaning it is RIGHT, but maybe it's not something new now being introduced.
 
I thought it was a common thing for C5s to drain the battery and why the trickle chargers are so popular. A couple of weeks is pretty quick though. Got a visor mirror on or some other small light that may not be turned off? I knocked my visor light once before and took forever to figure it out since I NEVER pull them down. I should really just remove them again now that I have a nice darkly tinted eyebrow again...just in case. :P
 
I thought it was a common thing for C5s to drain the battery and why the trickle chargers are so popular. A couple of weeks is pretty quick though. Got a visor mirror on or some other small light that may not be turned off? I knocked my visor light once before and took forever to figure it out since I NEVER pull them down. I should really just remove them again now that I have a nice darkly tinted eyebrow again...just in case. :P

I guess I need to check it in the dark to see if anything unusual is lit. I do know that there is a red light on the radio on at all times near the volume knob. Been so long since I've had the C5Z around that I don't remember is this is normal or not.

Well, this will just be a minor nuisance and shouldn't stop from proceeding with the tuning. But even that might be delayed just a bit as I've had a change of plans with the tuning itself.
 
Well, I just got back from the garage, and it's pitch black in there. The only lights I could see on are that red dot near the volume control on the radio, and the button for the deck lid down south west of the steering wheel on the lower part of the dash. There is nothing else illuminated anywhere on the car. I couldn't hear anything making any noises like a motor getting juice to it, or anything of that nature.

I left the trickle charger running on the battery, because when I was using my BIG battery charger, the cables got pretty darn hot. Not sure if that is normal or not, but I didn't want to leave it running overnight unattended.

Earlier today when I was looking over the engine, I found just a drop of gasoline underneath the front fitting on the driver's side fuel rail. I put the wrenches to it, but it felt pretty darn tight to me. Guess I'll need to just keep an eye on it in case I need to replace that fitting.

I couldn't remember what the torque specs are for the lug nuts. Anyone know?
 
Back a ways you had a picture of the battery with the side terminals apparently connected to the starter but I notice you also have somthing hooked to the battery withh the top posts. What ever those wires go to would be under power all the time unless the wires between the battery and what ever they go to are routed through a circuit that only has power when the key is on. If they go directly from the battery to whatever you have a constant power drain otherwise.
 
Back a ways you had a picture of the battery with the side terminals apparently connected to the starter but I notice you also have somthing hooked to the battery withh the top posts. What ever those wires go to would be under power all the time unless the wires between the battery and what ever they go to are routed through a circuit that only has power when the key is on. If they go directly from the battery to whatever you have a constant power drain otherwise.

Yeah, I will check them for current draw when I get a low current ammeter I just ordered, but those wires hook into relays that are controlled by the wire being fed by the fuel pump line from the fuse box. So supposedly the fuel pumps aren't drawing current until the stock fuel pump circuitry energizes those relays. Actually only one relay will get energized under normal running, as the secondary pump will only get energized when the Hobb's switch on the vacuum manifold block detects boost of around 2 or 3 psi.

I did put my ear to the pumps to see if they were getting power, and didn't hear anything. So yeah, if anyone else sees something I may have overlooked, PLEASE point it out to me. Have had a lot of stuff going through my mind lately with this car, so there is a very high likelihood that I am just overlooking something.

BTW, I may have a guy (Mike Carnahan) driving down here from Atlanta on Sunday to tune my car for me. He says he wants to do some fishing down here anyway on Monday, so he's cutting me a break on the tuning and travelling expenses. So perhaps the tuning will be on a fast track to getting done over the weekend.
 
Back
Top